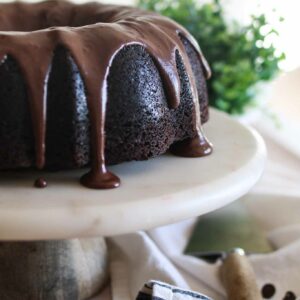
Decadent, incredibly moist chocolate bundt cake made with discard sourdough starter topped with a rich, buttery chocolate glaze.
The most tender bundt cake
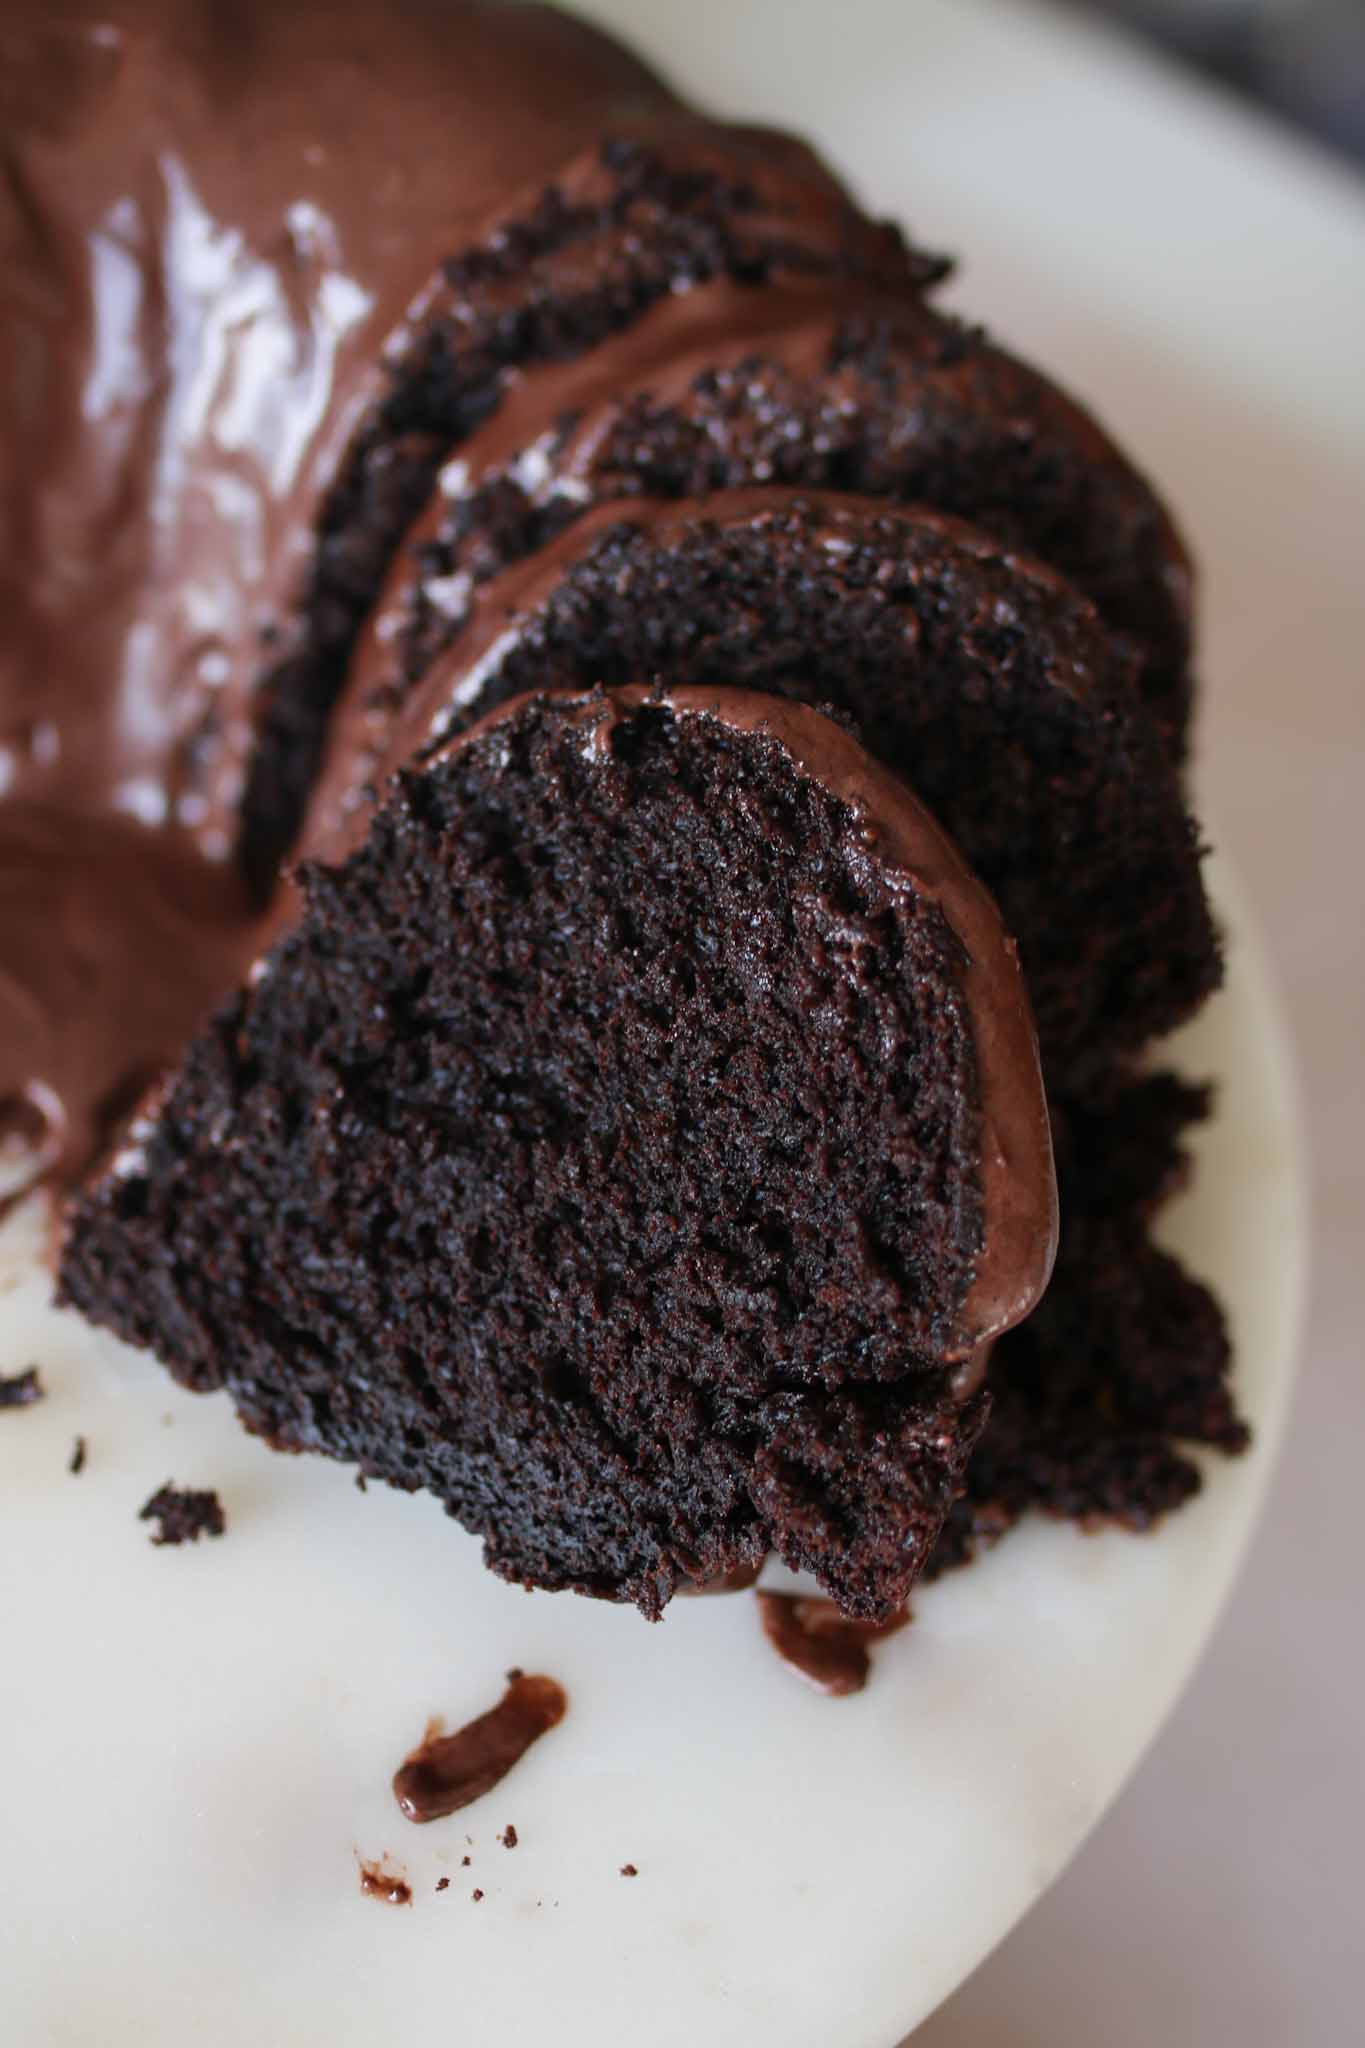
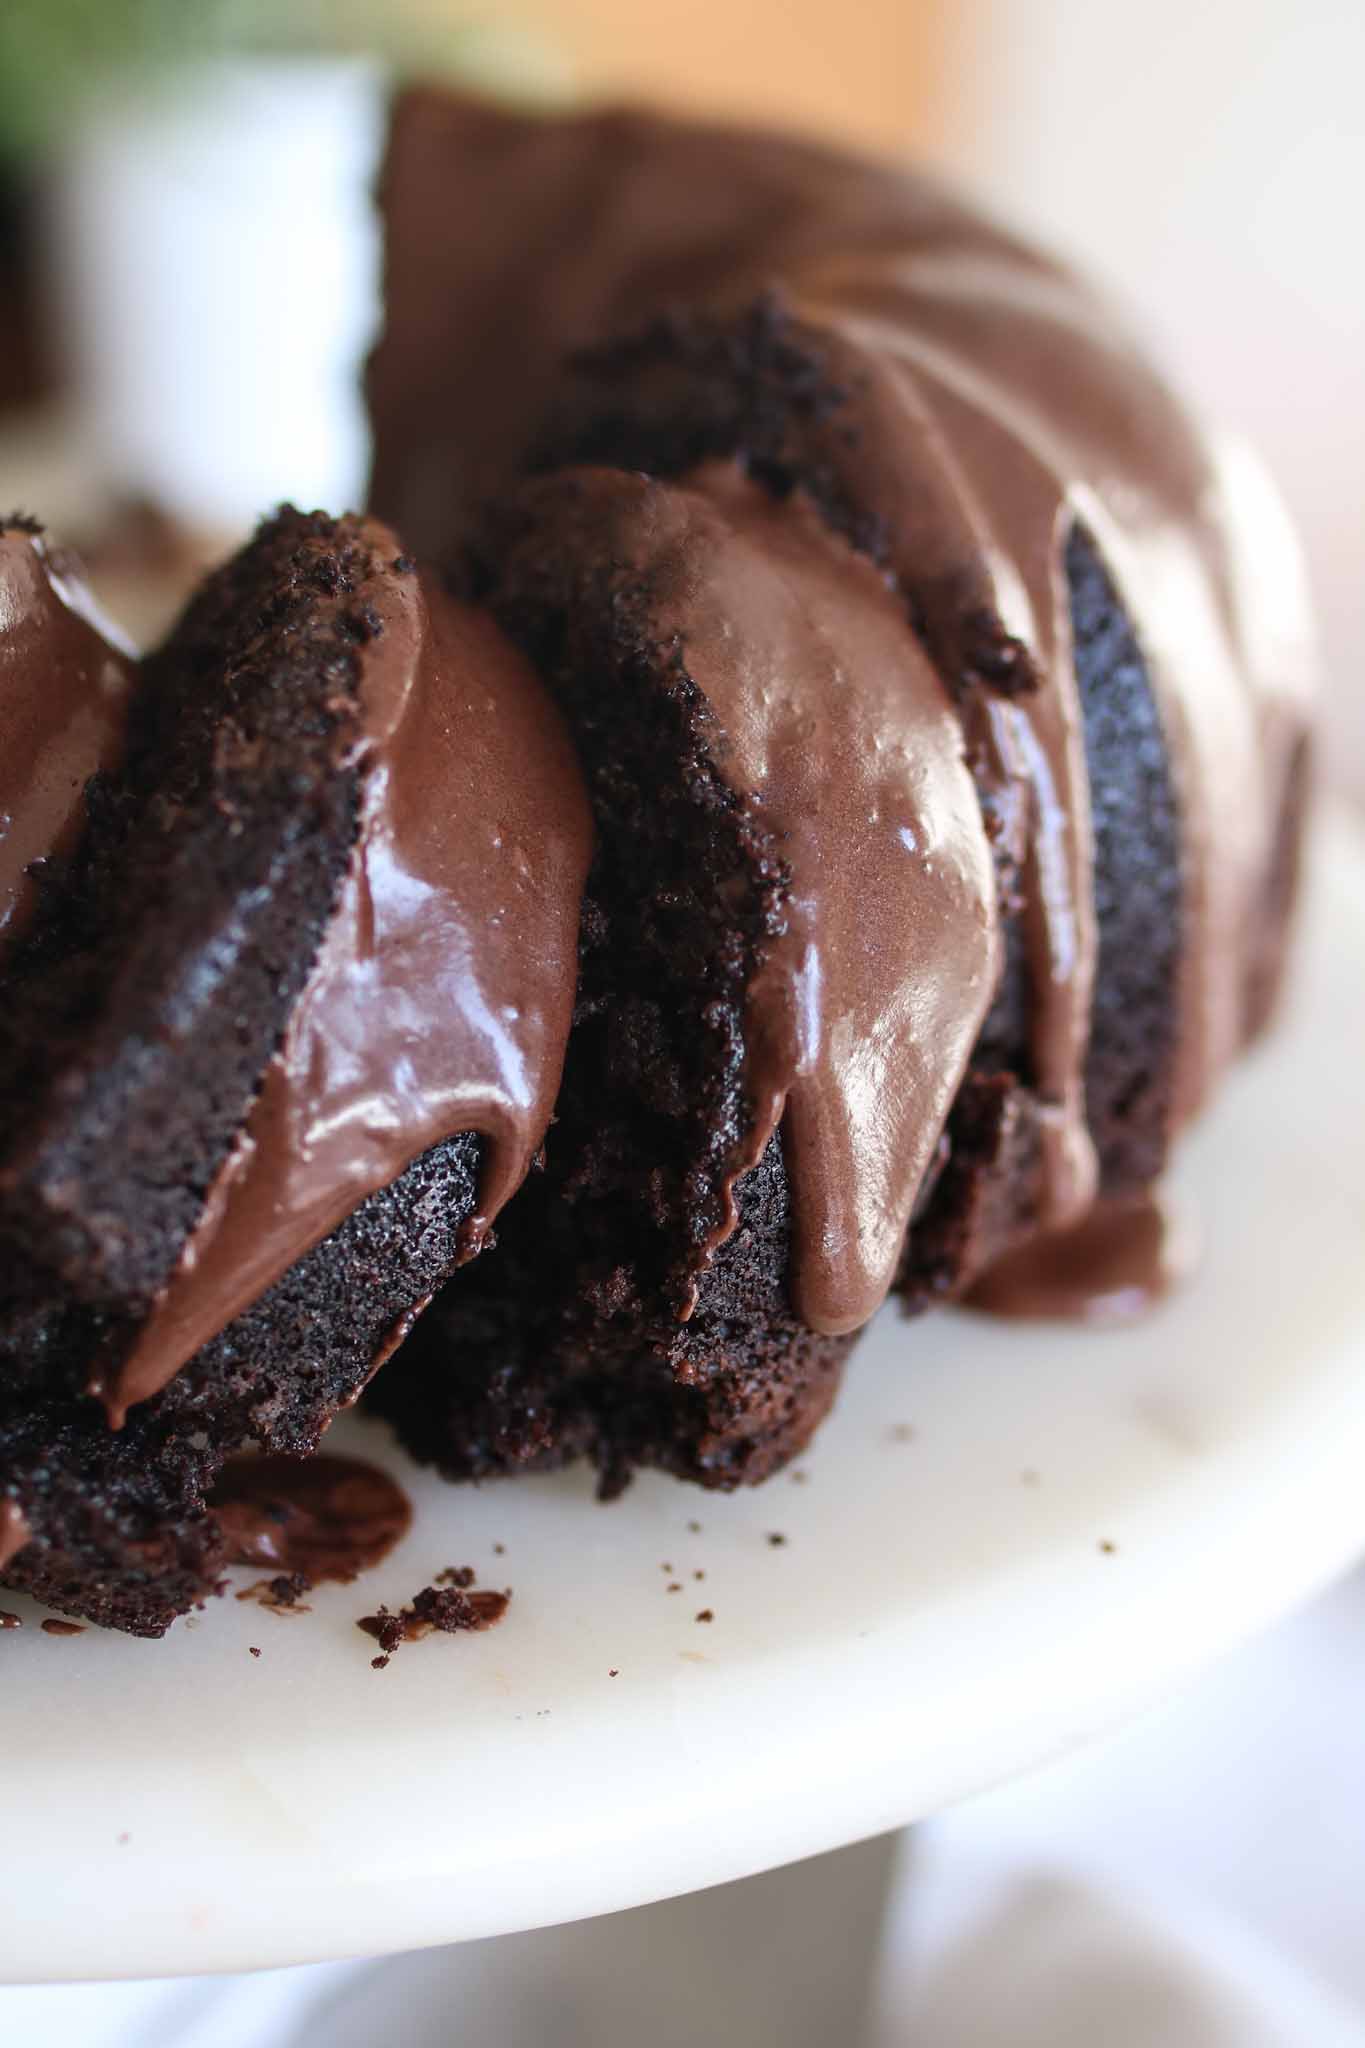
The written secret behind what makes this bundt cake incredibly tender, moist, and depth of flavor comes down to…sourdough starter. This cake calls for unfed sourdough starter – sometimes referred to as “discard sourdough starter”. It’s name “discard” doesn’t match it’s purpose as it is not something that needs to be thrown out! The extra sourdough starter you have from feedings that’s just sitting in your fridge can be used in so many baked goods. The fermented state of the flour and water together assists in bringing a tender texture and richer flavor to your baked goods.
And in the case with this cake, because it’s not a yeast-based good, your sourdough starter doesn’t need to be fed. Use it in its dormant, unfed state!
Why use sourdough?
Sourdough starter is a natural, wild yeast. It’s created by mixing together flour and water, and then feeding it additional flour and water over time until it becomes a fermented substance rich with healthy bacteria and carbon dioxide that helps raise up your baked goods and give it a natural rise – just like using packaged yeast from the store when trying to make bread.
When fed with flour and water, it activates and feeds the bacteria in the fermented base and you’ll see it grow twice the size, have beautiful air bubbles scattered through out, and have a sweet-sour smell. That’s when people use it in their bread recipes – to give it lift. BUT, when NOT fed, it’s dormant sluggish state is usually just hanging out in people’s fridge – the “discard” as some people refer to it as.
Using both fed and dormant sourdough starter has incredible health benefits – including promoting a lower glucose spike, easier to digest, and feeds good gut bacteria. It also gives deeper flavor and the most incredible moist, tender textures. (Don’t worry, the cake does NOT taste sour!)
– If you’re new to sourdough…check out my book Classic Sourdough, where I walk you through every step in learning about sourdough, including how to make the classic artisan loaf plus so many extra tried and true recipes.
– If you don’t have sourdough starter, but you’re still tempted by the cake…good news. You can substitute the sourdough starter with greek yogurt or sour cream. While it’s not identical, they are both acidic, wet substances and are pretty good substitutes for each other. Swap it out 1:1 ratio.
How to make a bundt cake NOT STICK!
We’ve all had that bundt cake that sticks to the bottom of the pan, and all the sudden you’ve lost half your cake. Here are some tips I’ve learned to help prevent that:
1. Generously grease all sides of the pan with just your classic vegetable oil based non-stick spray. Do not use butter or margarine.
2. Using a sifter, dust cocoa powder (or you can use powdered sugar or flour in the future for lighter colored bundt cakes), around the main sections of the bundt pan.
3. After baking, let the cake rest about 10 minutes in the pan before tipping it over. Doing so will allow the edges to natural release from the sides of the pan. If you try to flip it out right away, the cake will still be wanting to cling to the hot pan and you could get a mess.
4. When you flip the cake out, do so by placing a cooling rack on top of the pan, and while holding the rack and pan together, flip. If you just try to flop the cake out in the air onto a rack below, you could also invite a mess.
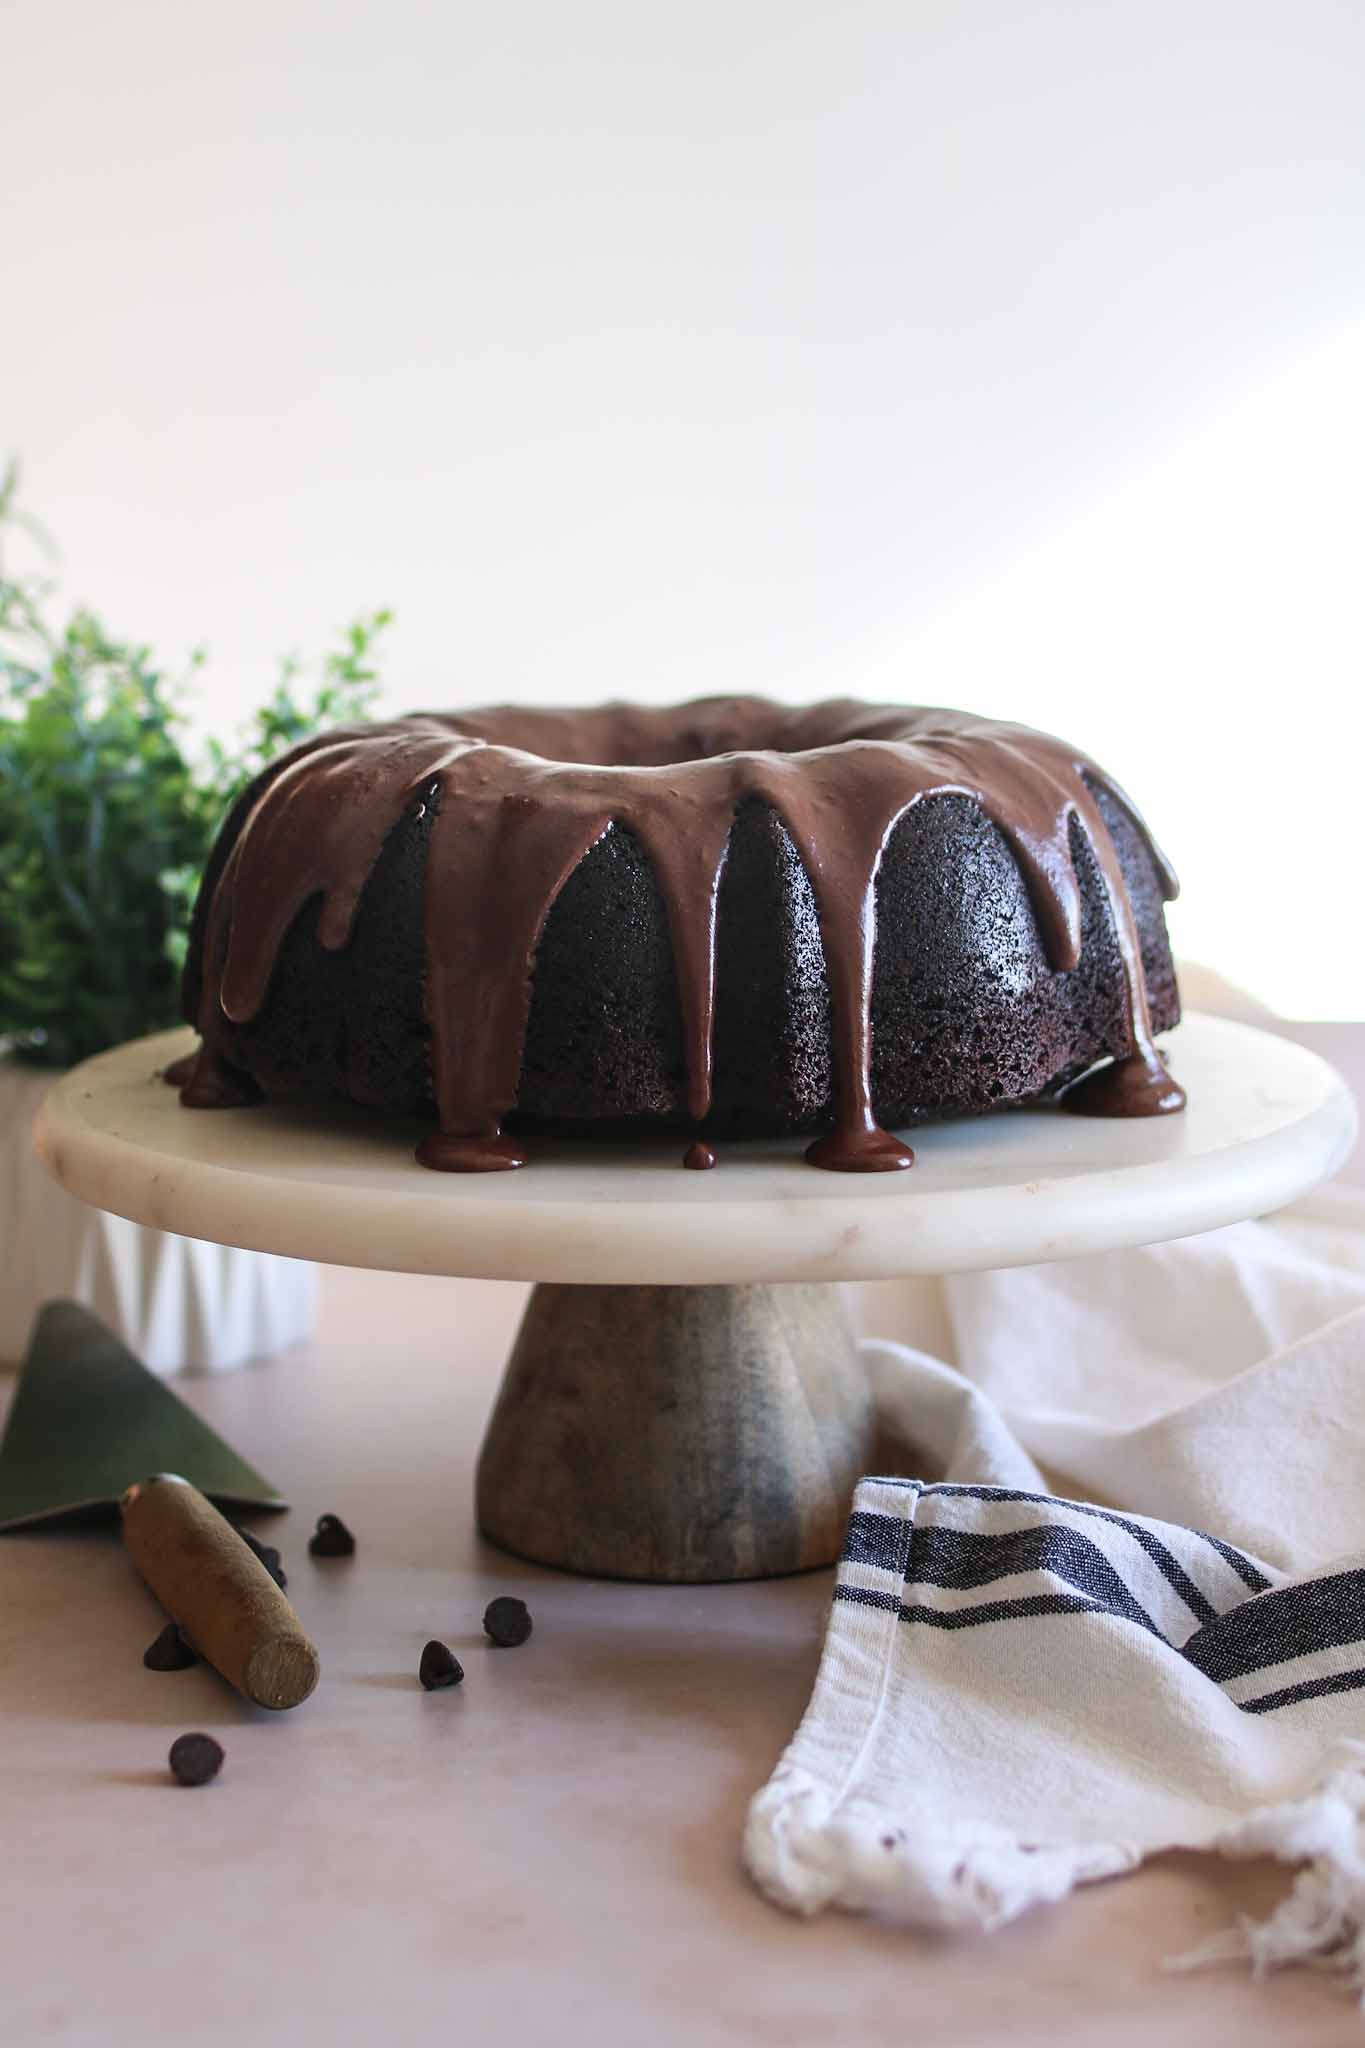
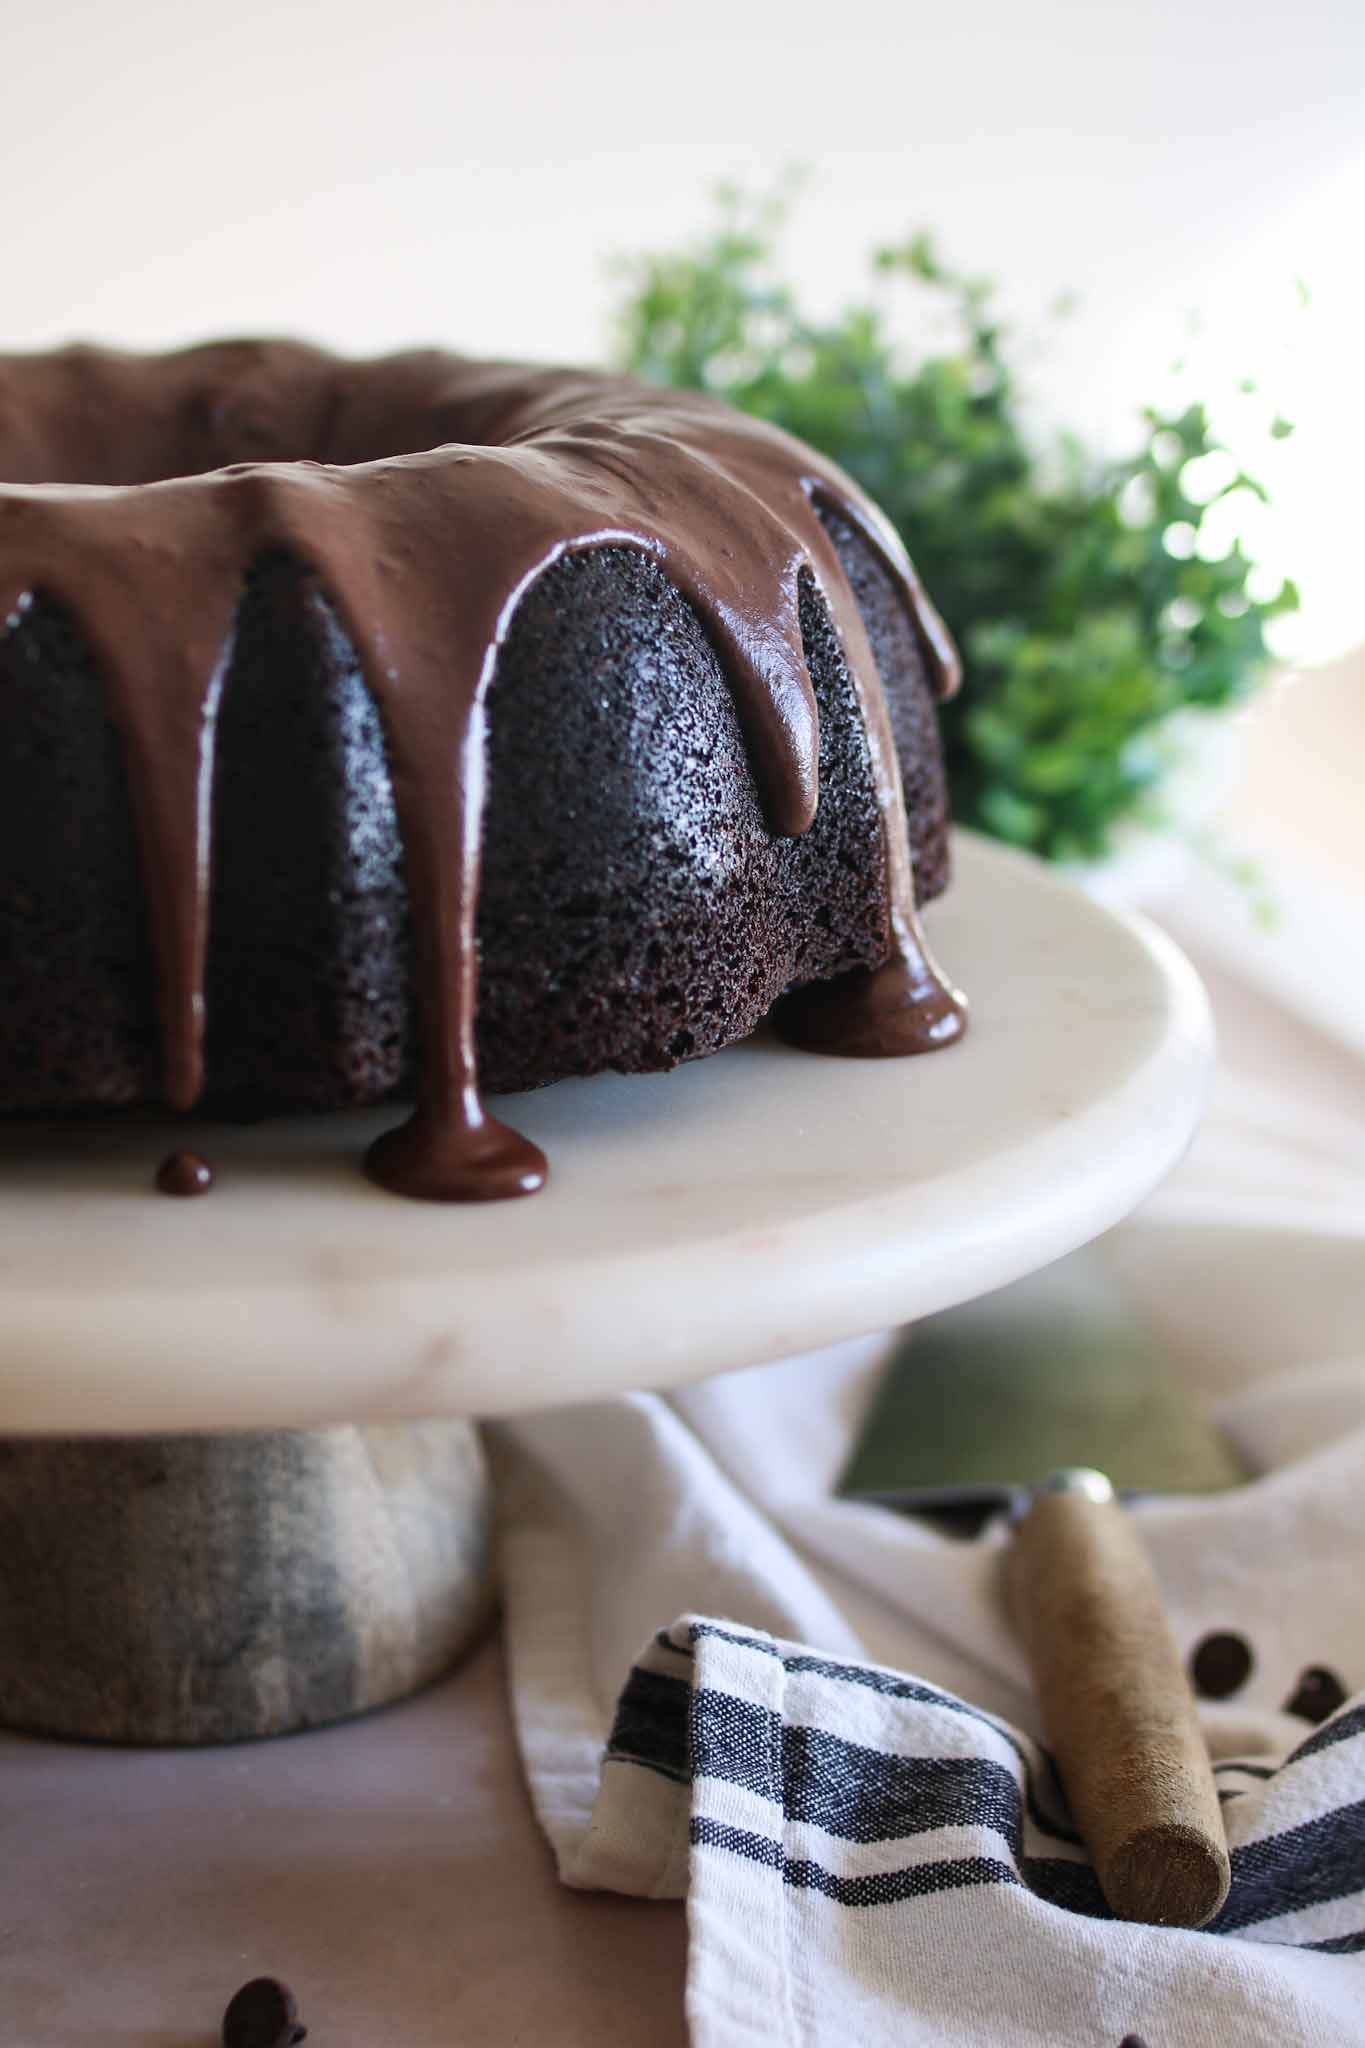
How to frost a bundt cake
Honestly, I struggled with how to frost this bundt cake for a while. I quite literally tested this cake TWELVE times to try to get everything right on the inside and outside.
You’ll find that most bundt chocolate bundt cakes come with just a classic chocolate ganache glaze (melted chocolate chips and cream together). Don’t get me wrong – it’s simple, classic, and decadent. But every time it went through the taste test, it just didn’t make the cut. As my husband stated in one tasting, “The base cake is so so good, and the ganache cheapens it.” Ganache and cheap don’t usually go together in a sentence – that’s how good this cake is if the ganache can’t even stand next to it. So I tried to find a glaze that matched in quality…
THE PERFECT GLAZE. I finally got it. I was making my Death By Chocolate Cake (a top recipe favorite!) and everyone commented on how much they LOVED the frosting. It’s rich and full of intense chocolate flavor without overpowering the cake. So I tweaked that base to convert it into a glaze fit for this bundt cake and it was a perfect combo! The cake finally met its match.
**TIPS ON POURING:
1. Watch the consistency. Add more cream to thin it, or more powdered sugar to thicken it. You can also use temperature to help. Heat it up to help it get thinner, or let it sit in the fridge for a minute to get it stiffer. What you’re looking for is a thick, pourable glaze consistency. Too runny and it’ll just run off your cake. too thick and you’ll have globs sitting at the top. Practice against the edge of your bowl if you’re not sure.
2. Use a spoon to pour. I’ve found when I just pour it from the bowl or a pouring container, I have less control. Using a spoon, I can position the glaze and control the quantity. Go slow and work your way around. When in doubt, lean in to the middle. No one will notice or care if there’s a small puddle of glaze in the center. In fact, make sure the inside is coated with the glaze too so that each slice gets a fair amount of frosting.
How to store bundt cake
This cake is best serve same day, as the glaze is at its most idea consistency. It can be stored at room temperature and stays very fresh for a few days. If you have a cake lid, you can use that. If not, it’s fine sitting out for the day. The glaze helps keep the cake moist. After cutting and serving, just put some plastic wrap where the exposed cuts are to retain freshness.
More sourdough recipes you’ll love…
- Death by Chocolate Cake
- Sourdough German Pancakes
- Sourdough Banana Chocolate Chip Muffins
- Sourdough Strawberry Scones
- Sourdough Discard Biscuits
If you make this recipe, make sure you tag @loskitchenco on Instagram and leave a comment below! You can also save for later by clicking the ‘Pin Recipe’ button on the recipe card. Happy baking!
Sourdough Chocolate Bundt Cake
Ingredients
Cake
- 1 3/4 cup (218 grams) all purpose flour
- 1 1/4 cup (250) granulated sugar
- 1/2 cup (85 grams) brown sugar, packed
- 3/4 cup (75 grams) dutch processed cocoa powder
- 1 tsp baking powder
- 1 tsp baking soda
- 1 tsp salt
- 4 oz semi sweet chocolate bar or baking chips
- 1/2 cup vegetable oil
- 3 large eggs
- 2 tsp vanilla extract
- 170 grams sourdough starter, unfed (heaping 1/2 cup)
- 1 1/4 cup hottest tap water
Glaze
- 2 oz cream cheese, softened
- 4 tbsp salted butter, melted
- 1/4 cup (25 grams) cocoa powder
- 1/2 tsp vanilla extract
- 1 1/4 cup (145 grams) powdered sugar
- ~ 1/2 cup heavy whipping cream
Instructions
- Preheat oven to 350° F.
- In a large bowl, whisk together the dry ingredients - flour, sugars, cocoa powder, baking powder, baking soda, and salt.
- In a separate bowl, melt the chocolate in the microwave in 15-30 second bursts, stirring each time. When fully melted, set aside to cool.
- Once the melted chocolate lightly warm or cooled, add the oil, eggs, vanilla, unfed sourdough starter, and whisk vigorously together or beat together with a hand mixer until well combined.
- Add the mixed wet ingredients to the large bowl of dry ingredients and gently mix together. Add the hot water last and mix together until everything is combined and smooth.
- Spray a bundt pan generously with nonstick spray. Optional, but an additional assist to ensure a nonstick bundt pan is to sift in cocoa powder to the main portion to the bundt pan.
- Pour the batter into the prepared bundt pan and bake in the oven for about 38-42 minutes, or until moist or no crumbs come out on a toothpick.
- Keep it in the bundt pan for 5-10 minutes until you see the edges of the cake release from the sides of the pan. Transfer to a cooling rack. You can do this by placing a cooling rack on top of the bundt pan and then holding it all together, flip it over swiftly and gently.
- Glaze: Prepare the glaze by first beating together the softened cream cheese and melted butter. Add cocoa powder, powdered sugar, and vanilla; beat again. Lastly add heavy cream until desired consistency. You can also warm it up in the microwave for 15-30 seconds at a time to assist with the glaze-like consistency.
- When cake is still slightly warm or cooled, use a large spoon to dress the cake with the chocolate glaze. Store at room temperature. Enjoy!
Can I use regular cocoa powder that I have or is the dutch processed cocoa powder necessary?
You can use regular cocoa powder because this recipe calls for both baking soda and powder – so both would react fine. I definitely recommend using dutch processed cocoa powder for it’s texture and richer flavor. (Even “hershey’s dark” that’s carried at most every grocery store will work). Dutch processed cocoa powder has been washed in a potassium solution that neutralizes its acidity so it pairs well with baking powder. It softens the flavor and typically has a higher fat content. But long story short, yes, you can still use regular cocoa powder 🙂
The best cake I’ve ever had! Everyone was raving! It is SO moist and the glaze is incredible on its own. This will definitely be a repeat around here.
Thank you for taking the time to share! So glad it was a hit for you!
I had the most heavenly slice of this cake at a sourdough baking class Lori taught. It was absolutely delicious! While I haven’t had a chance to bake it myself yet, I have added it to my baking list and I’ll be making it soon! I love all the tips in the recipe and blog post – bundts can be tricky but I know I’ve got the information I need to make it like Lori did. Here’s hoping that the glaze turns out just as beautiful as hers!
Yay! Hope you love it!