Classic Chocolate Mint Brownies
Ultimate fudgy brownies (like REALLY fudgy!) with a light mint frosting layer & topped with a rich chocolate ganache. This one is for my chocolate mint lovers out there!
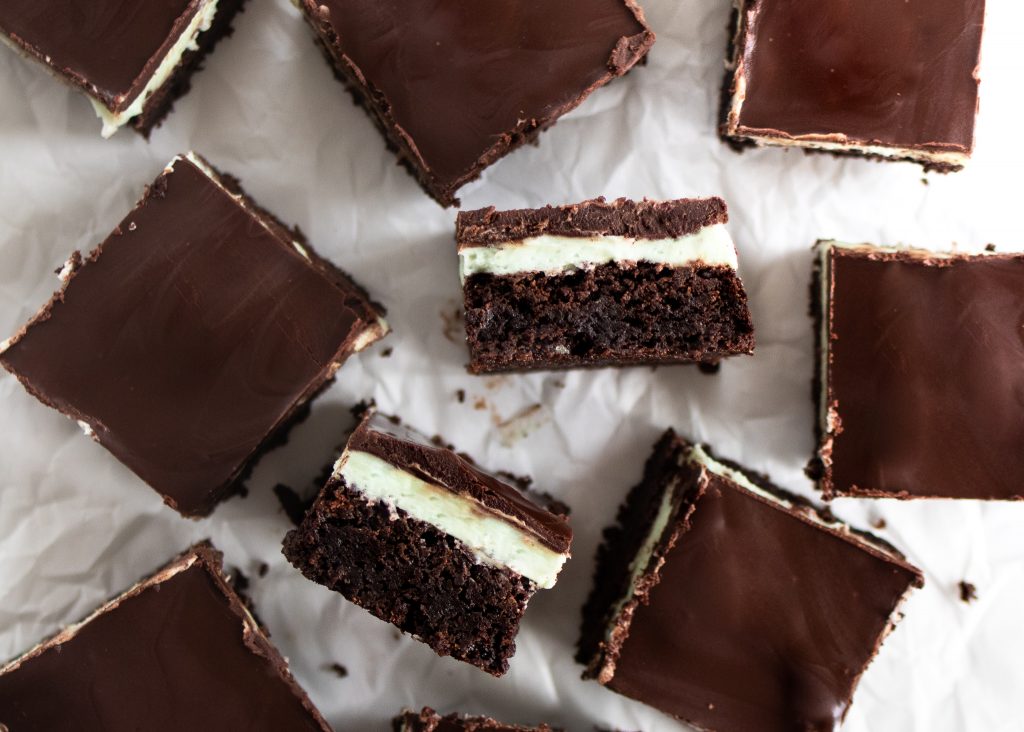
These mint brownies are a family staple. They have made their repeated appearance at baby showers (including my own), Christmas parties, and more. They’re easy, impressive, and oh so delicious. In a pinch you can use a boxed brownie mix for the base layer (no shame!) but once you have a good brownie from scratch, it’s hard to go back to the box – especially when they’re this easy! A few tips:
Line your baking pan
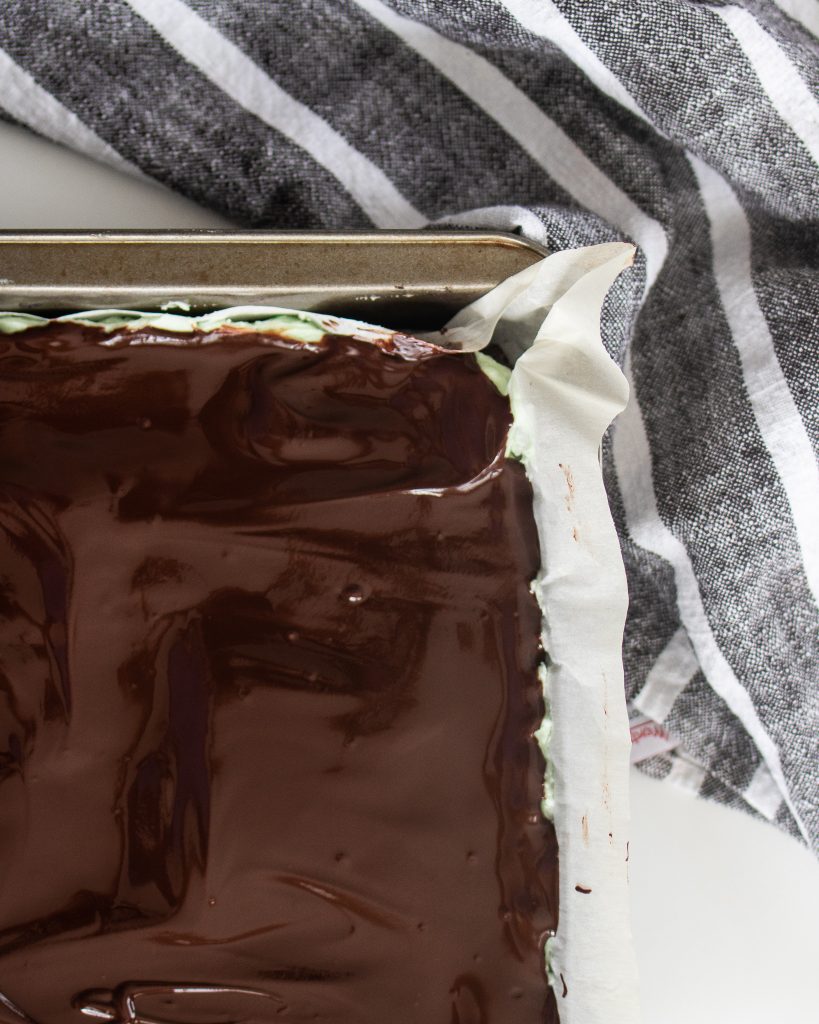
I have found much better brownie results when I line my pan with parchment paper first. I leave 2 ends of parchment hanging out so it’s easy to pull the brownies out. I find that doing this helps with a couple things:
1. Helps remove the brownies cleanly so you’re not digging out of the pan, always ruining the first piece (which I’ve been known to do about every single time).
2. Allows the brownies to cook evenly. Ever have a big dip in your brownies? That can be due to a couple things – over mixing AND not baking evenly. Parchment will help with this!
Make sure your layers are set
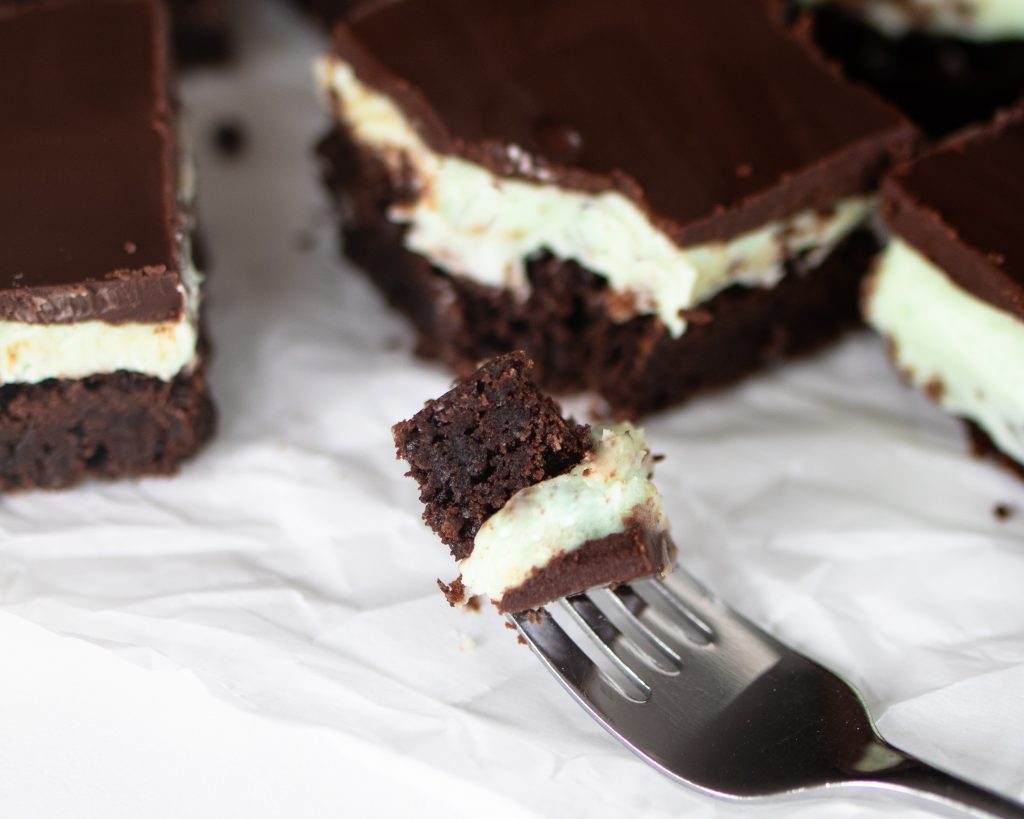
I know, we’re all in a rush when those delicious smelling brownies get pulled out of the oven. But trust me, there is success in waiting! Follow the instructions in the recipe to cool & set each layer before moving to the next one. This applies to the last step of cutting as well. If you wait until the chocolate has set, you’ll get cleaner cuts. Something else that helps with a clean cut is wiping off your knife with a paper towel between each cut. This prevents any crumbs or frosting from the first cut from getting into the next one.
How long do these stay fresh?
Forever! Okay, not really – but close. These brownies are so moist and fudgy and they stay that way for a while. Which means these are great to make in advance! I know, our favorite phrase! I keep these in the fridge until serving to keep the layers nice and set. These will stay fresh in the fridge airtight for 3-5 days or you can wrap them well and store them in the freezer for about 3 months. Plastic wrap and a ziplock bag will easily do the trick.

How to achieve a nice mint color
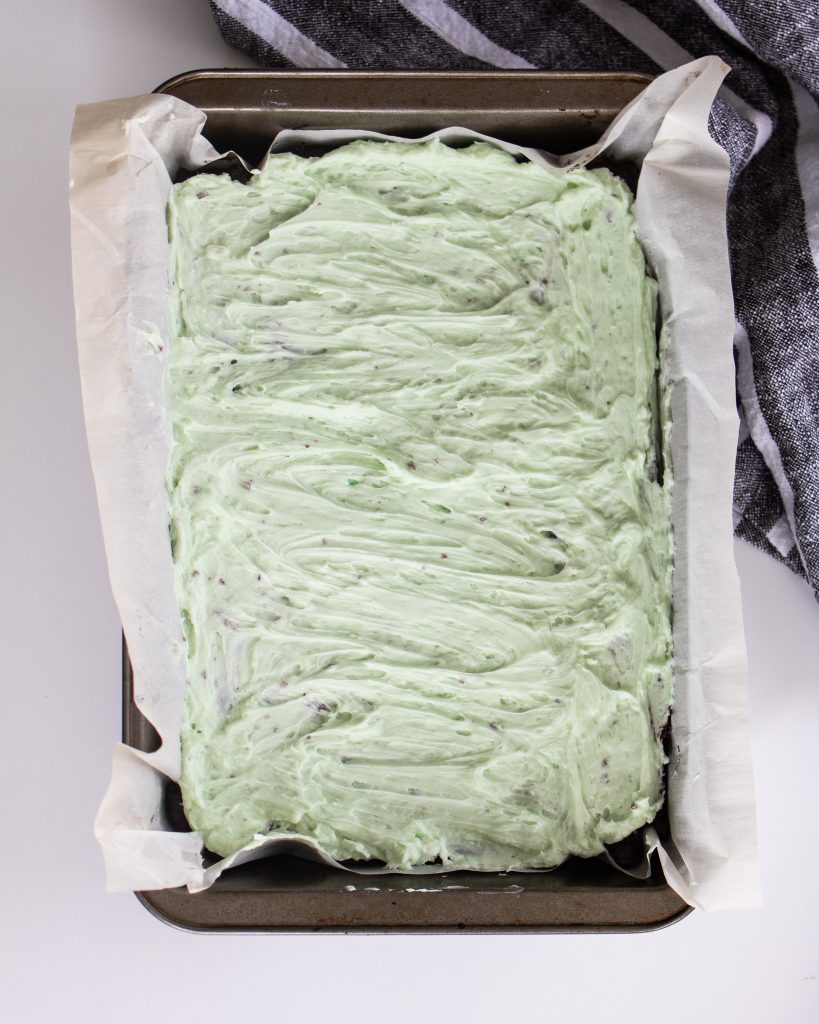
My favorite brand to use for food coloring is AmeriColor. It provides the most true color and because it’s a gel instead of a liquid, it doesn’t change the consistency of whatever you’re making. A little goes a long way! When I want to get a really light color, sometimes I even transfer the color using a toothpick if I’m concerned a full drop will be too much. In these mint brownies I used one drop of Leaf Green. You can purchase a variety color pack (so worth it to replace your food coloring – it’ll last you a long time!) or just get the single color. Happy baking!

Mint Brownies
Ingredients
Brownies
- 1 cup (230g) unsalted butter
- 8 oz semi-sweet chocolate
- 1 ½ cup (300g) sugar
- ½ cup (100g) brown sugar light or dark is fine
- 3 large eggs, room temperature
- 2 tsp vanilla extract
- 1 tsp salt
- ½ cup (42g) unsweetened cocoa powder spoon and level if you don't use a scale
- 1 cup (120g) all purpose flour spoon and level if you don't use a scale
Mint Frosting Layer
- ¾ cup (141g) unsalted butter, softened
- 3 cups (360g) powdered sugar
- 1 ¼ tsp peppermint extract* or to taste
- 1 small drop green gel food coloring*
- 2-3 TB milk till desired consistency
Chocolate ganache layer
- 6 oz semi-sweet chocolate chips
- ½ cup (113g) unsalted butter
Instructions
Brownies
- Preheat oven to 350°F. Prepare are 9x13 baking pan by lining it with parchment paper. I like to have 2 of the ends hanging out so it's easy to pull the brownies out.
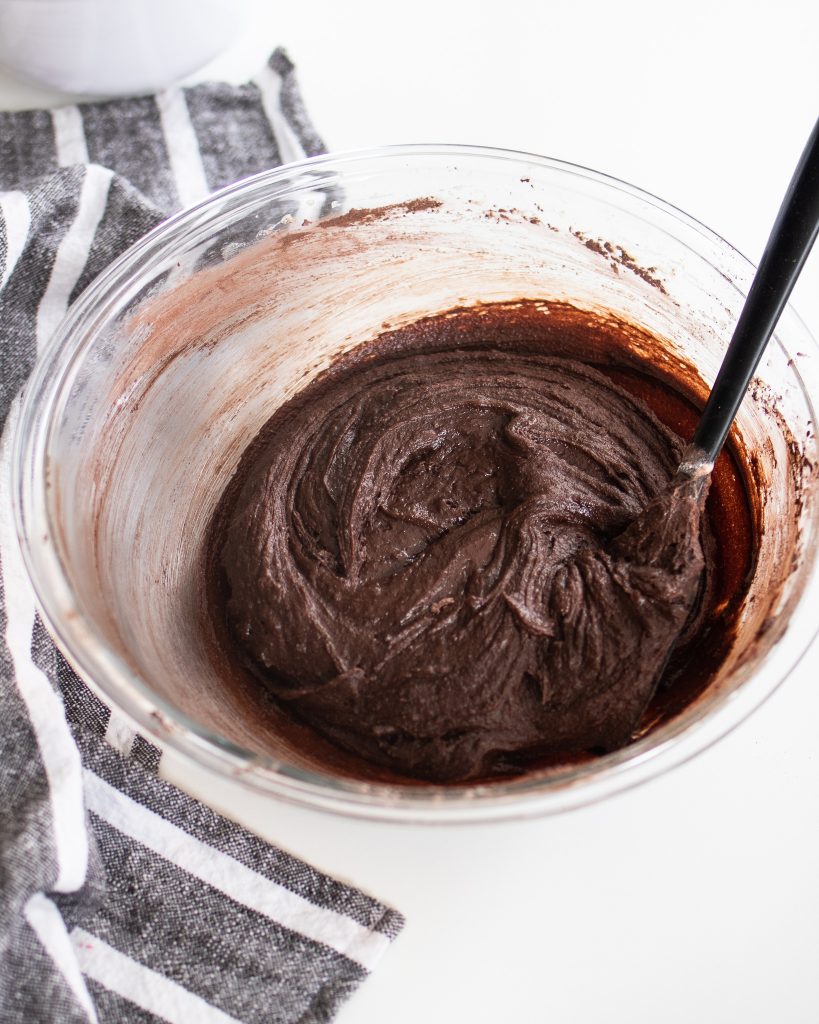
- In a microwave safe bowl, melt together the butter and chocolate. Melt in 20-30 second increments, stirring after each time. Set aside so it can begin to cool.
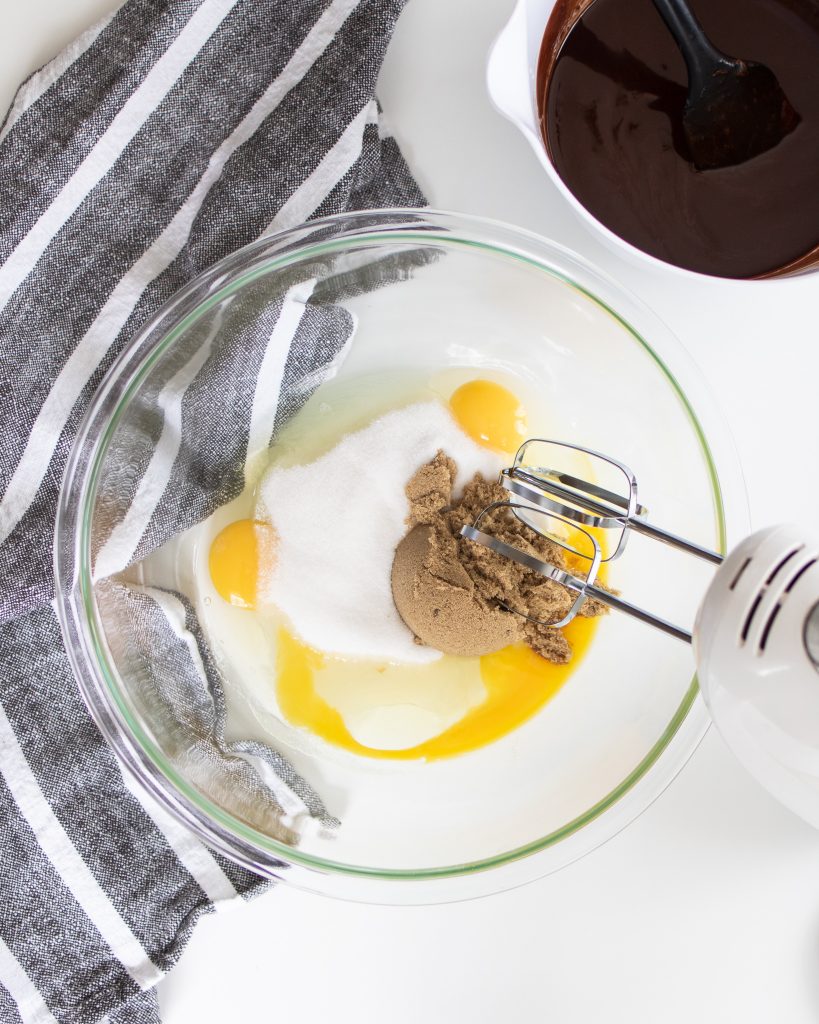
- Using a hand or stand mixer, beat together the eggs and sugars until light and fluffy (about 2 minutes). Once your chocolate has cooled, add that to your egg & sugar mixture. Add the vanilla. Mix until combined.
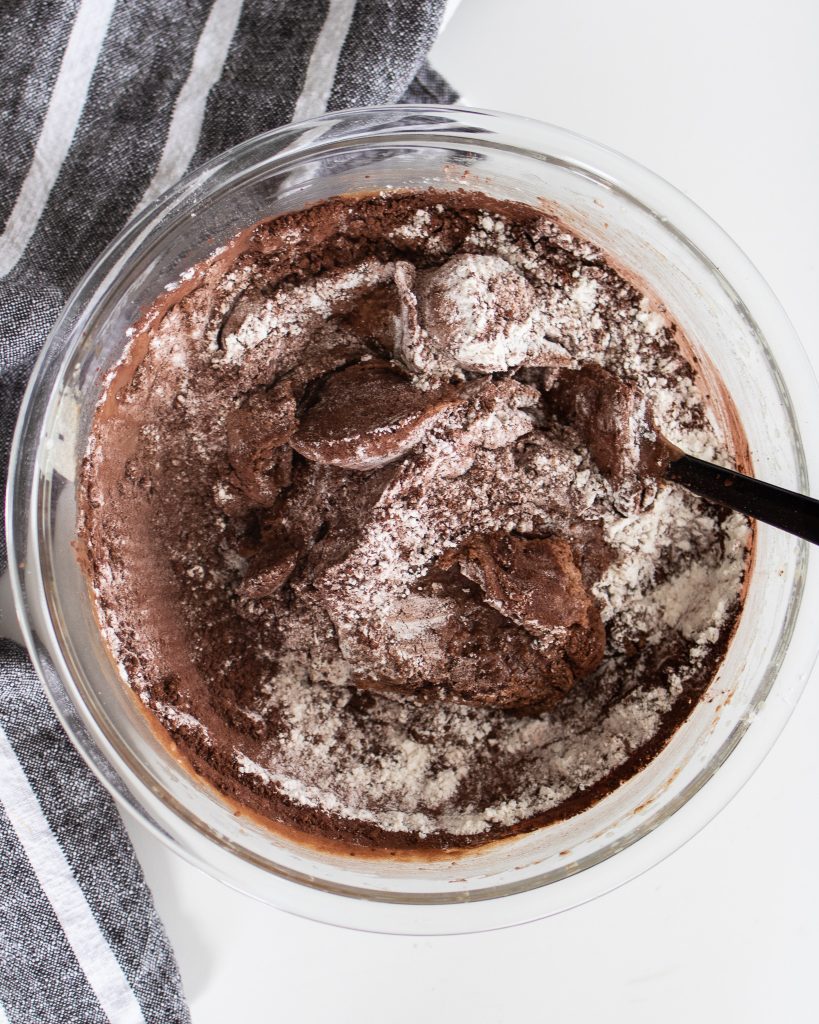
- Using a spatula, gently fold in the the dry ingredients until everything is combined. Be careful not to over mix.
- Pour the batter in the prepared pan and bake for 30-32 minutes. Your brownies are done when the sides start to pull away from the pan, the center is not jiggly, and you have moist crumbs on your toothpick. Remember, brownies continue to bake in the pan after you pull them out. We don't want to over bake these!
- Let the brownies cool. I like to put my pan on a wire rack to help this process. While the brownies cool, you can begin to make the mint frosting layer.
Mint Frosting
- Using a hand or stand mixer, beat the butter on high for 2 minutes to get it light and fluffy. Add the powdered sugar, and 2 TB of the milk. Beat together until combined and fluffy. Then add peppermint extract and food coloring. Beat together till combined. Add up to 1 more TB of milk if needed.
- Once the brownies have cooled, frost an even layer of the mint frosting on top of the brownies. Set inside the refrigerator so it can begin to set while you make the chocolate ganache. Letting it set will help the ganache spread easier and will provide cleaner layers.
Chocolate Ganache
- In a microwave safe bowl, melt together the chocolate and butter. Melt in 20-30 second increments, stirring after each time until it's completely melted.
- Pour the chocolate over your set mint layer. With a spoon or offset spatula, spread the chocolate out evenly. Place in the refrigerator for one hour to set the chocolate.
- Once the chocolate has set, you can remove the brownies from the pan (optional - you can also keep in the pan) and cut into squares. I like having a paper towel handy to wipe my knife off after each cut so that I continue to get clean cuts as I go.
- Store airtight in the refrigerator or wrap well and freeze! These bites of goodness will last well for 3-5 days in the fridge and a few months in the freezer, so they're easy to make ahead!