
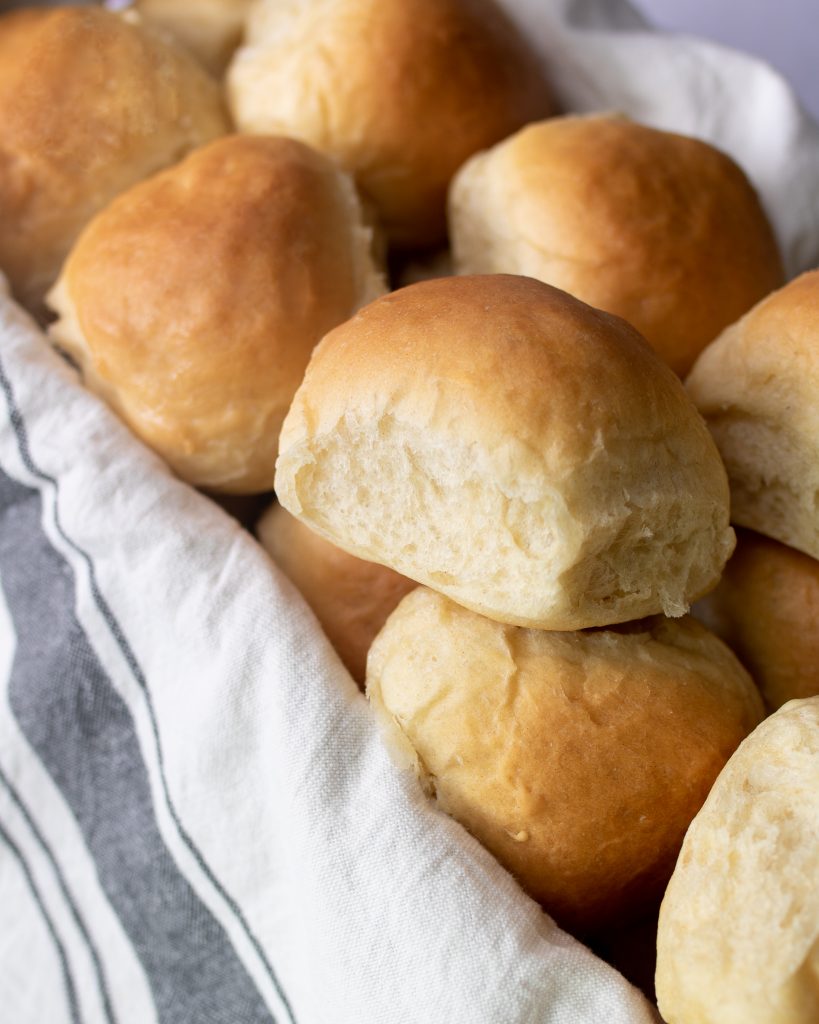
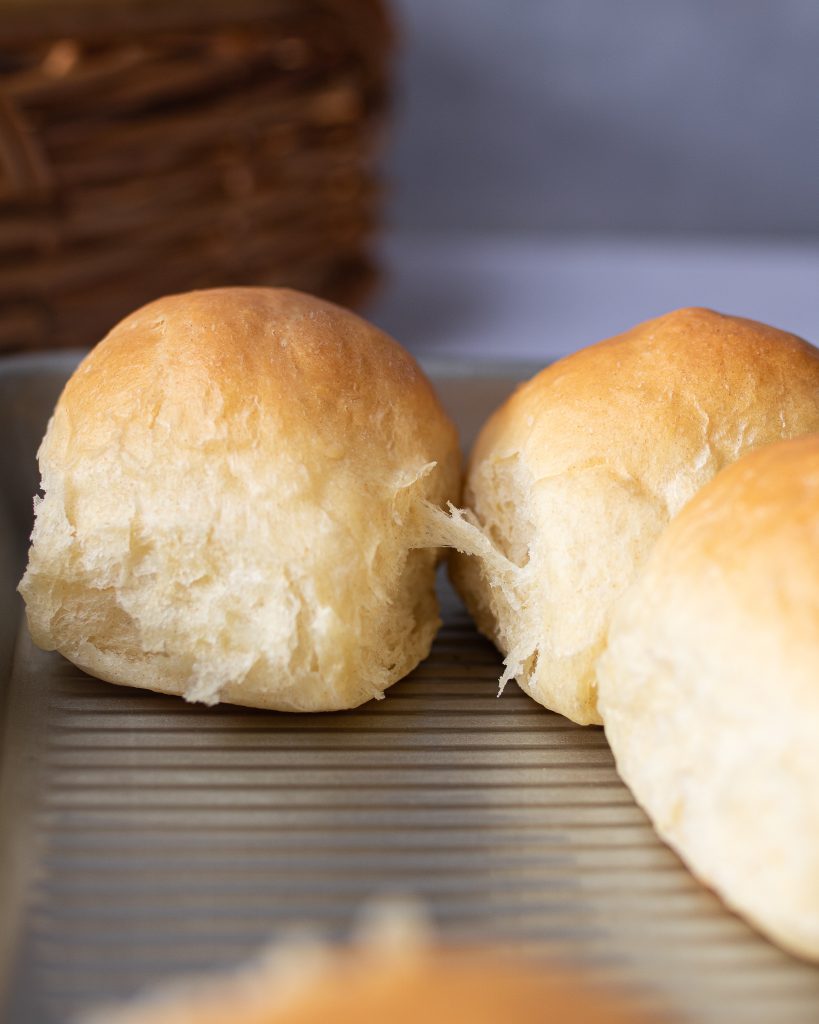
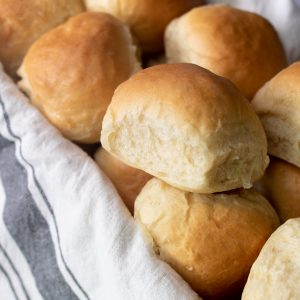
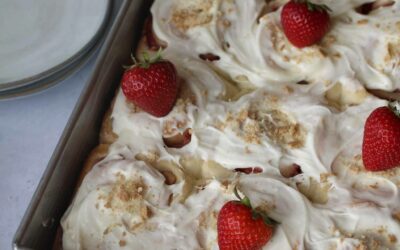
These incredible soft, fluffy, and buttery rolls are the star at dinner time. There are several options in how to make them in advance so it makes dinner time that much easier. With basic ingredients and techniques, this is an easy go-to recipe for bakers at any level.
The best dinner rolls
Nothing beats a fluffy, buttery roll on the dinner table. Nothing beats a recipe that’s hard to mess up either. With this recipe I bring you both of those things! A crowd pleasing roll with simple ingredients and simple steps. I have made these in my family for literally years – selling them every Thanksgiving and Christmas back when I did home bakery orders. There are several ways to form dinner rolls and make dinner rolls in advance.
How to make dinner rolls in advance
I’ve tested this countless ways, and I won’t lie – the absolute best way is to have these fresh. The fresh dough and fresh rise make for perfection. BUT, but I’ve still had very very yummy results making these ahead of time, and sometimes that’s our only or best option if we want homemade rolls (Thanksgiving in the kitchen can get busy, I know!). Here are some make ahead options:
1. DELAY RISE (SAME DAY): Make the dough in the morning, let it do its initial first rise, then form and place on the pans. Instead of letting them sit out at room temperature to rise, cover with sprayed plastic wrap (so the wrap doesn’t get stuck to the dough) and store in the fridge. About 1 – 1/2 hours before dinner, let the dough get back to room temperature and rise more if needed, then bake. The benefit to this is fresh hot rolls at dinner but all the mess is cleaned up and out of the way, allowing you to focus on the other last minute parts of the meal.
I prefer to do this same day but you can allow the rolls to rest overnight in the fridge.
2. FRESH FORMING (OVERNIGHT): Depending on how you prefer your timing, you can also make the dough in advance and let its initial first rise rest in the fridge. About 2 – 3 hours before dinner, set the dough out to get back to room temperature, then form and give it it’s second rise. Bake and again, have fresh rolls at dinner! This method works especially well with my sweet roll recipes, where you often don’t want to make them too far in advance otherwise the filling would slowly seep out.
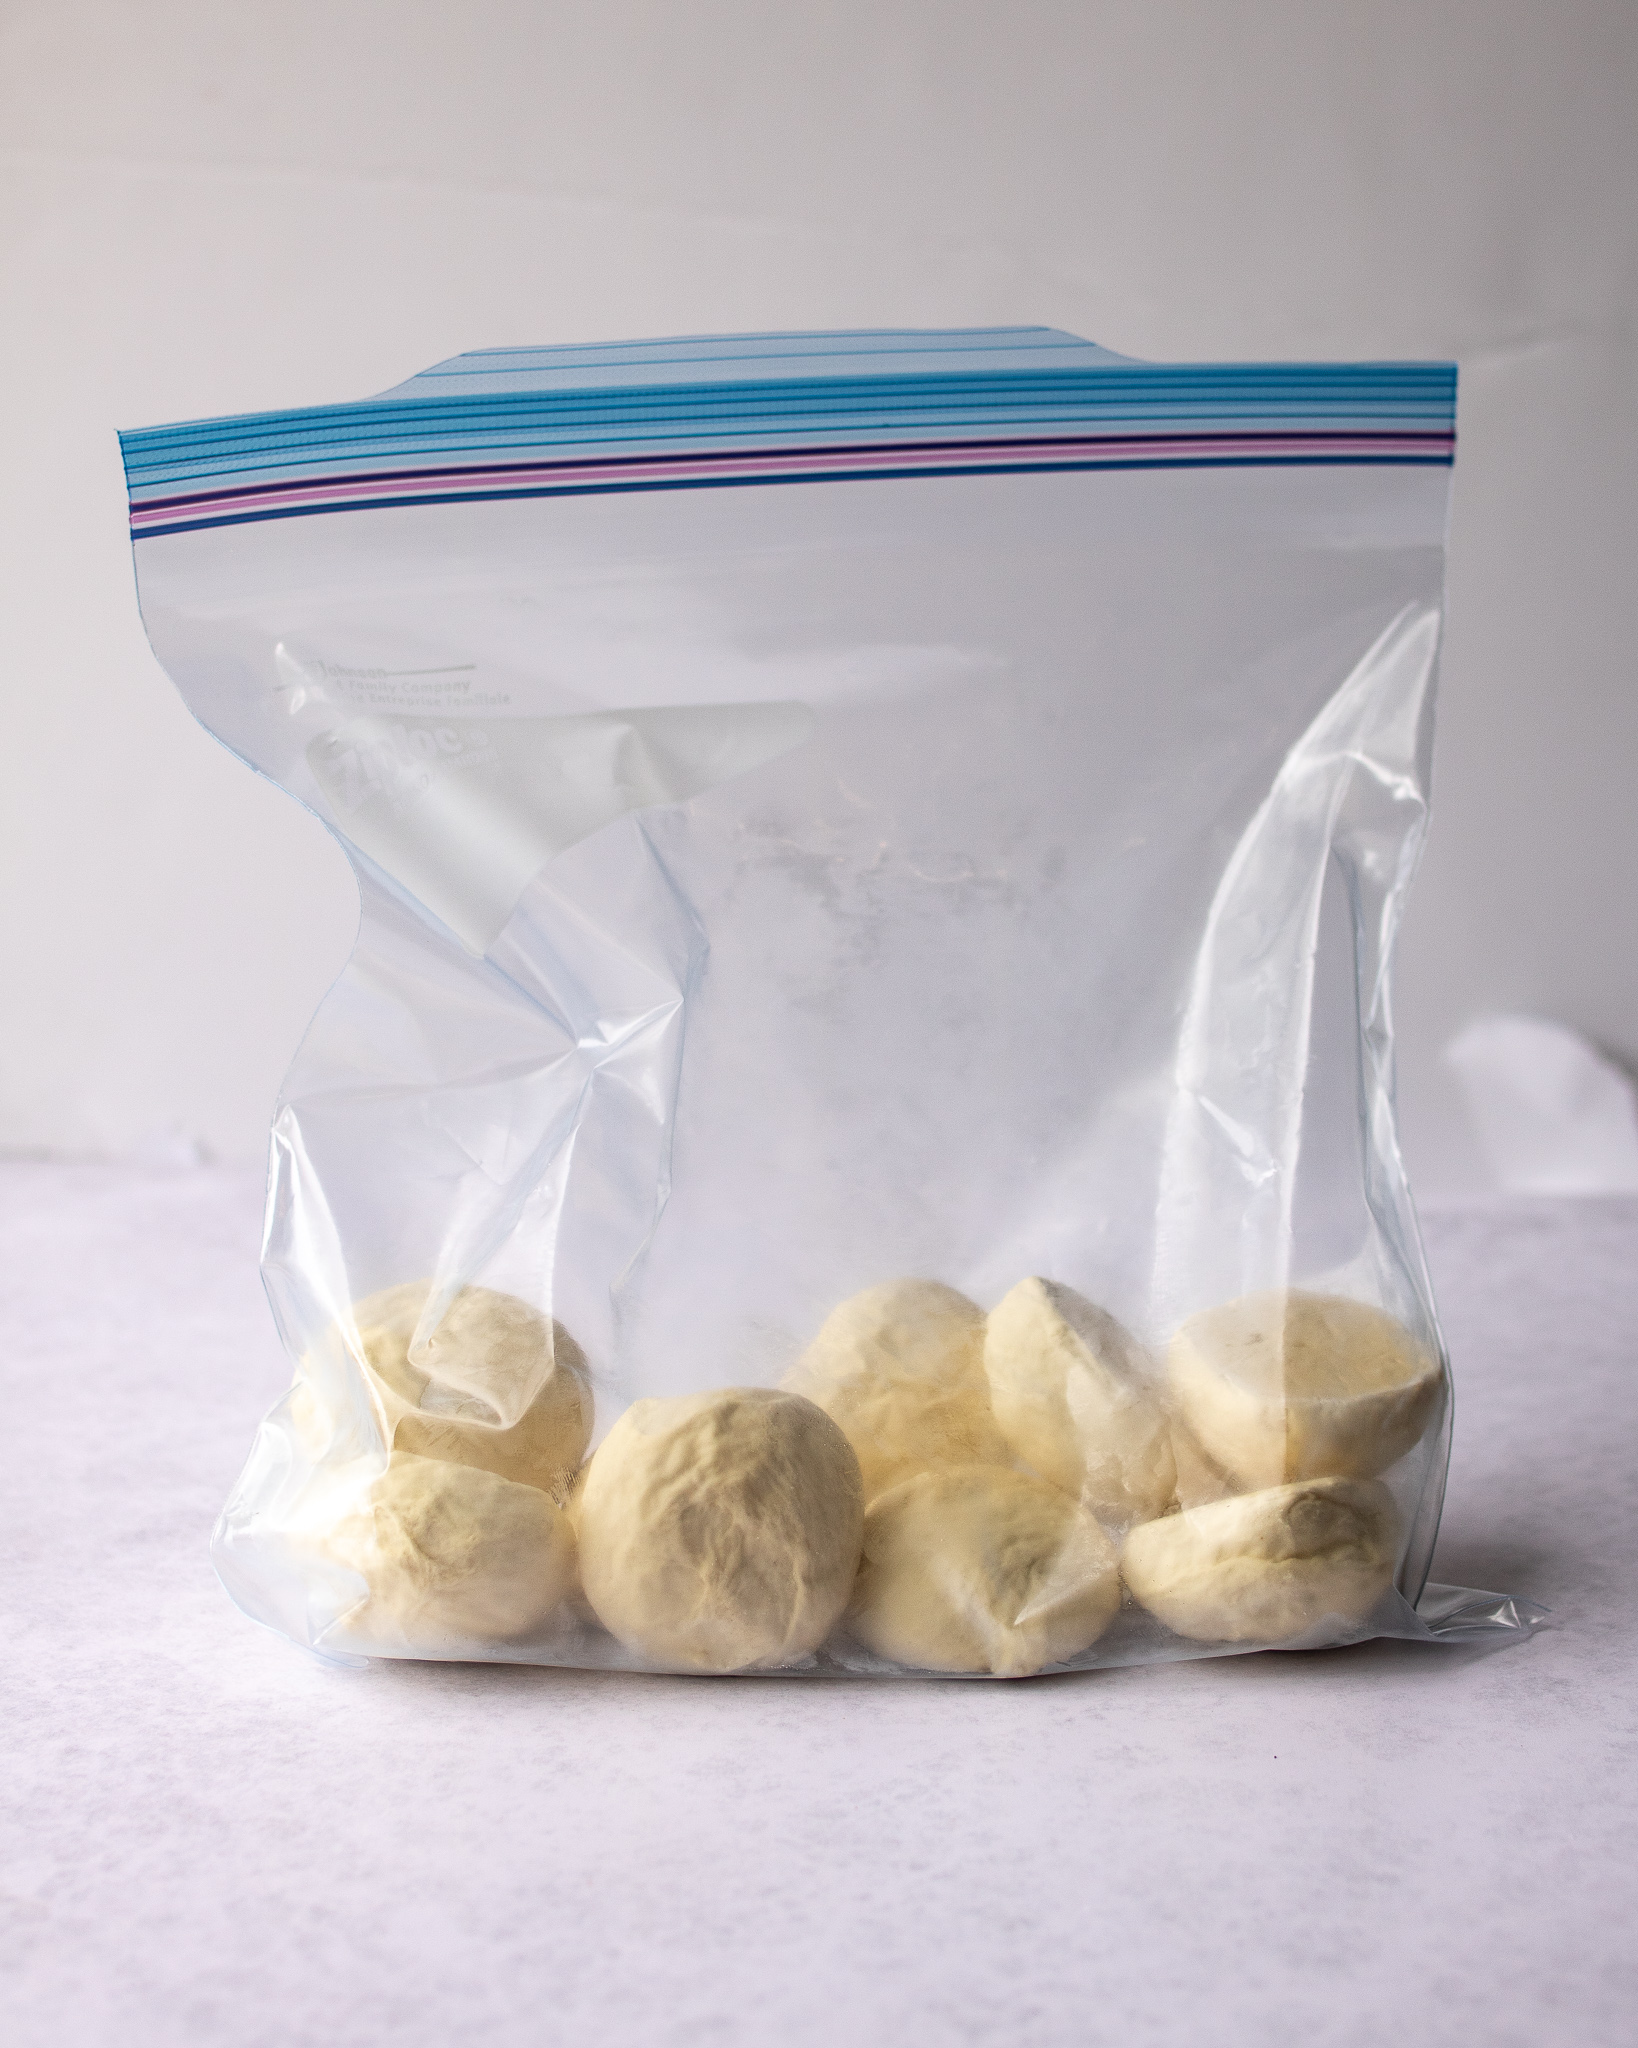
3. FREEZE DOUGH: You can make the dough, give it the initial rise, then form into rolls. Then immediately after forming, space them apart on a baking sheet and place in the freezer. Once they are frozen separately you can take them off the baking sheet and store them in a Ziplock bag for easier storage. To thaw, place rolls on baking sheet about 4 hours before dinner. Cover with sprayed plastic wrap. Let them come to room temperature and rise before baking. To expedite the proofing process, you can put them in a gently warm oven to act as a proofing box. This is a great way to make the dough weeks in advance and not worry about it at all come the day of! Also makes for a great last minute dinner side and way tastier than Rhodes rolls.
4. PAR BAKE: You know the “take and bake” partially baked bread you get from the store? Yup, you can do that with your homemade rolls too! This method allows you to get most of the oven time in advance, so that it frees up your oven for the main stuff. This is great for people with only one oven, because all you need to reserve is about 10 minutes of oven time at the end to reheat the rolls – which usually is about the amount of time it takes to get the family together, right? Bake the rolls day of or day before, until just barely cooked – about 12-15 minutes. Then finish off the baking and heating right before for fresh hot rolls.
5. FULL BAKE: When in doubt, yes, you can just bake the rolls ahead of time! If you’re bringing them to an event and you’re not the one hosting, this is a great choice so you don’t have to ask the host to use their oven. I prefer to make these day of, and no more than 24 hours in advance for freshest results. People love love rolls, even when they’re not fresh hot out of the oven.
How to work with yeast
There are several different kinds of yeasts out there. None are necessarily bad, but they all respond differently so it’s important to know what you’re working with. There are 3 primary kinds of yeasts – active dry, instant, and rapid rise. For this recipe my favorites are either active dry or instant. Active dry needs to be activated prior to using by letting it sit in warm water with sugar (or honey) for 10 minutes until foamy. Instant has already been partially activated and you can let it get foamy first, or just add it to your recipe with a warm liquid and it’ll still continue activating like normal. For more information on this see my tips page on working with yeast.
Whatever yeast you use, two general key principles:
1. It’s best stored in the refrigerator or freezer for longest shelf life. I’ve heard a lot of people say “6 months” for the freezer once it’s been opened, but I’ve used my yeast past that point and it’s still worked great. One If you see your yeast isn’t activating, you could have killed it by using too hot of a liquid, or it could have gone bad if you’ve had it for a while.
2. You can kill your yeast by having your liquid component to hot! On the flip side, it won’t activate well if you put it in water. So what does yeast love? A nice warm bath. It’s true. If you need a specific number, I always recommend 110 degrees F. I recommend taking the temperature especially if you’re new to bread making because it can be the make or break of having successful results.
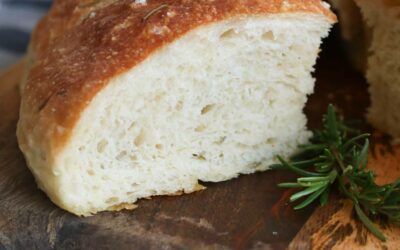
How to form a dinner roll
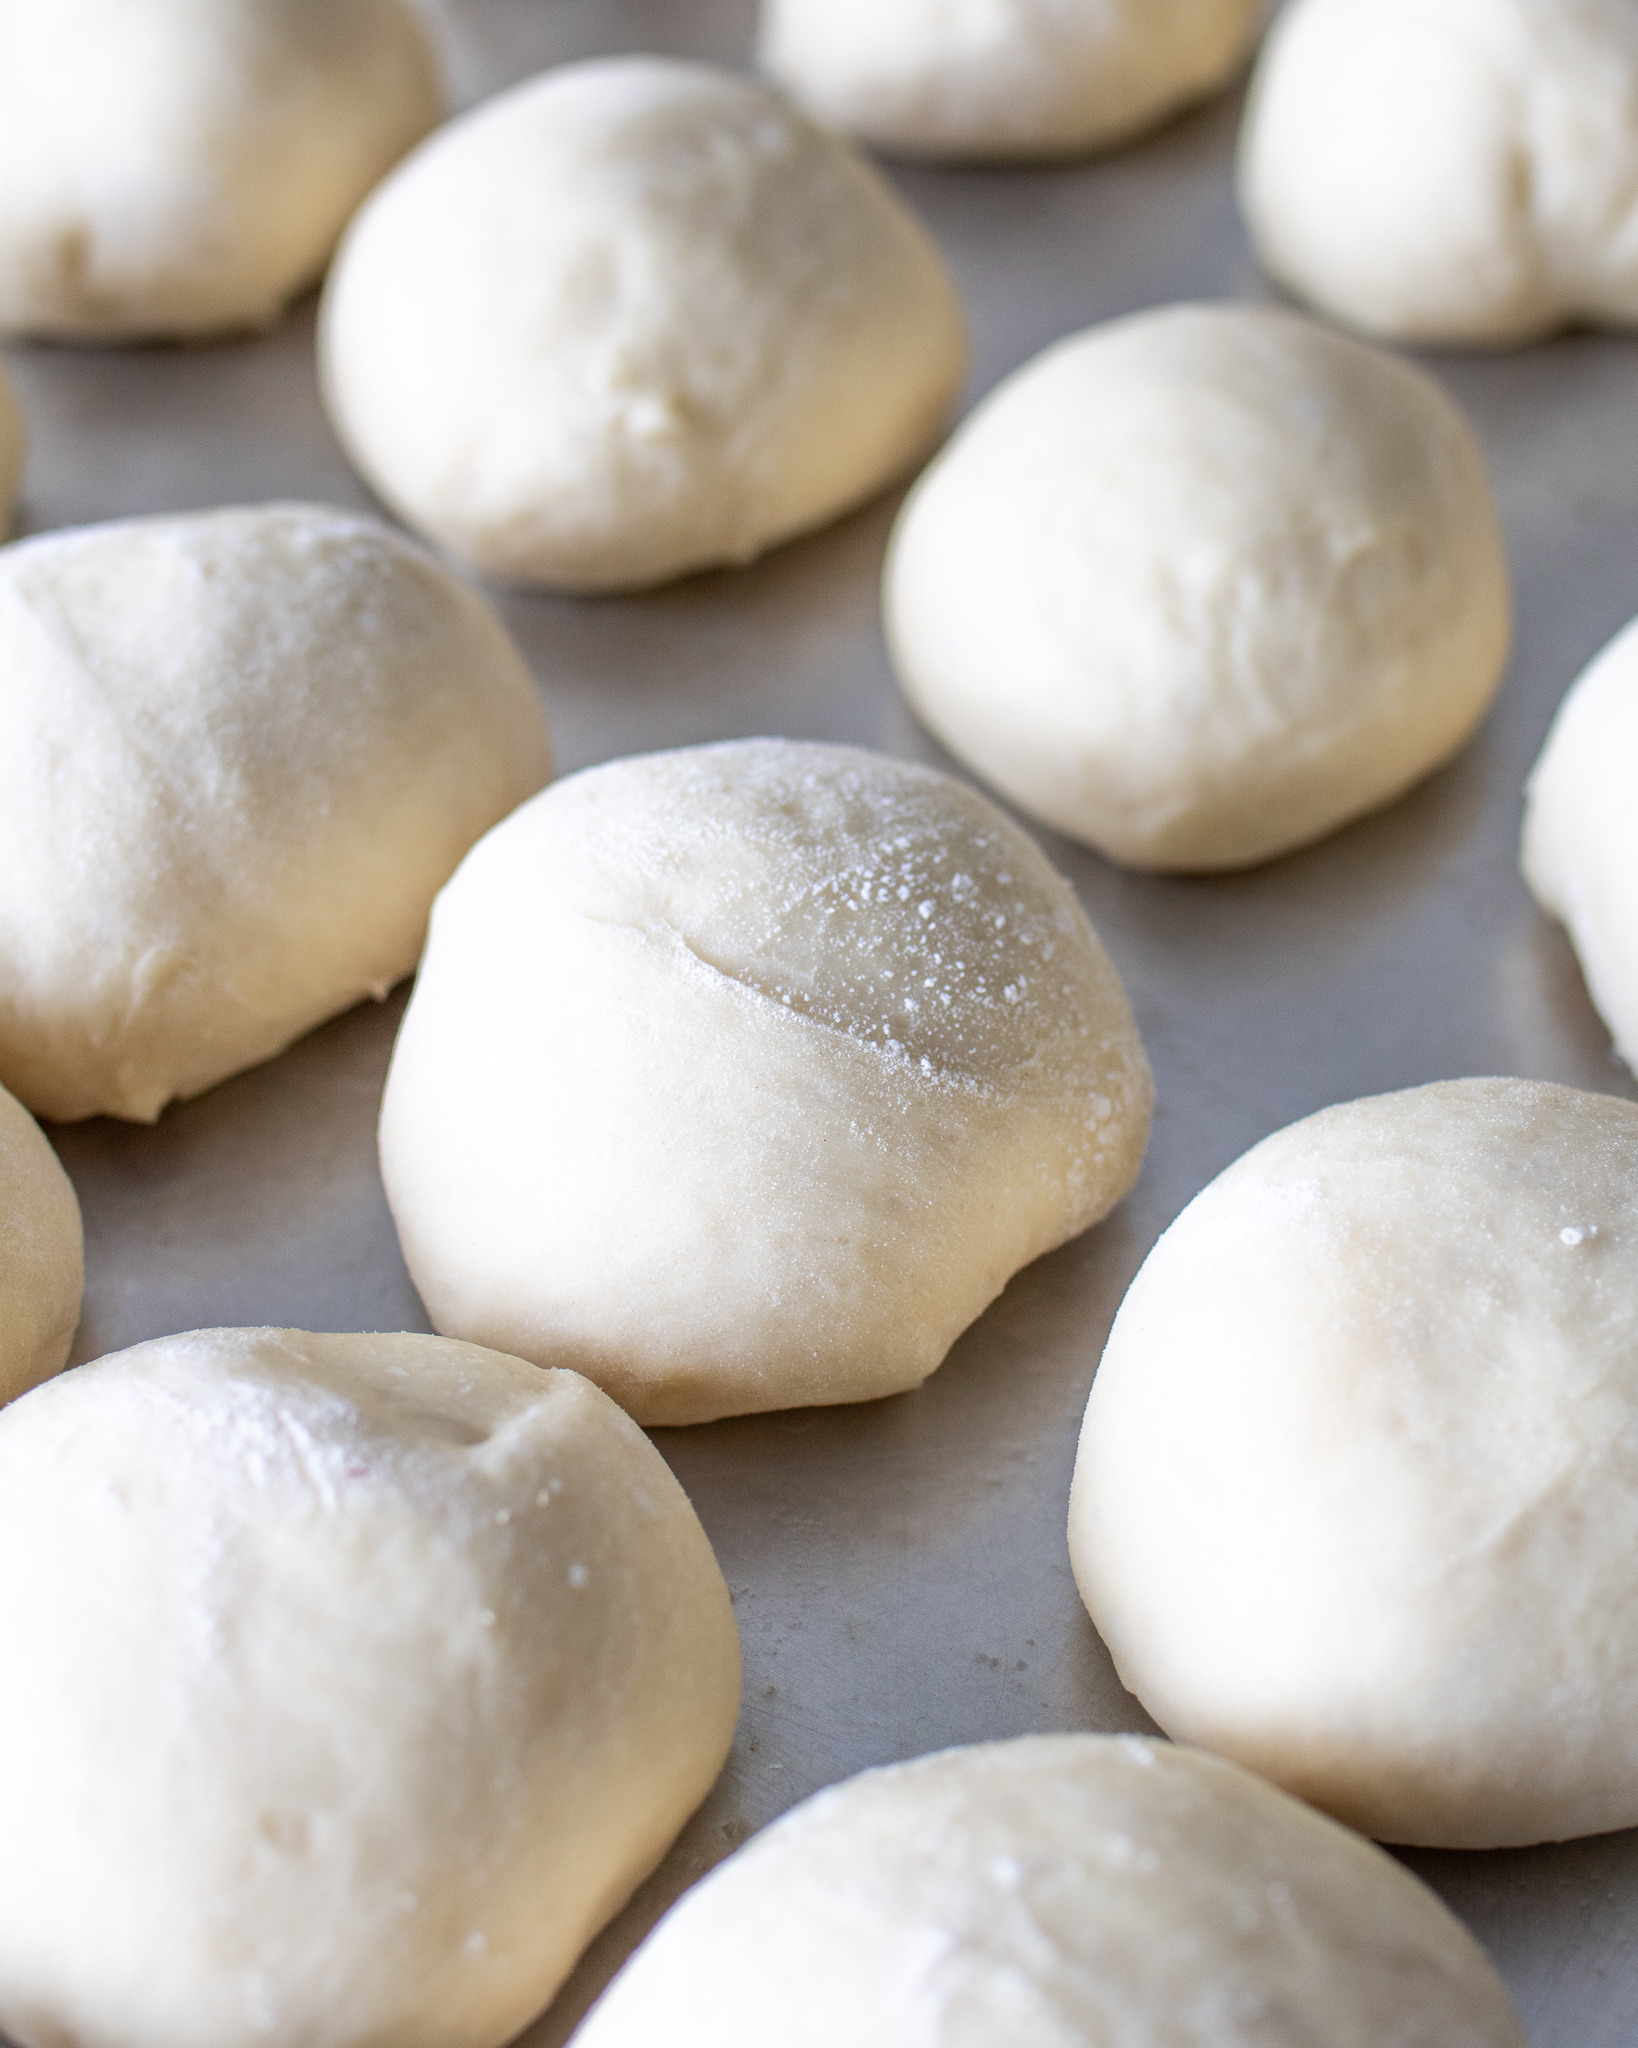
Pinch off a piece of dough about the size of a small tangerine. Space the rolls about an inch apart on the baking sheet. They will grow and meet together as they rise, becoming more like pull apart rolls. Check out my Instagram’s IGTV video to learn several other methods of forming including Lion House style, knots, and crescents.
1. CLASSIC DINNER ROLL
Pinch off a piece of dough the size of a small tangerine. Use the palm of your hand to move the ball in a circular motion quickly on your work space to round out any funny shaped looking balls.
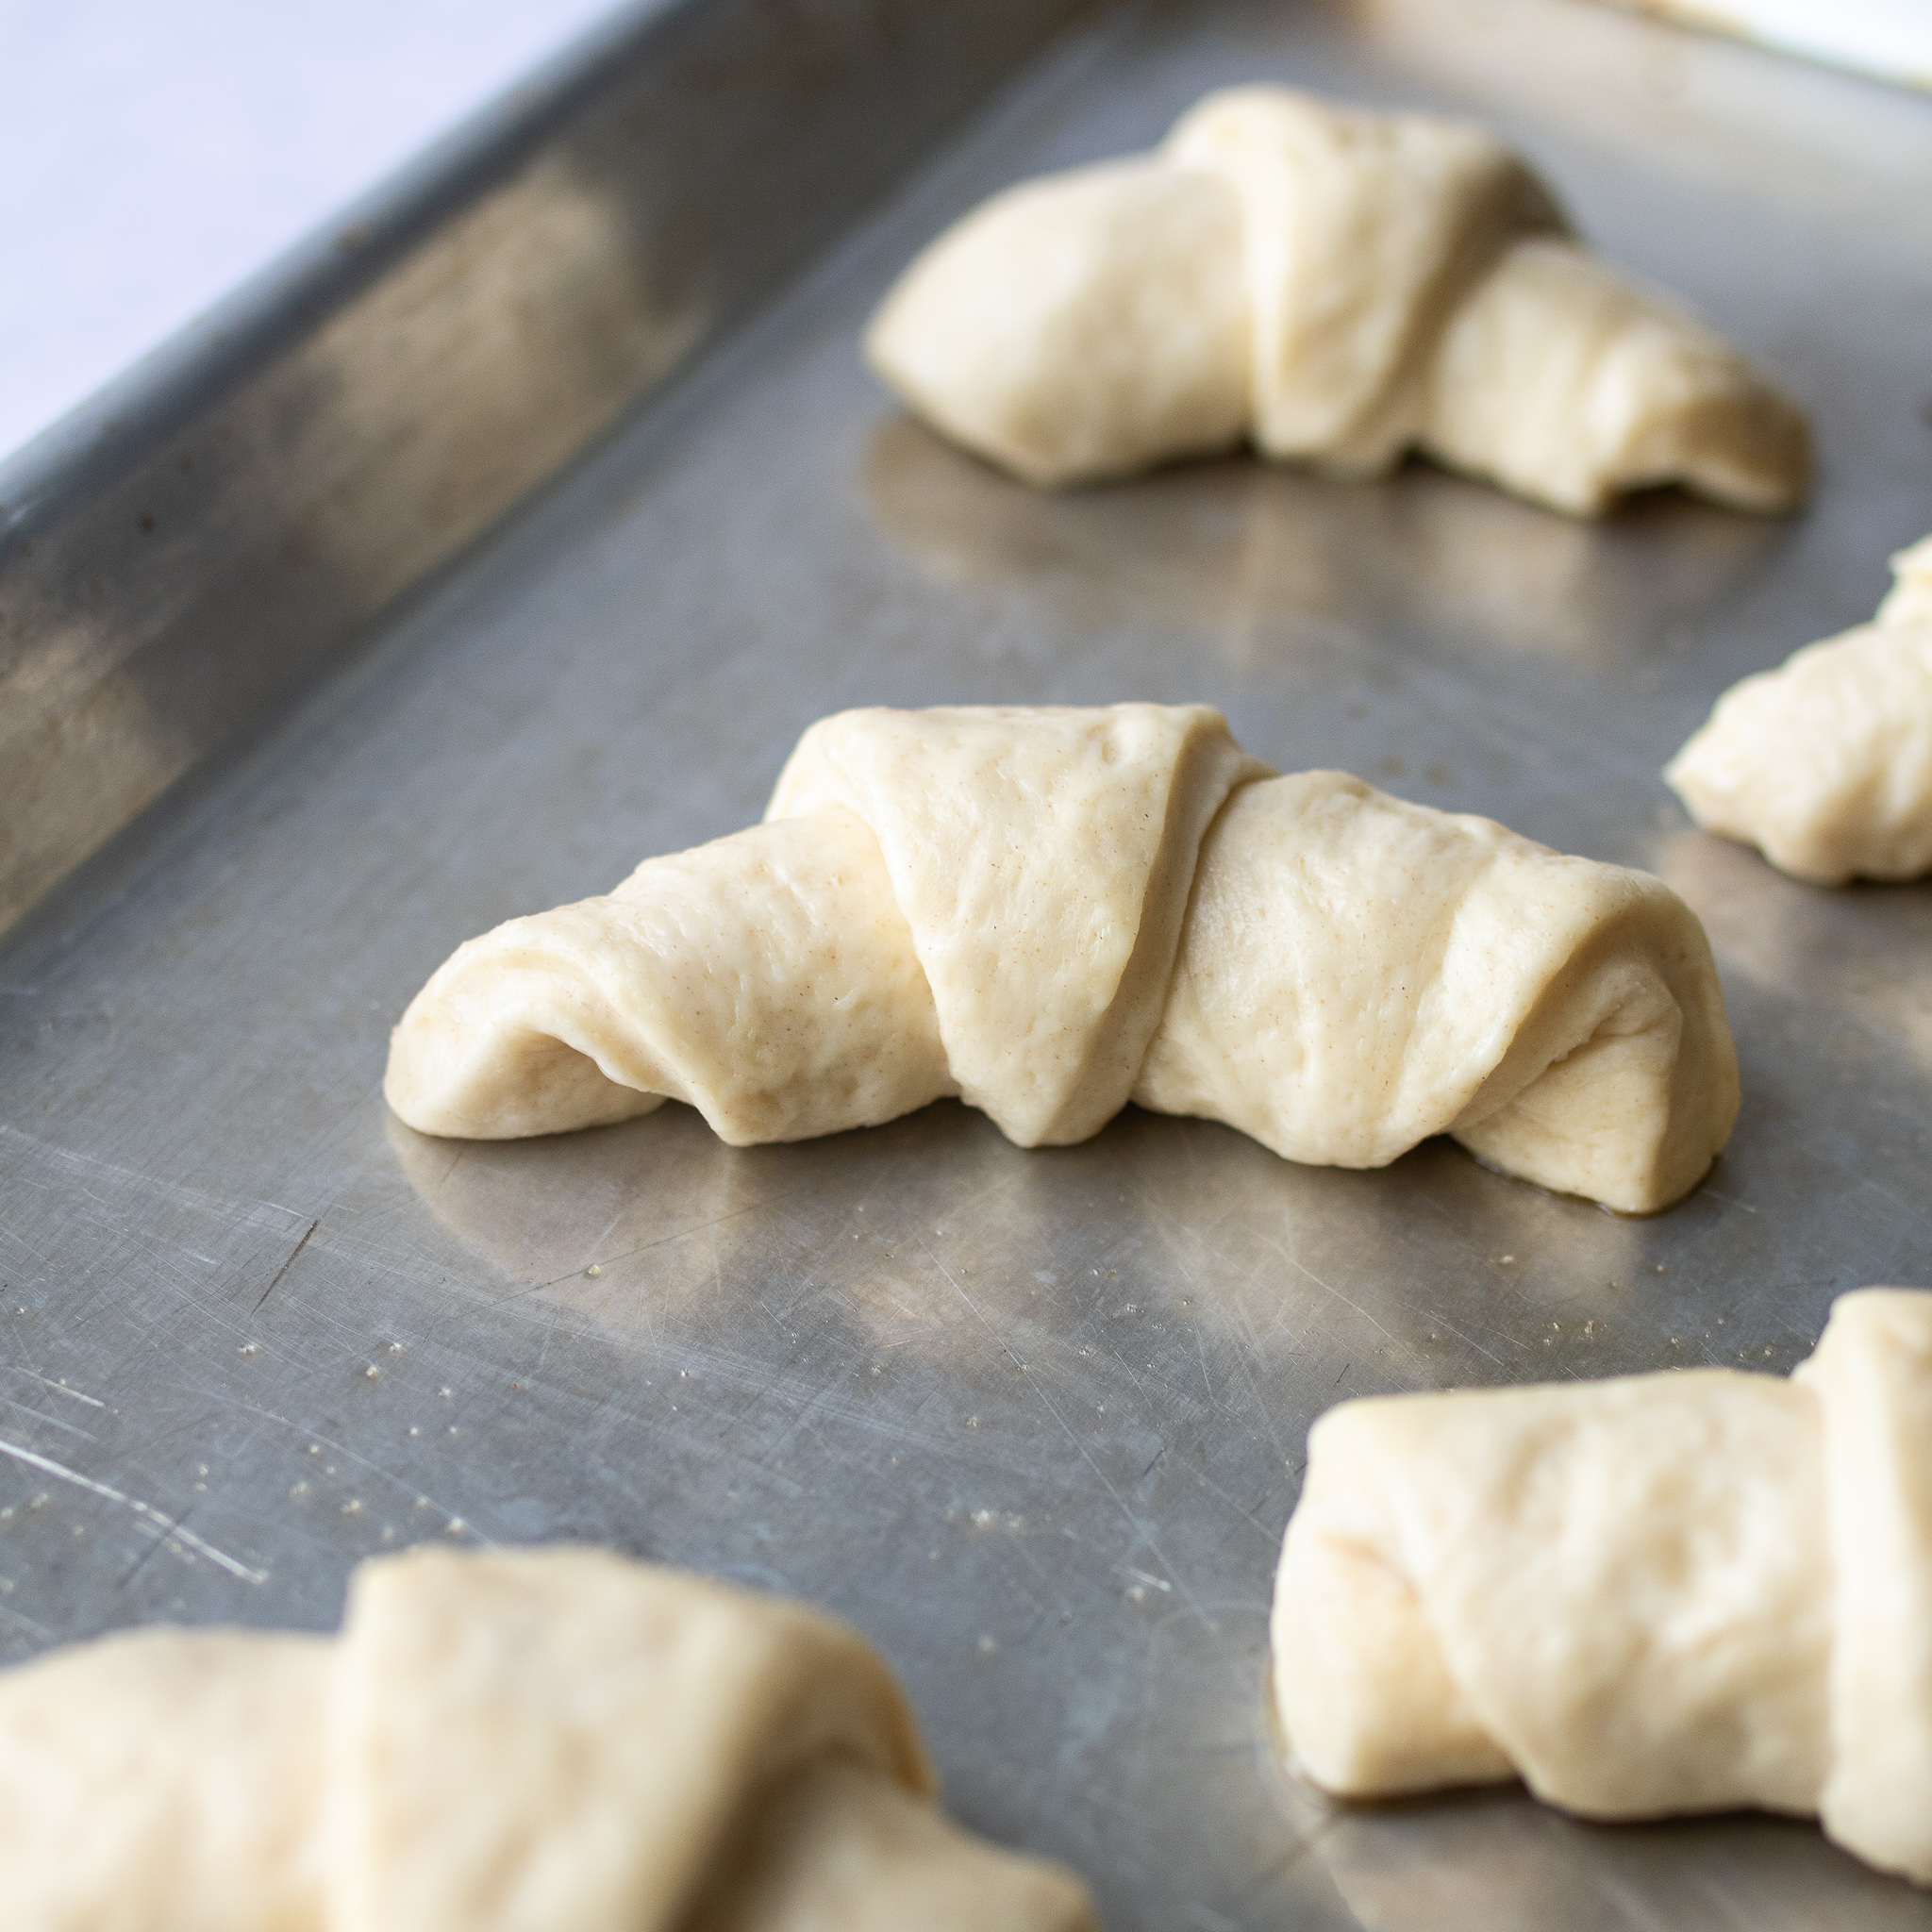
2. CRESCENTS
Divide the batch of dough into two sections. Roll out into a large circle, about 1/4 inch thick. (Pro tip: brush the tops with melted butter! Makes the crescents pull apart and be extra buttery and delicious.) Cut into triangles like a pizza. The top of each strip should be about 3 inches wide. Gently roll up. Make sure the tips are tucked under the dough completely to avoid having them flip up while baking.
3. LION HOUSE
Divide the dough into two sections. Roll out two large rectangles that is about 6 inches in width. Pro tip: brush with melted butter. Helps get that defined Lion House swirl look, instead of the dough just blending in together like a normal roll. Plus it’s extra buttery and delicious as you pull it apart.
Make the letter “L” with your hand (your thumb and your pointer finger). This is your guide for the size of the rolls. The pointer finger is the length of the roll, and the thumb sticking out is the width. Cut outside of your thumb to cut the width. Continue to go down the line of the large rectangle, cutting out those “L” shaped rectangles. Gently roll up. Set on baking sheet with the edge of the roll “sitting” or “kissing the pan”. See picture below.
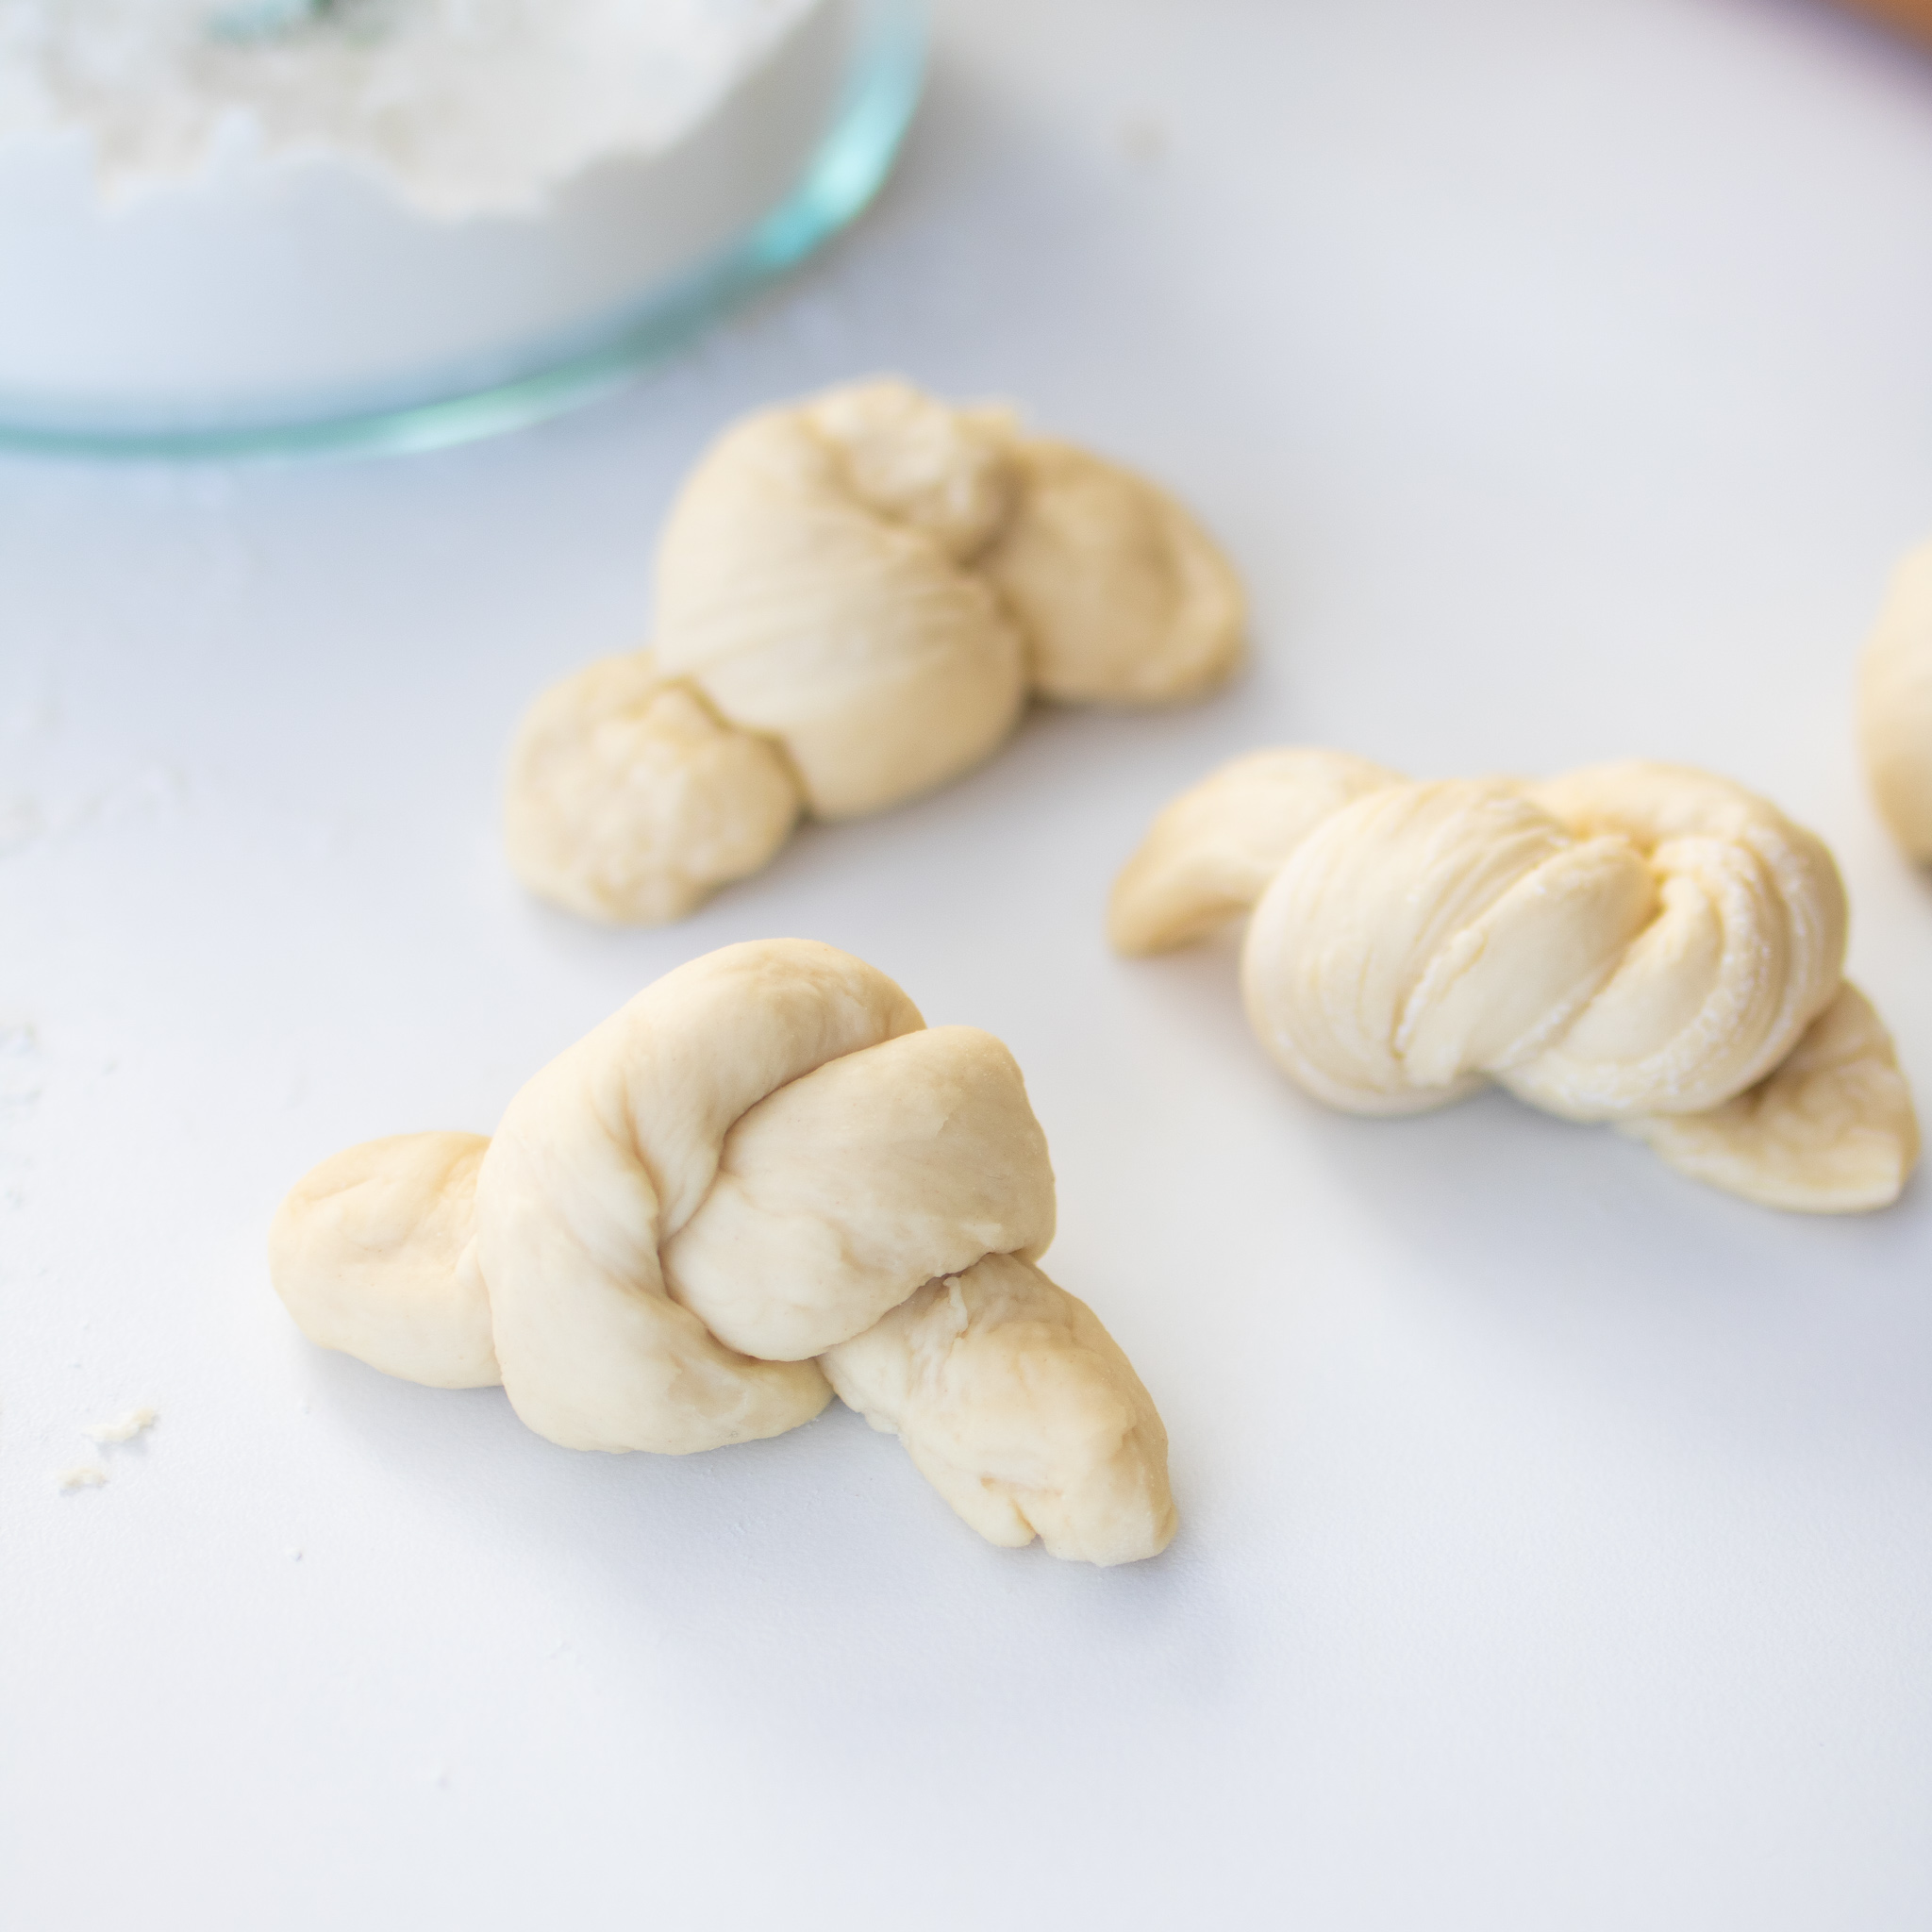
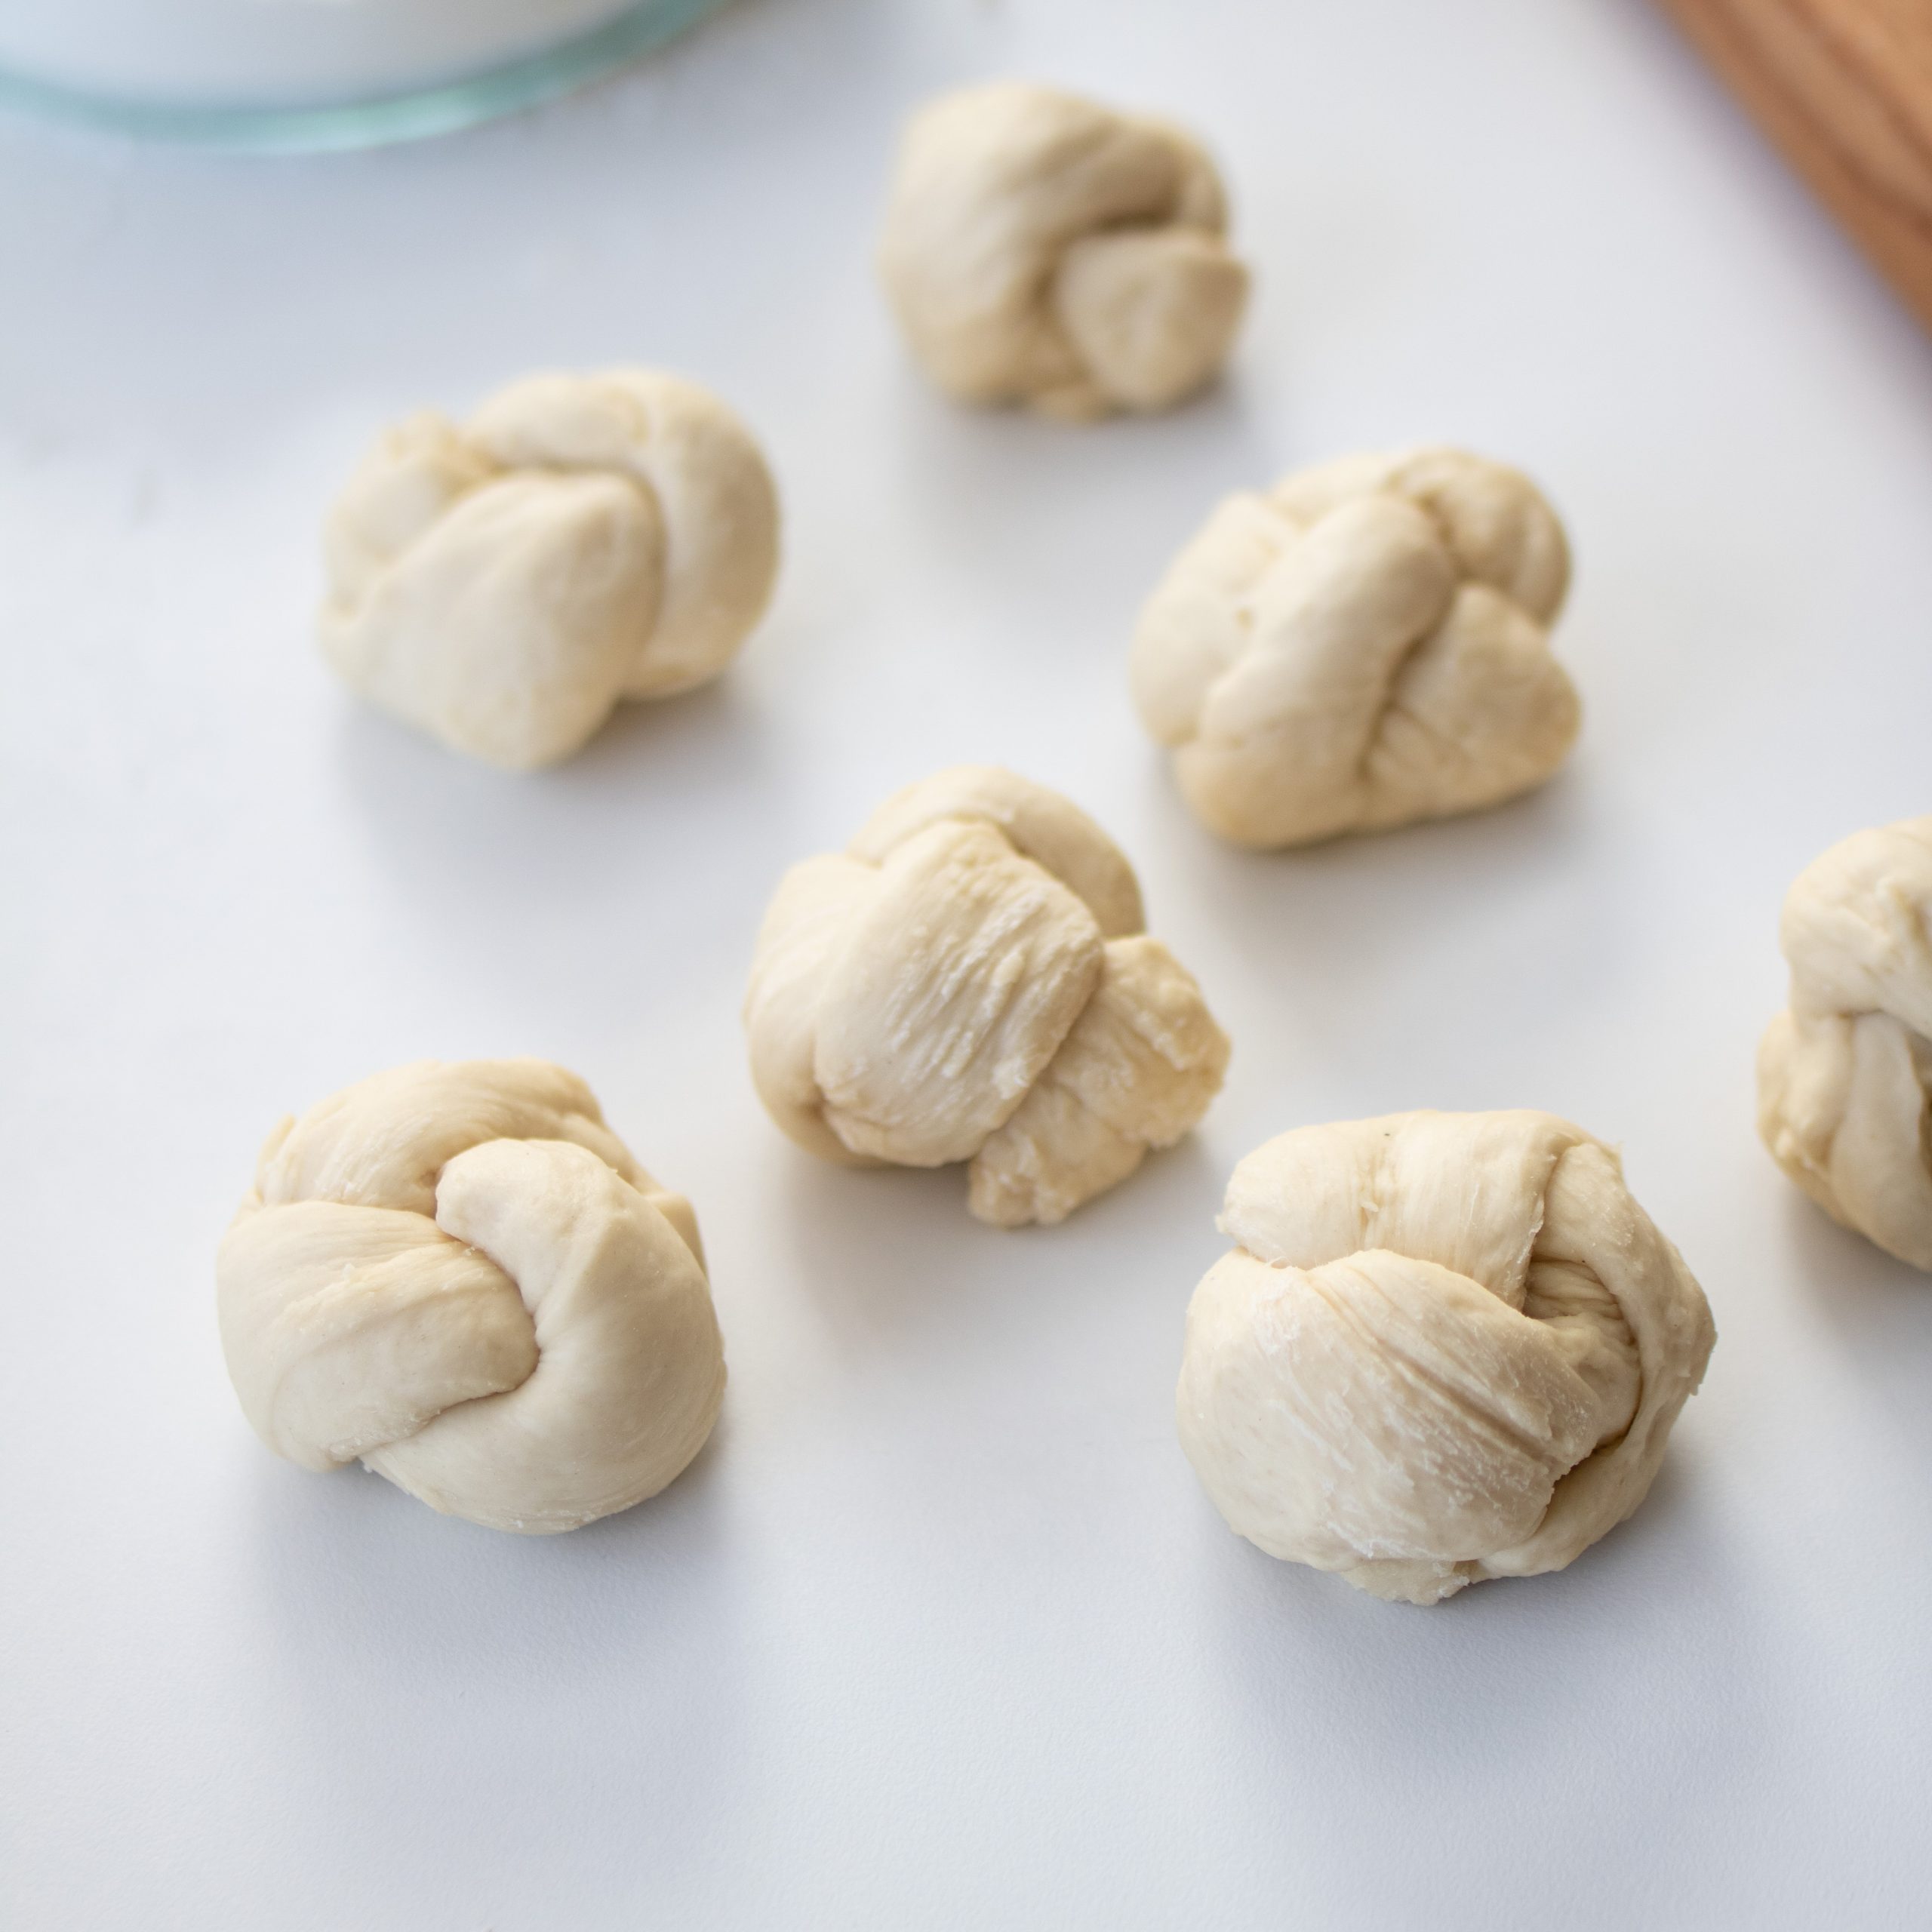
4. KNOTS
Step by step pictures on how to form knots are on this recipe page.
5. CLOVER
If you can make a knot, you can make a clover! You simply make a knot, then connect the two tails together, and tuck it on the bottom of the roll. You end up with a fun clover look as pictured below.
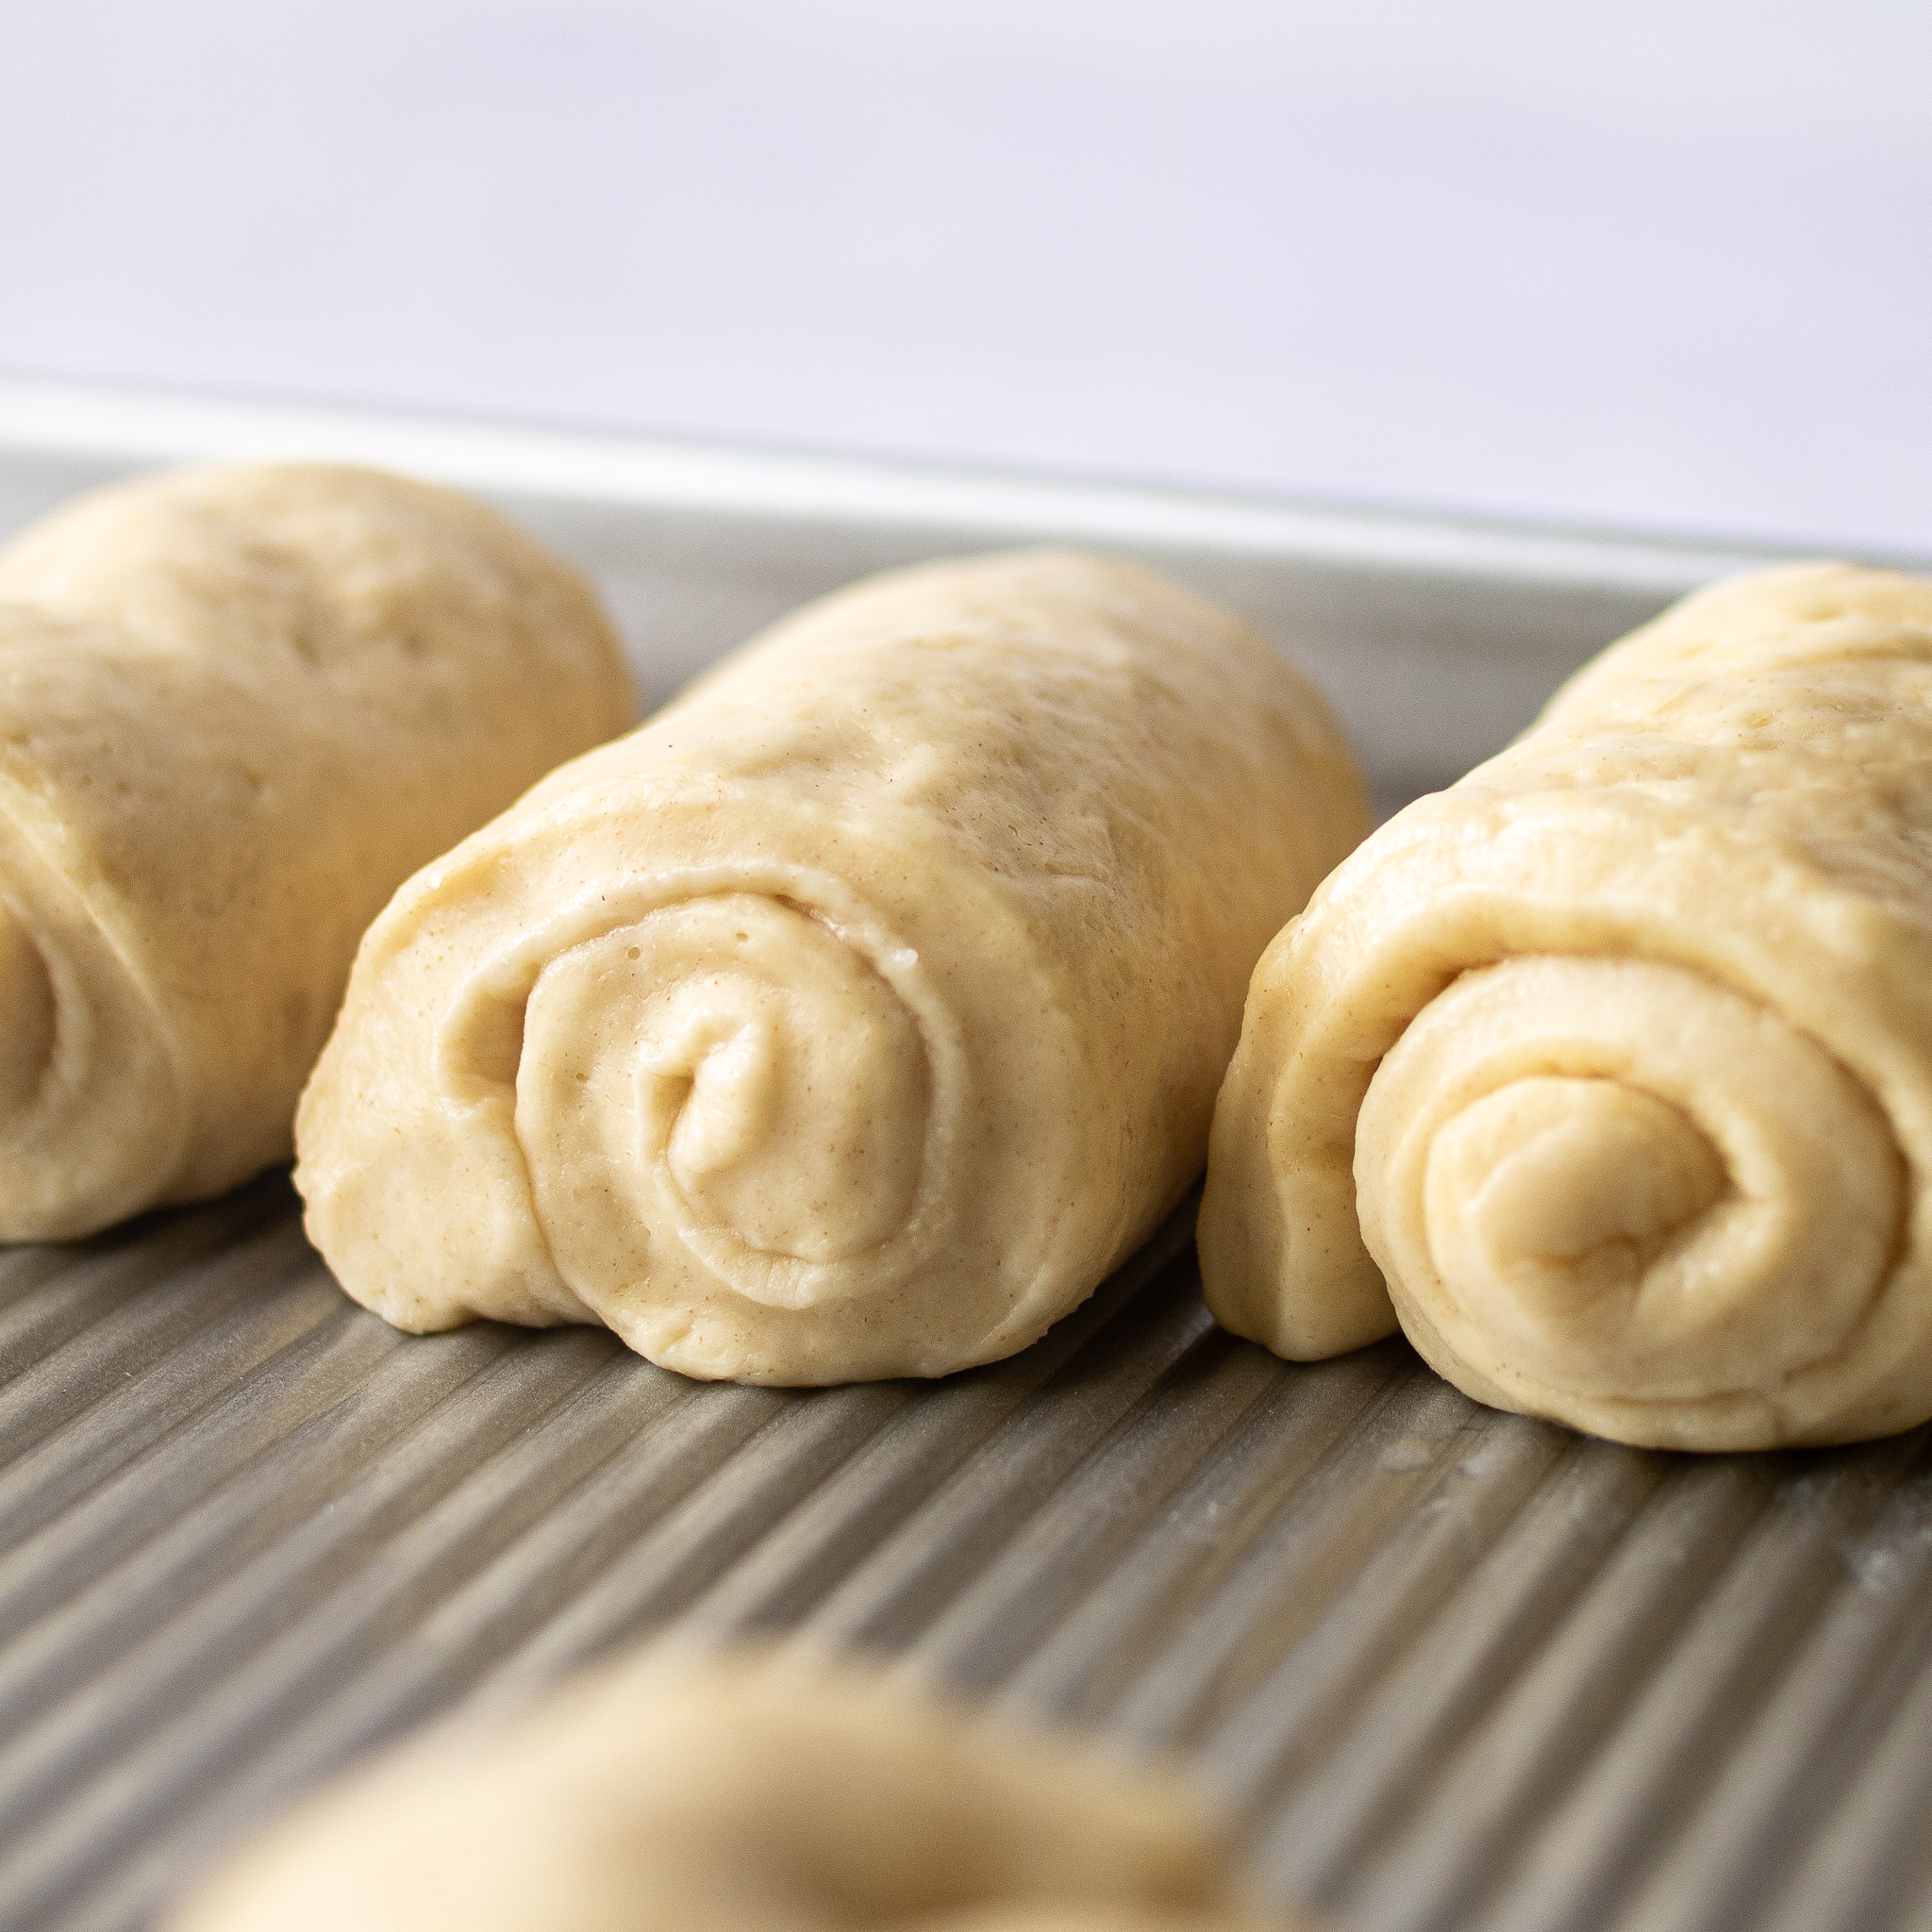
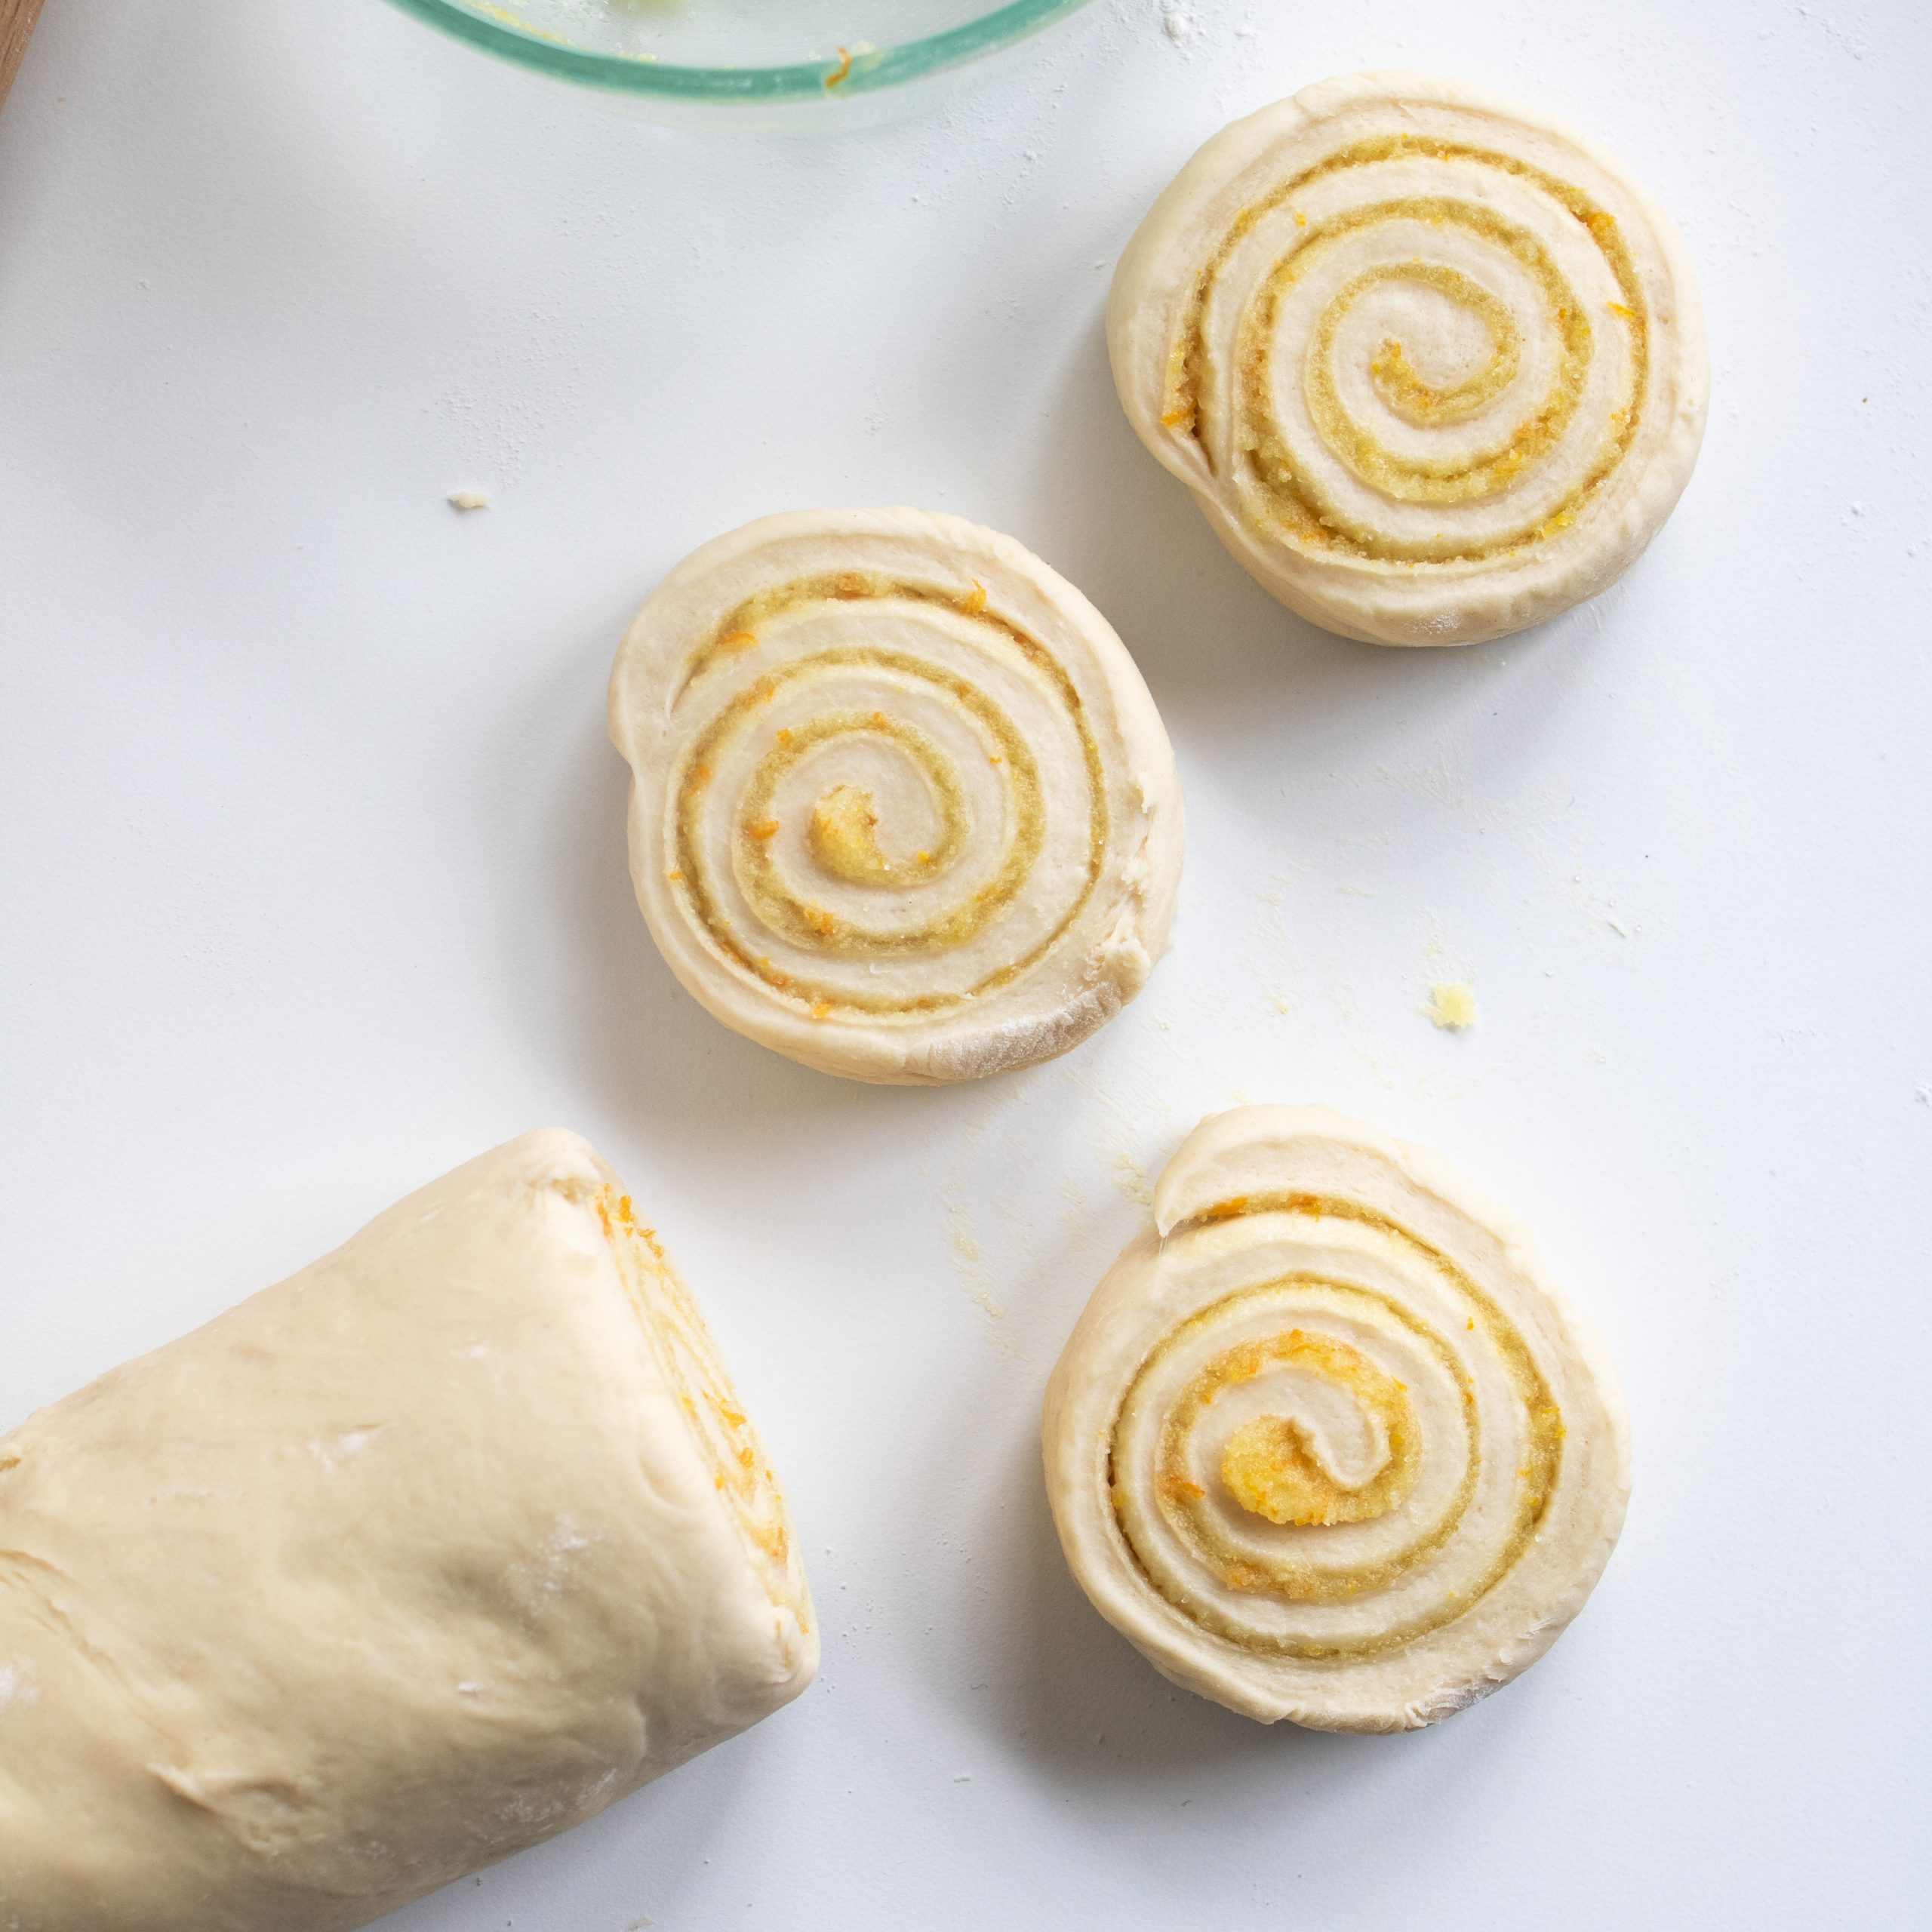
6. SWIRL
You can form these sweet roll style too! Use a savory filling like the garlic butter listed in my garlic knots recipe. Or pick a favorite sweet roll filling to use instead. Double or half the batch to make half classic, and half with a swirled flavor! I roll this into a large rectangle about 1/4 inch thick, top with a filling, roll up into a log, and cut into 1″ swirls. I like using dental floss to do this!

How else can I use dinner roll dough?
There are various ways to form dinner rolls. Outside of the classic dinner roll, this same recipe makes amazing garlic knots and sweet rolls. One of my favorite ways to use this recipe is double the batch and make half as standard dinner rolls and half sweet rolls. Check out my favorite sweet roll recipes same amazing base dough with a sweet filling!
Garlic Knots
Classic Cinnamon Roll
Raspberry Sweet Rolls
Orange Sweet Rolls
Cranberry Orange Rolls
Chocolate Peanut Butter Sweet Rolls
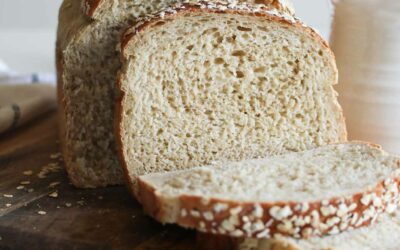
Dinner Rolls
Ingredients
- 2 cups warm whole milk (at about 110 degrees F) any other milk will work; fattier the better
- 1 ½ TB yeast
- ¼ cup honey or sugar
- 2 tsp salt
- ⅓ cup unsalted butter, softened
- 2 large eggs
- About 5 1/2 cups all purpose flour*
- + ¼ cup salted butter to brush on top after baking
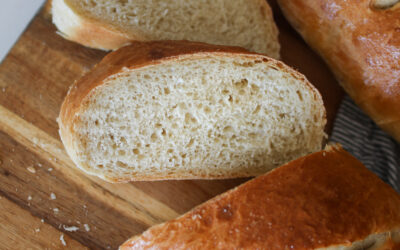
Instructions
- Using a stand mixer* with a dough hook, place the warm milk (think baby bath water warm), yeast, and honey/sugar together. If you are using standard dry yeast, wait about 5 minutes to ensure it's activating (yeast will begin to foam). If you're using instant, you can proceed to the next step.
- Turn the mixer on and add 3 cups of flour. Mix together. Add salt, softened butter and eggs. Continue to mix on low.
- Slowly add the additional 2 1/2 cups of flour. In pouring your last cup, do so slowly, watching the dough. When you've added enough flour, the dough will be soft and just slightly sticky. It will barely start pulling away from the bowl. Leave the mixer on for an additional 8-10 minutes to knead.
- Take your dough hook out, and cover the bowl to let the dough rest and rise for 45-60 minutes, or until doubled in size.
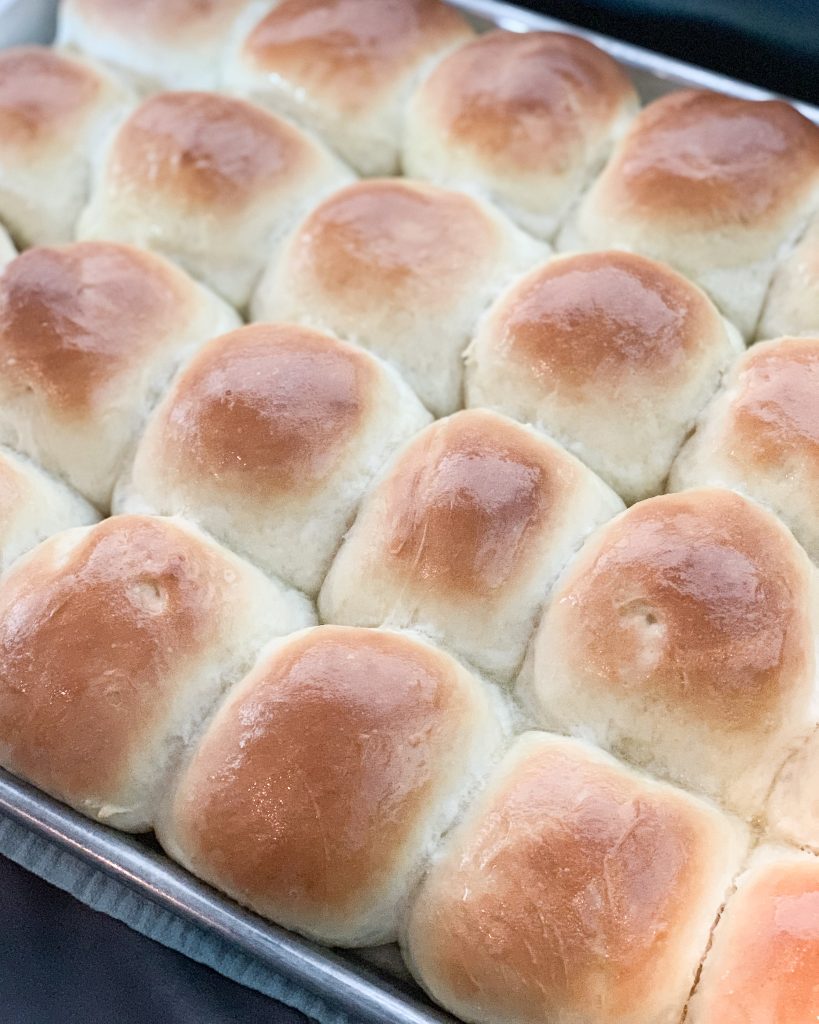
- Grease 2 baking sheets or line with parchment paper. When the dough has doubled, place it on a floured work surface. To form, gently pinch off pieces of dough, about the size of a small tangerine. Place the shaped dough on the baking sheet, and continue to shape the remaining dough, keeping the rolls about an inch apart (they'll rise and spread).
- When the rolls are shaped, cover with a sack cloth towel and place in a warm, draft free place for about 30 minutes, until dough has grown slightly and is soft. Preheat oven to 350° F.
- Bake for 16-20 minutes. If the tops begin to brown too quickly mid-bake, place a piece of aluminum foil over top to slow down the browning.
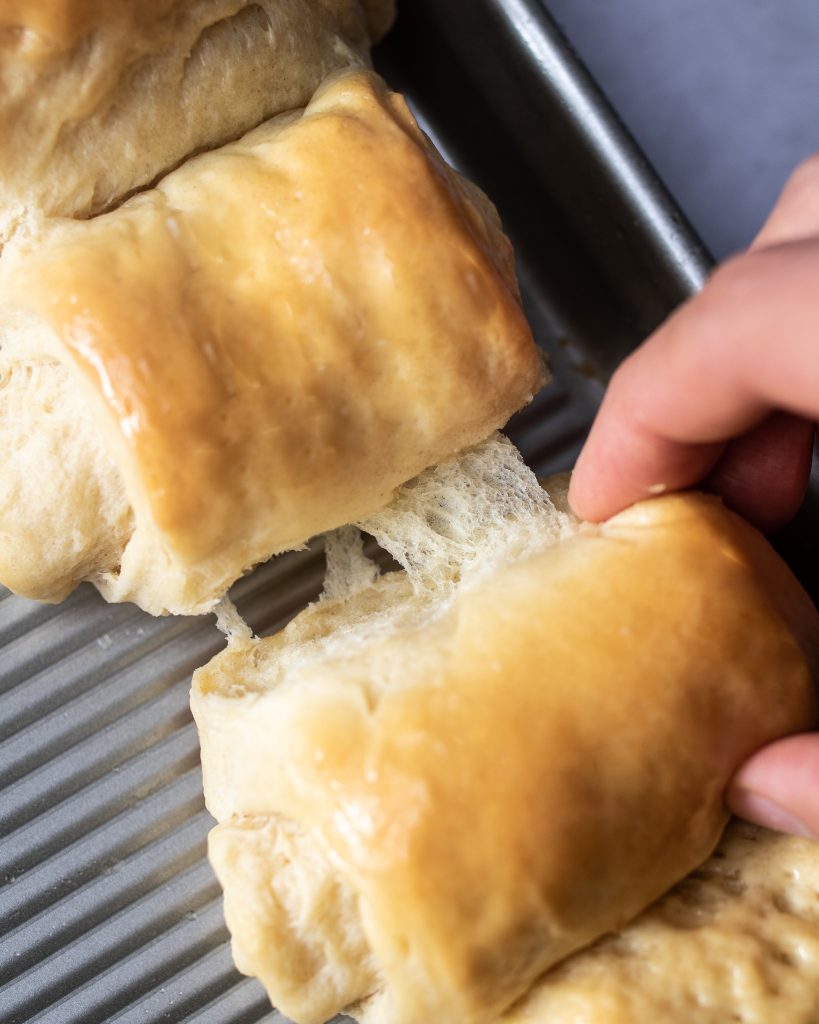
- The rolls will be done when the bottoms are lightly golden brown. Take out of the oven and brush with butter while warm.
Made these yesterday and they were absolutely delicious!!
Thank you so much for taking the time to share Rosy! Glad they were a hit!
These were literally PERFECTION! I followed the recipe exactly; no needing to add more or less flour. They rose perfect, shaped perfect, baked perfect, and TASTED PERFECT. So glad that I found these just in time for Thanksgiving! You are the best, Lori!!
I’m so glad these were a hit for you Lindsey! Thanks for trying the recipe and taking the time to share! Happy baking!
I love these rolls! Now that I’ve found the recipe they’re the only rolls i make. The instructions are super clear and easy to follow. And most importantly, they’re delicious!
So glad you loved these! Thanks for taking the time to share!
I’ve tried a handful of dinner roll recipes over the years. Every time, they just don’t work out! Dry/flat/not fluffy. I tried this recipe on Sunday and they were PERFECT. I’m so proud of them ???? the best recipe with such great info in the IGTV for shaping. Bonus I used priceless info from the virtual donut class to know when I added enough flour! THANK YOU, LORI!!
These are my Go To dinner rolls every time. They always turn out perfect and have never failed me. Such an easy recipe to follow.
I love the ease of this recipe and they turned out so delicious!
We made these rolls for Thanksgiving dinner. My family loved them! I should have doubled the recipe. They turned out perfect. Thanks for sharing your recipe.
Thank you for sharing Lois! So glad you loved them. They are a staple around here. My family always says “make sure you double it!” haha! So I know what you mean!
I’ve never made dinner rolls before handmade. I practiced once a week before Thanksgiving (which turned out amazing for my first time) and then made 72 rolls Thanksgiving morning. Everyone raved about them. You would have thought I had been making rolls for years they tasted so good! I watched Lo’s instagram stories to get a better idea on how to form them which was so helpful! We will definitely be making these rolls for years to come. So so good and totally fool proof.
Thank you for sharing Megan! Wow! You’re amazing! Good for you for making that many rolls. Sounds like you were the Thanksgiving hero haha! Keep baking!
I made these rolls in Thanksgiving and everyone went crazy for them! Highly recommend. I did the delayed rise by forming them the night before so all i had to do was take out the pan a few hours ahead of time and bake!
So glad these were a hit for you! I love the fridge delay rise! Great choice! Happy baking!
Made these today for Easter and they turned out amazing! So soft and fluffy! Definitely will make these again!
Is it possible to omit the eggs or replace them ?
Hello! Yes, you can omit the eggs. It will turn out a little more bready and not as tender, but still delicious. The eggs help enrich the flavor and texture. My sandwich bread recipe does not have eggs and we use it as breadsticks often, so it’ll still be good!
Can the recipe be halved To just 1 dozen?
For a dairy free version of recipe can I use coconut milk and smart balance butter?
Okay, I have always had a really hard time with rolls. Loaves of bread are easy, but the second it’s rolls I overthink and they turn out like rocks (now I know I was confusing sticky and tacky). I was determined to make good rolls for Easter dinner and I followed this recipe and watched the videos to know just what things should look like and my rolls turned out perfect finally!! We had the missionaries over and they each ate like 6! I am so grateful for these resources helping me feel confident enough to try again and succeed!!
Thanks for the recipe I’ll be making them for Mother’s Day and I’m an 81 year old Mother Grandmother and Gr Grandmother They sound delicious and I’ve been baking for many years
Enjoy them!! What a wonderful idea. Happy Mother’s Day!