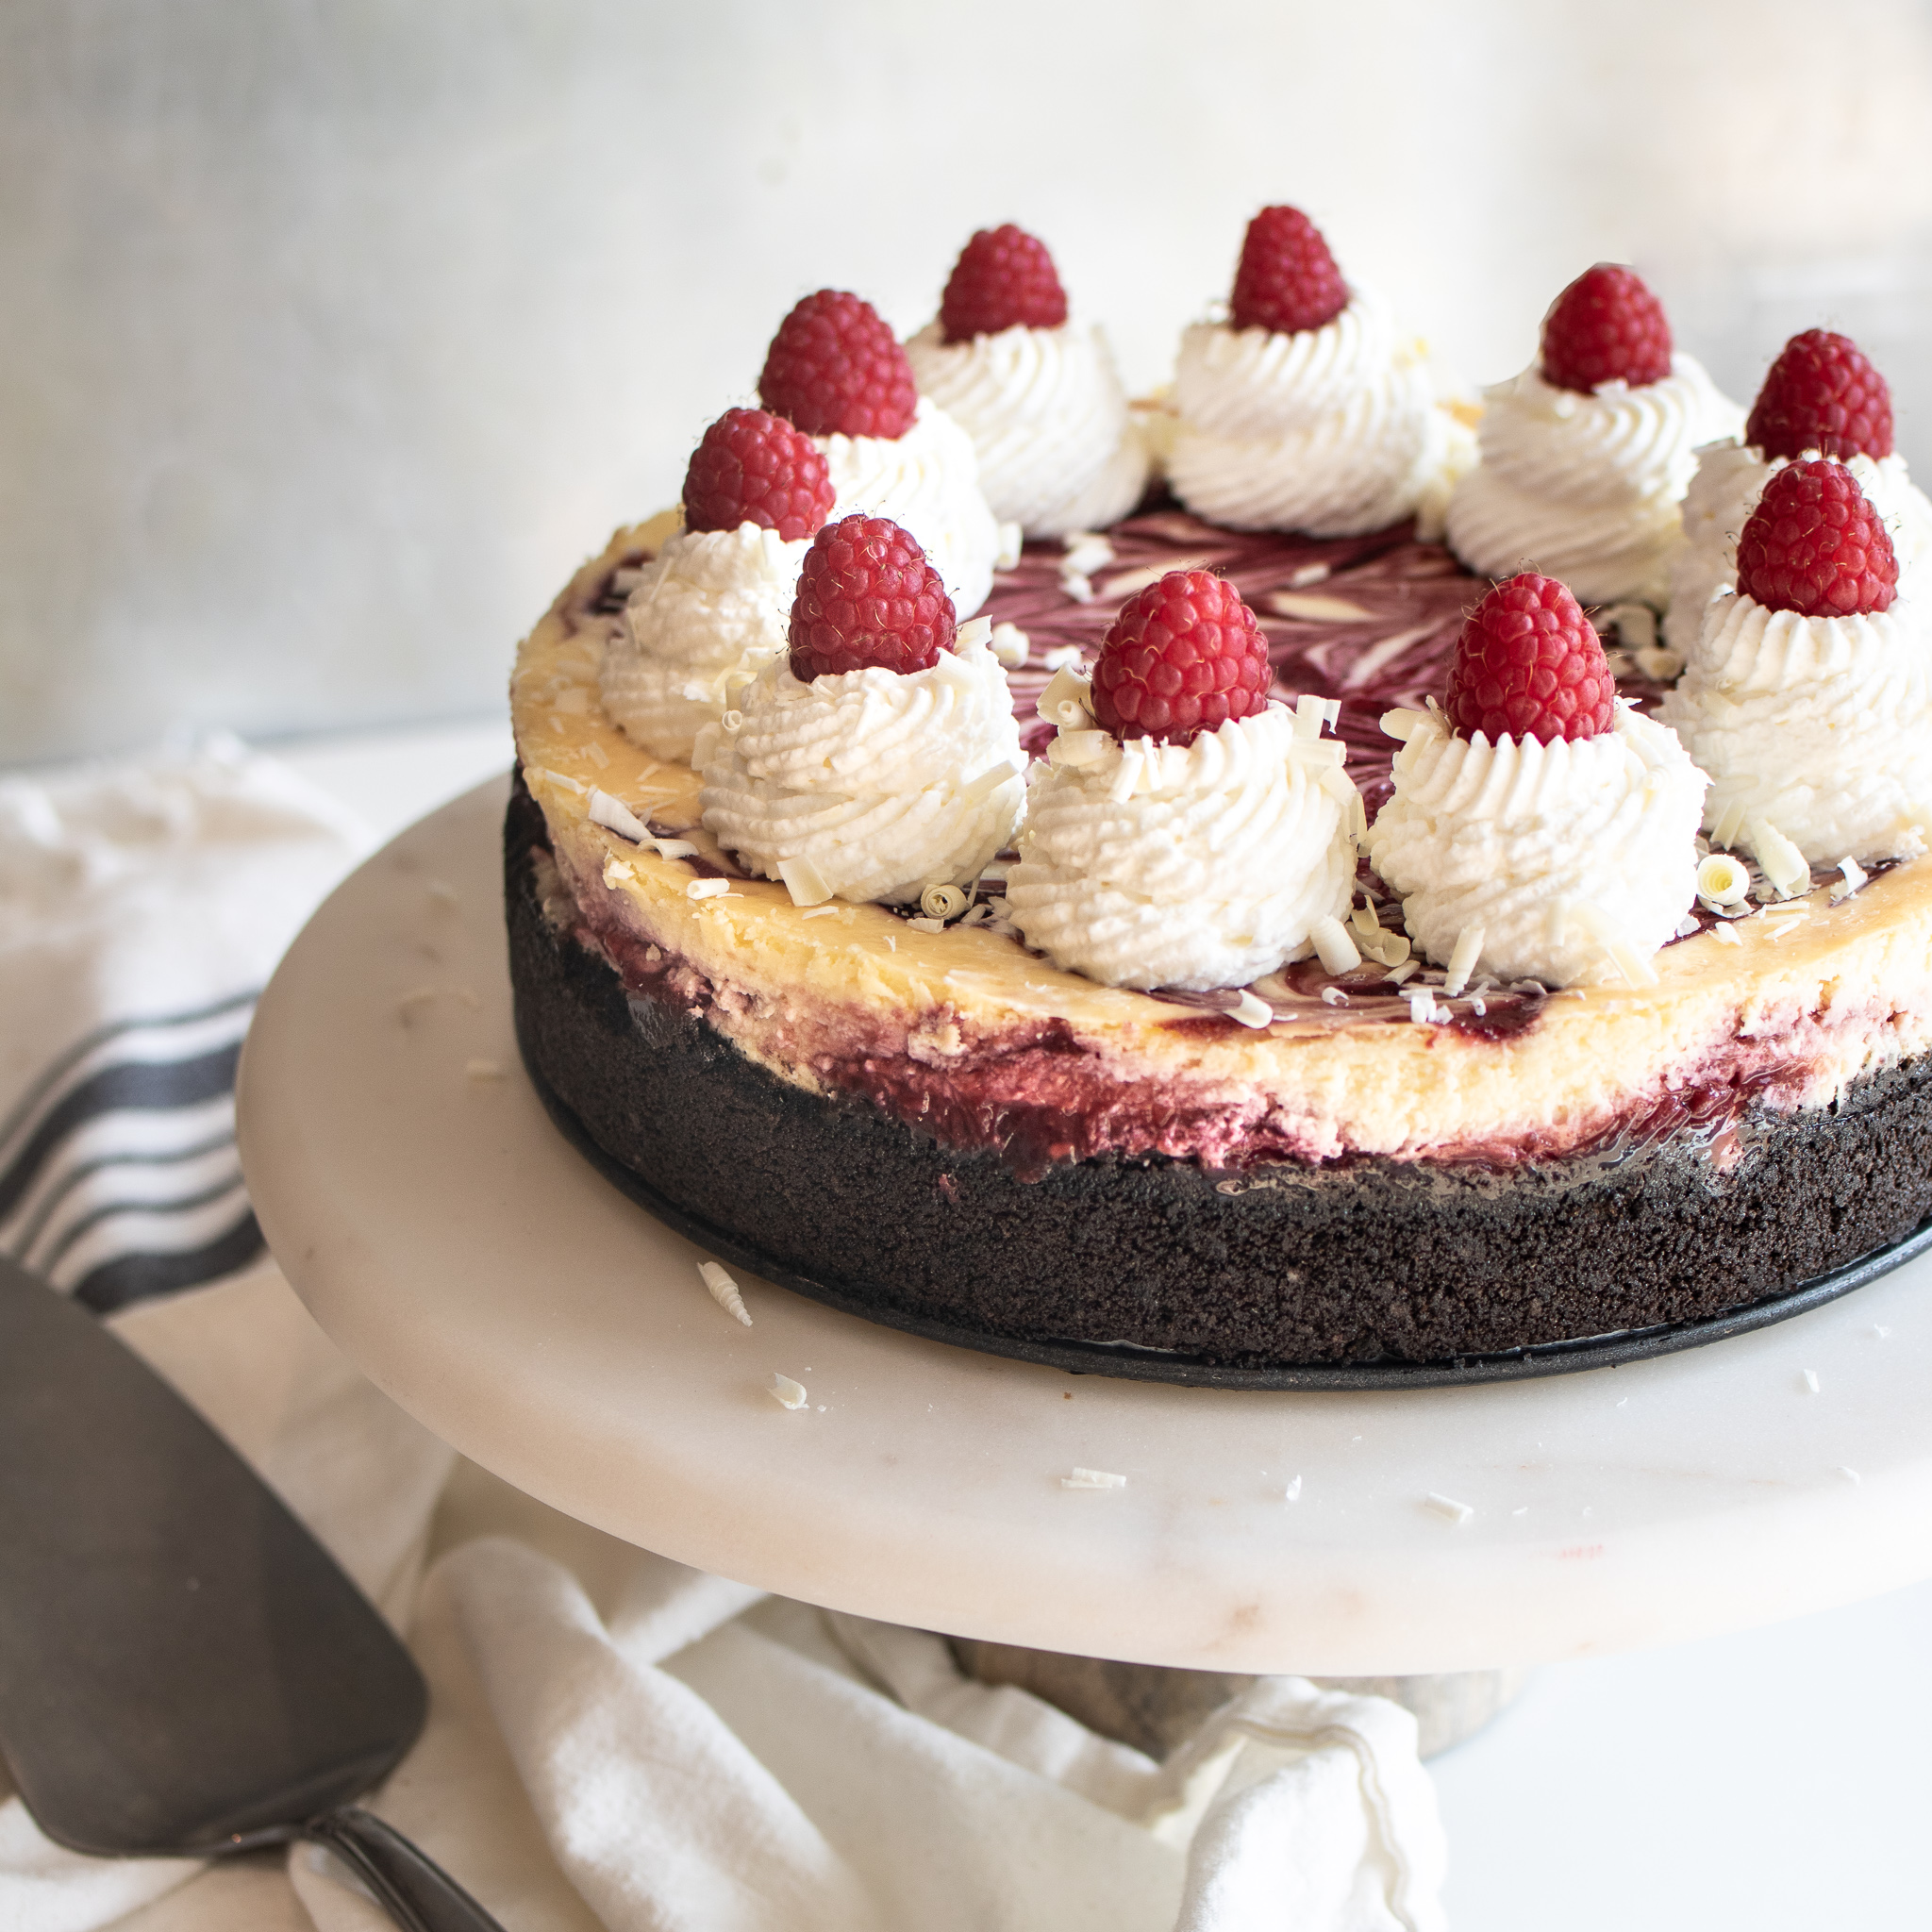
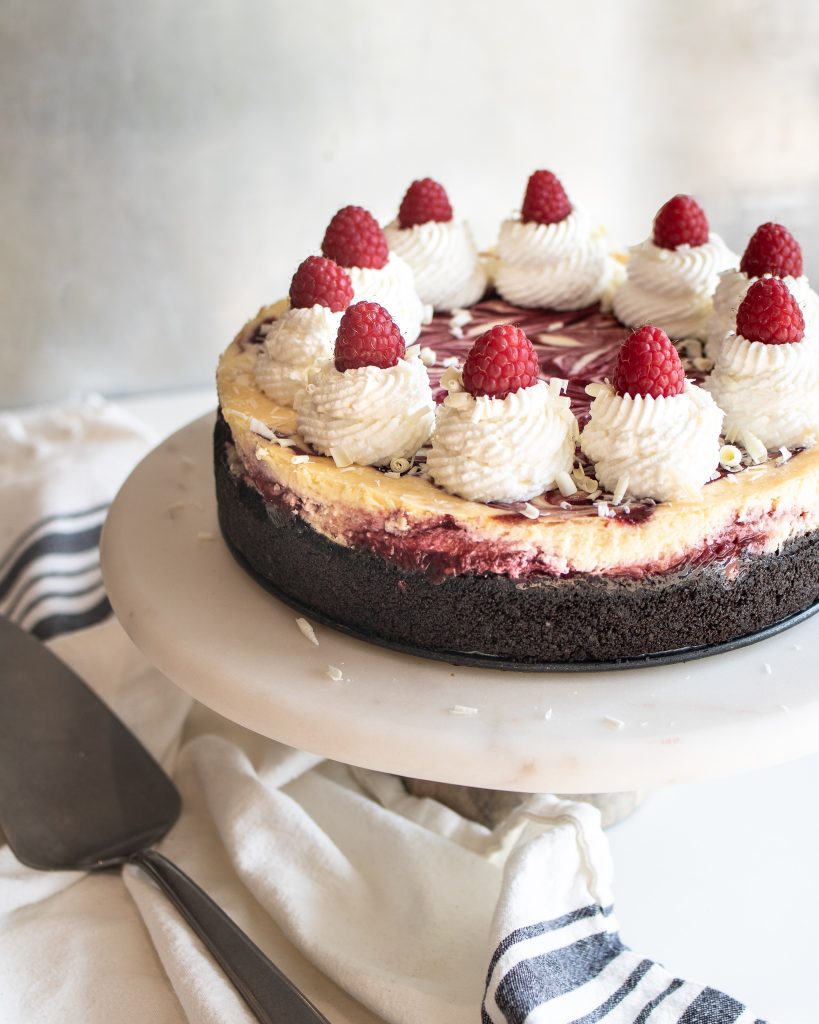
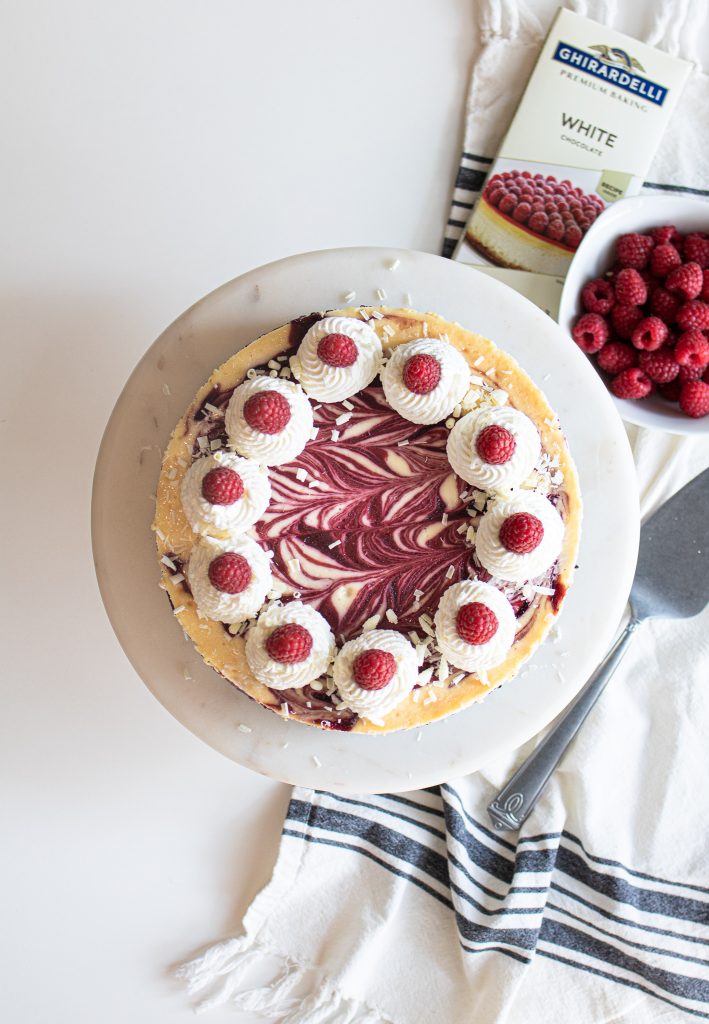
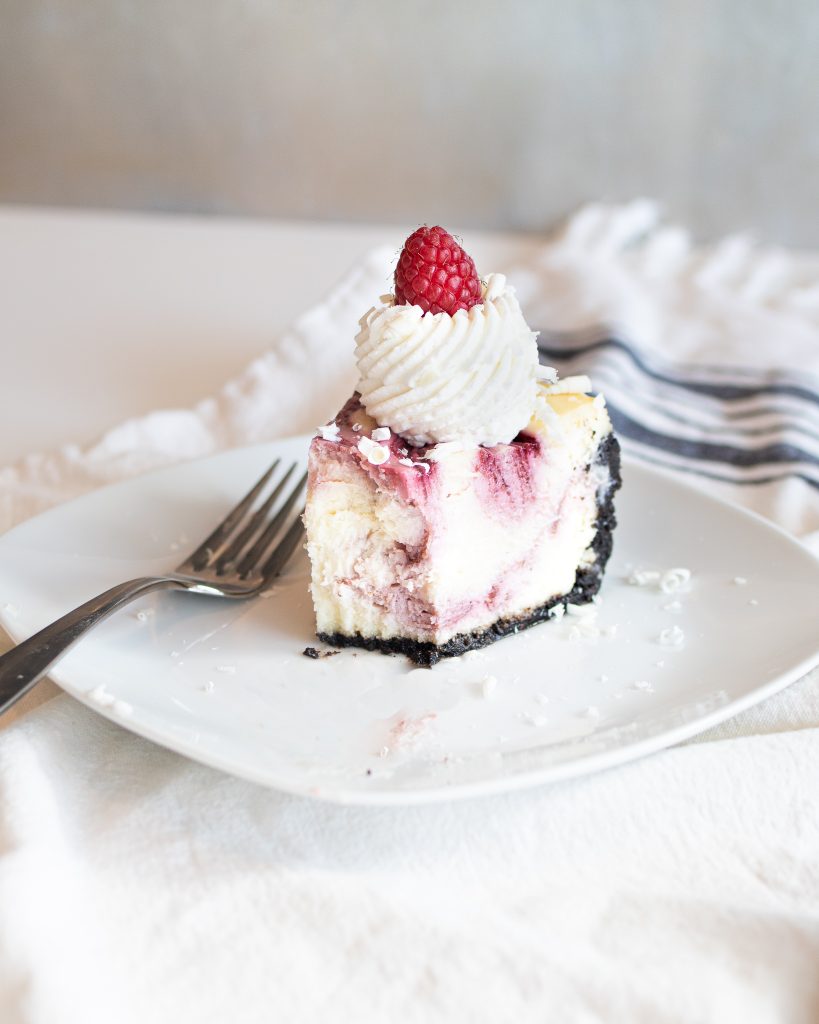
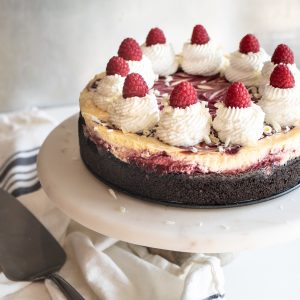
Creamy, melt in your mouth white chocolate cheesecake swirled with raspberry puree. Inspired from Cheesecake Factory’s White Chocolate Raspberry Truffle Cheesecake.
Tips to create amazing cheesecake
Making cheesecake may seem daunting, but with this recipe and a few simple tips, I promise you’ll be on the easy road to success! Elements for a perfect cheesecake:
Springform pan: Springform pans create a nice even bake and releases perfectly from the edges of the cheesecake.
Room temperature ingredients: Cheesecake batter mixes up SO much better when all of the ingredients are added at room temperature. If you’ve forgotten to set it out on the counter beforehand and are in a rush, you can put your eggs in a bowl of warm water and cream cheese in the microwave to speed up the process.
Not over mixing: Once you’ve added the eggs to the cheesecake mixture, the key is to NOT over mix to prevent any air bubbles from getting into the cheesecake.
Water bath: A water bath isn’t necessary, but it will almost guarantee that you won’t get any cracks in your cheesecake. A large roasting pan makes a great water bath. You wrap the bottom of the cheesecake in a thick layer of aluminum foil, stick it in the roasting pan, and have the water line come about 1/3 – 1/2 way up the pan. Allows for a nice slow, even bake that prevents cheesecake from cracking.
If you’re making a cheesecake with an additional layer on top that will cover any cracks, like my Cheesecake Factory Oreo Cheesecake or Biscoff Cheesecake, then it’s not crucial. Even with this cheesecake, you can help disguise any cracks with white chocolate shavings or whipped cream. Cracks don’t effect the taste – so even if they happen, don’t stress – you’ll still have amazing tasting cheesecake!
Long cooling time: Another factor that can help prevent a cheesecake from cracking is avoiding any sudden changes in temperature. When the cheesecake is done baking, I turn off the oven and keep the oven door CLOSED or just slightly CRACKED. I let it sit in there for a couple hours before transferring it to the fridge.
Assembling the Cheesecake
This cheesecake is easy to put together. All you do is just layer in the raspberry sauce, give it a little swirl, and bake!
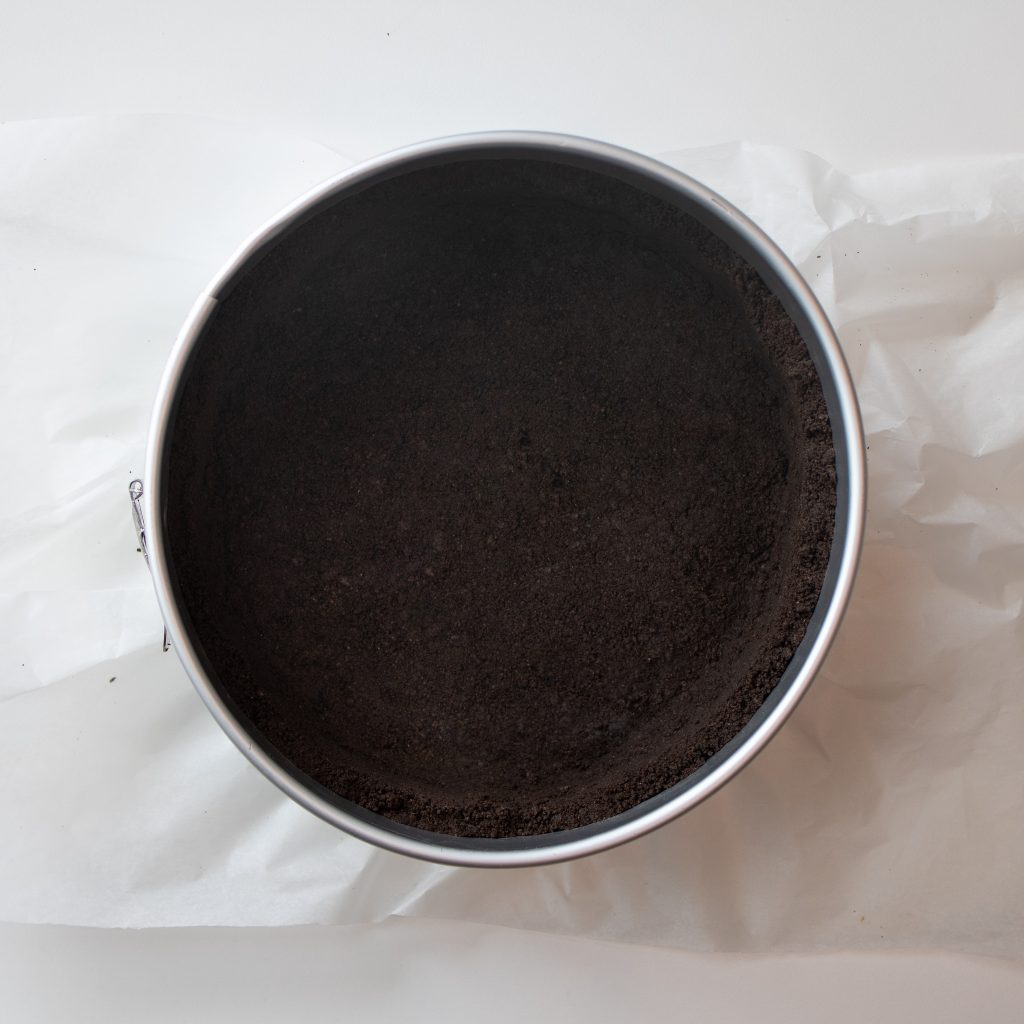
1. Bake Oreo crust.
2. Place half of the cheesecake in the crust. Pour in about 1/2 cup raspberry puree.
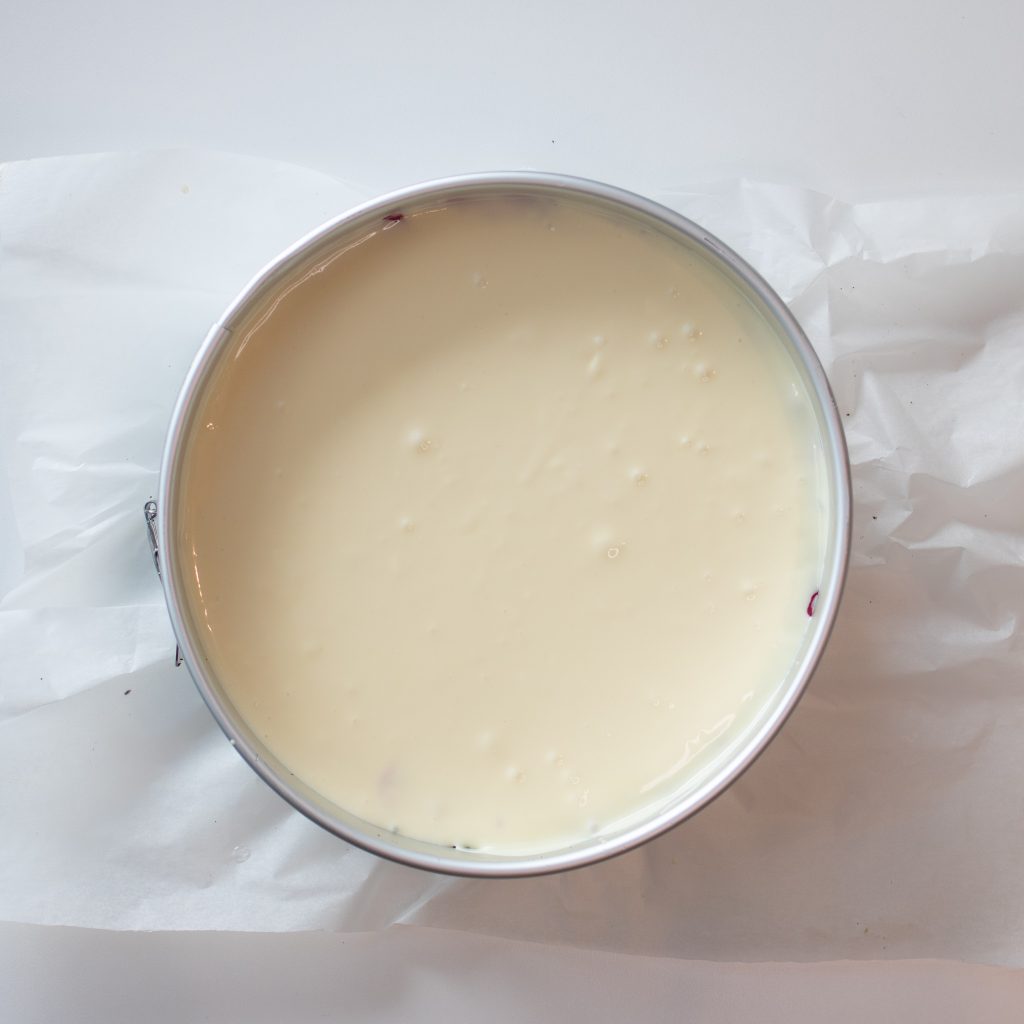
3. Pour remaining cheesecake batter on top.
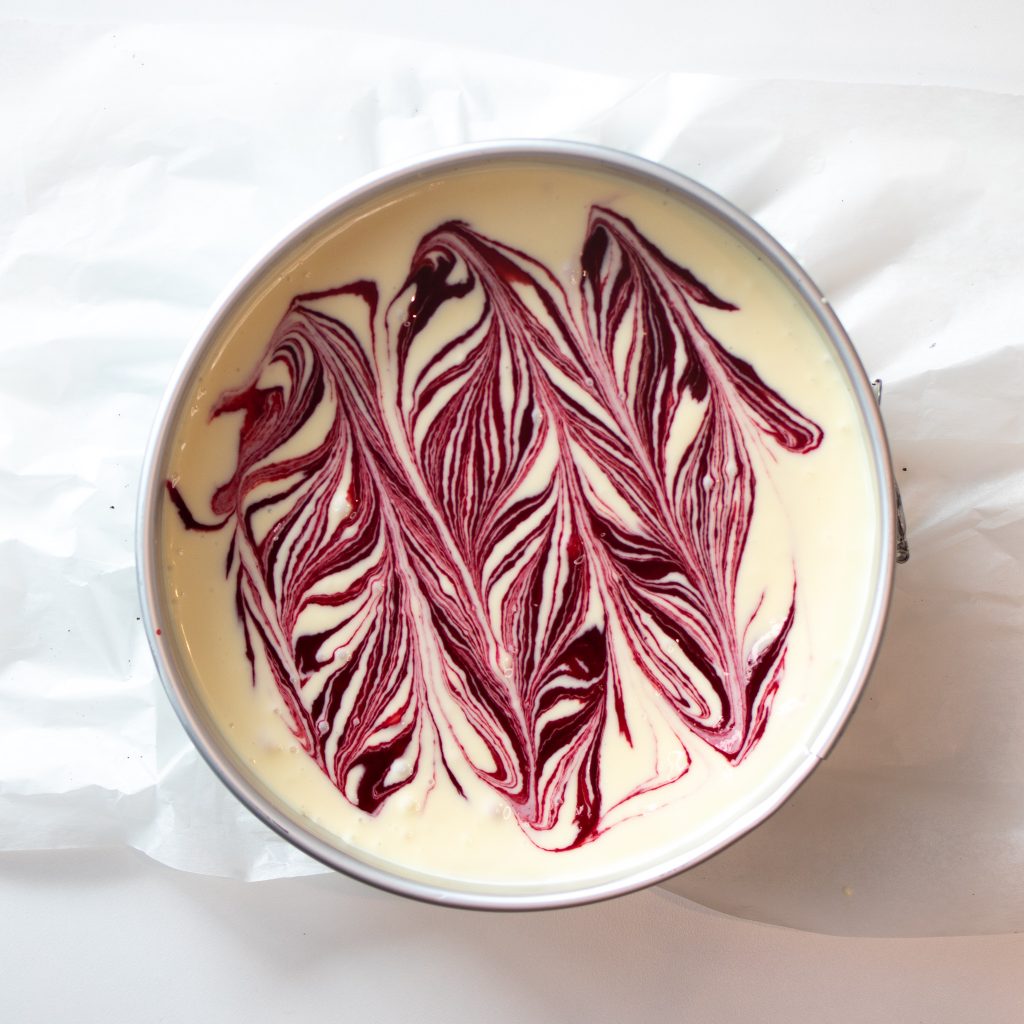
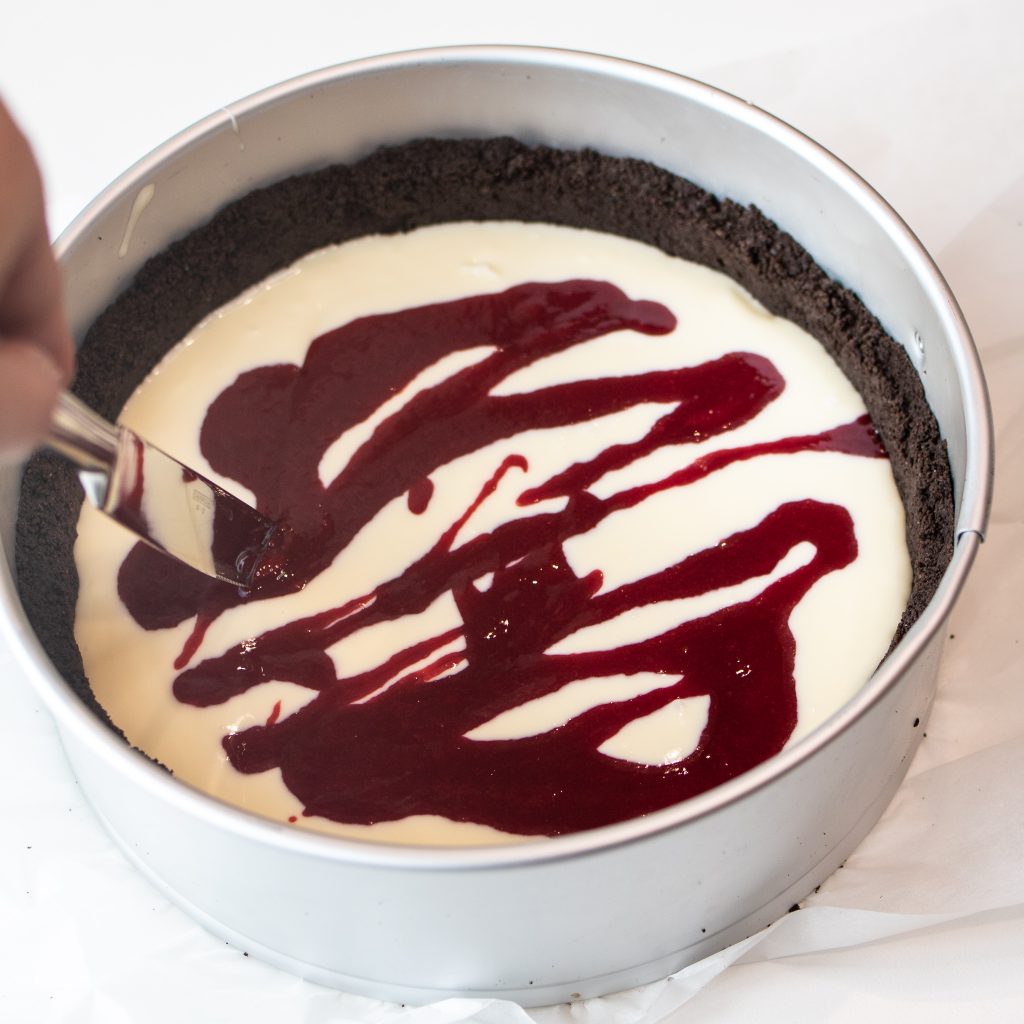
4. Place about another 1/2 cup of raspberry dollops on top. Swirl using a butter knife.
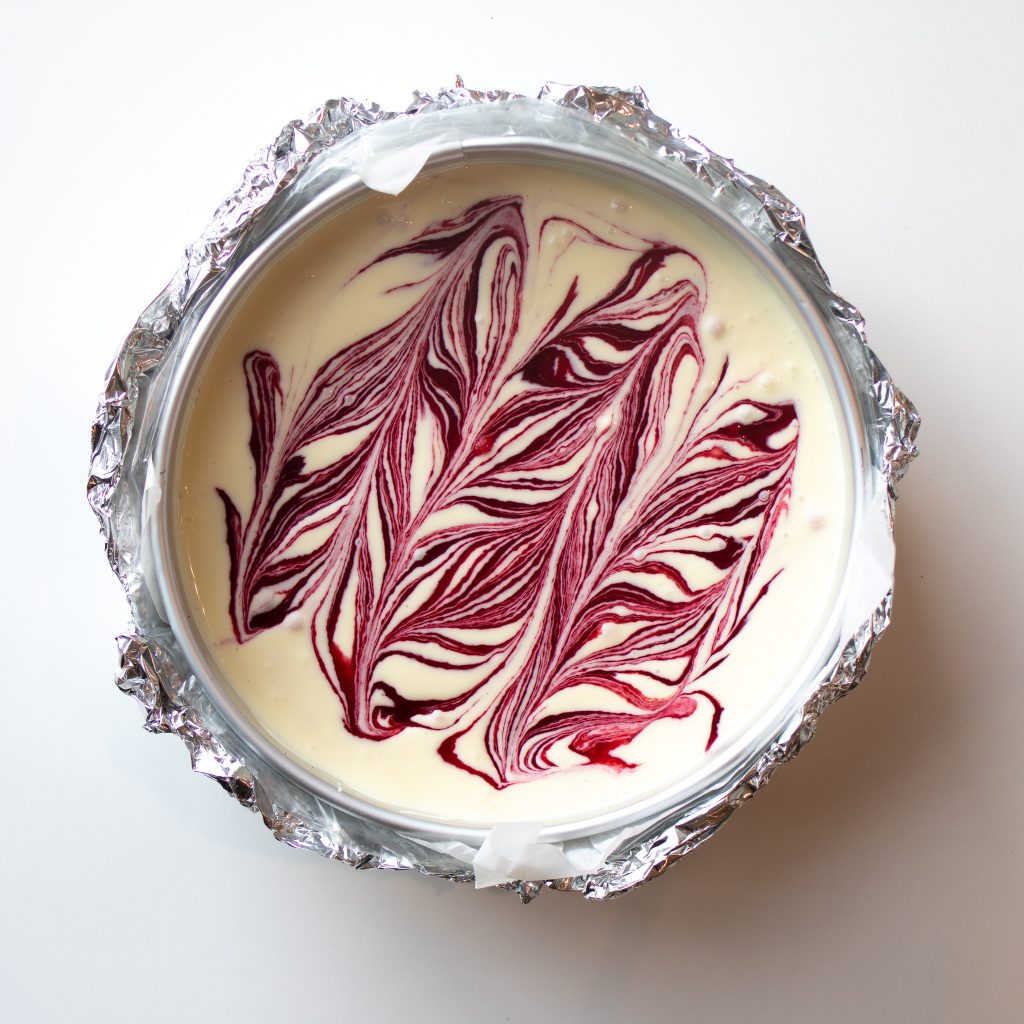
5. Wrap in heavy duty aluminum foil.

6. Place in large pan with water reaching about half way up the springform pan. Bake!

White Chocolate Raspberry Truffle Cheesecake (CF Copycat)
Ingredients
Oreo Crust (*see note)
- 28 Oreo cookies
- ¼ cup butter, melted (salted or unsalted is fine)
Raspberry Puree (*see note)
- 10 oz frozen raspberries
- ½ cup water
- ⅓ cup sugar (+ more to taste. I prefer mine slightly tart)
- 1 tbsp corn starch
- 1 tsp lemon juice
Cheesecake
- 1 cup granulated sugar
- 32 oz cream cheese (4 packages), room temperature
- 2 tbsp corn starch
- 2 tsp vanilla extract
- 8 oz high quality white chocolate bar
- ½ cup heavy cream
- ½ cup sour cream, room temperature
- 4 large eggs, room temperature
- 1 cup raspberry puree
Whipped Cream
- 1 cup heavy whipping cream
- ⅓ cup powdered sugar
- ½ tsp vanilla extract
- 1 package, or 2 tsp, whipped cream stabilizer* optional
Instructions
Oreo Crust
- Preheat oven to 325° F.
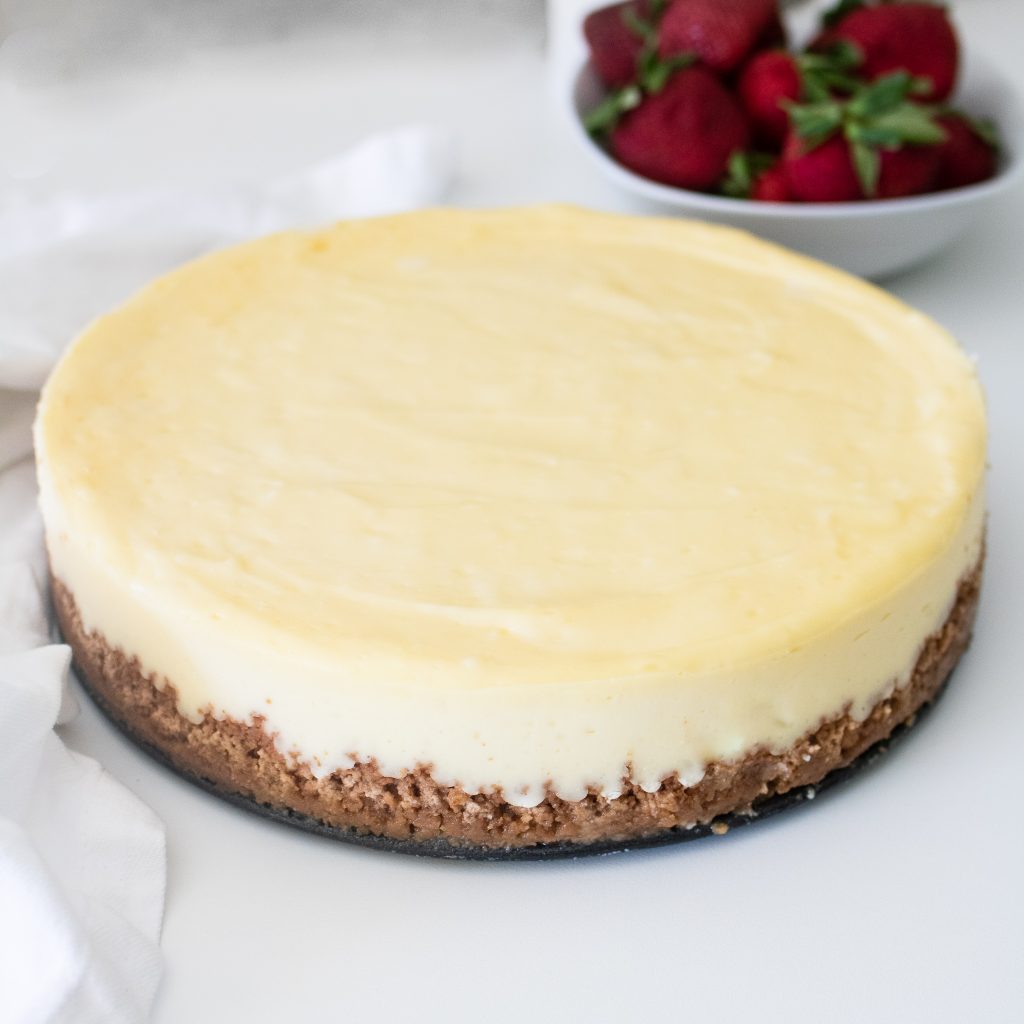
- In a food processor (or using a ziplock bag and rolling pin) blend or crush the Oreos into fine crumbs. Add the melted butter and mix until evenly combined. Press the crust into a 9" springform pan, working the crumbs about half way up the side. (Pressing the crust in using a measuring cup is really handy!) See notes for other chocolate crust ideas.
- Bake for 10 minutes. Remove from oven and set aside to cool.
Raspberry Puree
- In a pot over medium heat on the stove, combine all of the puree ingredients. As it begins to heat up, stir often and assist the raspberries in smashing down to a puree form. Add more sugar to your liking.
- Stir as it gently simmers for about 10 minutes until the mixture has thickened.
- Immediately pour it through a fine mesh strainer with a bowl underneath. Stir the puree in the strainer to help push the liquid through. Do so until mostly seeds remain. Store puree in refrigerator until ready to use. You can discard the seeds. Puree lasts for 2+ weeks in the fridge. (You can omit this step if you don't mind having seeds in your sauce, but I personally prefer the texture better without them!)
Cheesecake
- PREP: Make sure your crust and puree are prepared. Optional water bath: Wrap your springform pan in heavy duty aluminum foil. You can also double wrap it by layering a plastic crockpot liner bag. We do this to prevent any water from coming into the pan as it cooks in a water bath. Set aside. Pull out a roasting pan or large baking dish - something large enough for the cheesecake pan to sit in. (This water bath is optional, but helps prevent the cheesecake from cracking.)
- Gather the cold ingredients and bring to room temperature. Preheat oven to 325° F.
- MIXING: Combine white chocolate and heavy cream together, melt in the microwave, and stir until smooth. Set aside to cool.
- Using a stand mixer or large bowl and hand mixer, mix together the softened cream cheese and sugar until smooth and light, about 1 minute. Add corn starch and vanilla and mix again until combined.
- Slowly add the cooled white chocolate, then add the sour cream. Add the eggs one at a time and mix until just combined. You do not want to over mix the cheesecake once the eggs are added.
- Pour about half of the cheesecake batter into the springform pan with prepared crust. Add dollops of about half of the raspberry puree or jam on top. Add remaining batter over the top, then add dollops of the remaining puree on top of that.
- Take a butter knife and in one motion create vertical swirls going back and forth across the whole cheesecake. Then move your knife the opposite direction horizontally and create additional vertical swirls. See pictures above.
- BAKING: Place the wrapped springform pan in a roasting pan or similar pan for a water bath. Pour water in the pan, being careful not to splash any in your cheesecake. The water level should be about 1/3 of the way up the pan. Bake for about 90 minutes until the edges of the cheesecake are set and the center is just slightly jiggly. Turn off the oven and crack the oven door to allow the cheesecake to cool slowly for a couple hours. (This slow cool process also helps prevent cracking!) Then remove and chill in the fridge for at least 4 hours.
- Feel free to garnish with whipped cream, white chocolate shavings, and/or fresh raspberries. You can also serve slices with leftover raspberry puree. See notes below for storing and making ahead tips.
Whipped Cream
- To make fresh whipped cream, combine all of the ingredients into a large mixing bowl and beat together for about 5 minutes, until stiff peaks form. Tip: Put your beaters and bowl in the freezer prior to mixing to get it really cold. It helps the whip cream form stiff peaks nicely.
Notes

DID YOU MAKE THIS RECIPE?
Tag @loskitchenco on Instagram and
hashtag it #loskitchenco
You may also like…

CHEESECAKE FACTORY OREO DREAM EXTREME CHEESECAKE

BISCOFF COOKIE BUTTER CHEESECAKE
BEST CLASSIC CHEESECAKE

A maz ing!! Made this for my nieces birthday and it was a HUGE hit! Not a crumb left.
I am trying this for a second time, the first time ended badly. The water made it into the pan somehow, and it overflowed badly. What size springform pan are you using?
Hi Heather, I use a 9″ springform pan. This is the one I have: https://amzn.to/3vu2mw3. You can also half the recipe if you want to use your current pan. If the water overflowed over the top, just add less water in your pan – about 1/3 of the way up the pan. And if it came in from the bottom, I recommend using heavy duty aluminum foil or a crockpot bag to seal it. Let me know how it goes on round 2 and if you have any other questions!
I just baked this recipe for Thanksgiving. I have been making cheesecakes for about 10 years, and have never had a recipe so disappointing. There is too much filling for a ,nine inch springform pan, and 90 min is way too long! The entire too of my cheesecake browned and the whole cheesecake was still pretty much liquid. I temped it and it was over 155 so I turned off my oven and let it cool inside for an hour. The entire top is cracked and I’m hoping it will st in fridge by tomorrow. I followed the recipe to the letter but it was a disaster. Will make again but reduce it by 1/4 so I don’t have to find a use for all the filling I couldn’t get into my pan. Also, I will reduce time to 60 min and temp. Hope this helps someone that is making for the first time.
Leah, I am so sorry to hear this didn’t go as expected for you and I appreciate you taking the time to share feedback. Did you place it in a water bath as encouraged in the recipe? If the cheesecake is in a water bath it won’t puff up and should stay flat and not crack. When I don’t use a water bath, the cheesecake expands and becomes too much for the pan as well, so a water bath gives it that ideal height. If you have extra next time, you can put them in muffin tins for mini cheesecakes, but reducing the recipe will also work great. This recipe has been tried and true for my family and I even made and sold it as a dessert in a restaurant for a time, so I totally stand behind the recipe, but feel terrible that yours didn’t turn out! I hope you try it again, and feel free to message me with any other questions or concerns. Let me know how the next one goes!
Need to explain the waterbath better. 1st time making a cheesecake. Total flop. Doubled the foil. Water still got in the bottom. No where does it say to use boiling hot water for the bath either. Found that on another site after I wasted time and money on this flop.
Hi Jim, I’m sorry to hear water still got in the bottom. Another solution to try is using a crockpot bag to help seal it in. I use regular hot tap water, not boiling. So while that other resource was not wrong, I hope it helps to know that that was not what messed up your cheesecake. Should you try it again, know that can still be an option for you. I never using boiling water and have success. Lots of approaches. This recipe has been tried and true for us for a long time, so if you decide to give it another shot, let me know if you have any other questions as you get going. Happy to help and look forward to hearing how your next one goes if you try it again. It’s been sold at a restaurant for some time and was rated better than Cheesecake Factory so it’s possible to make it a delicious success! Happy baking in all you do!