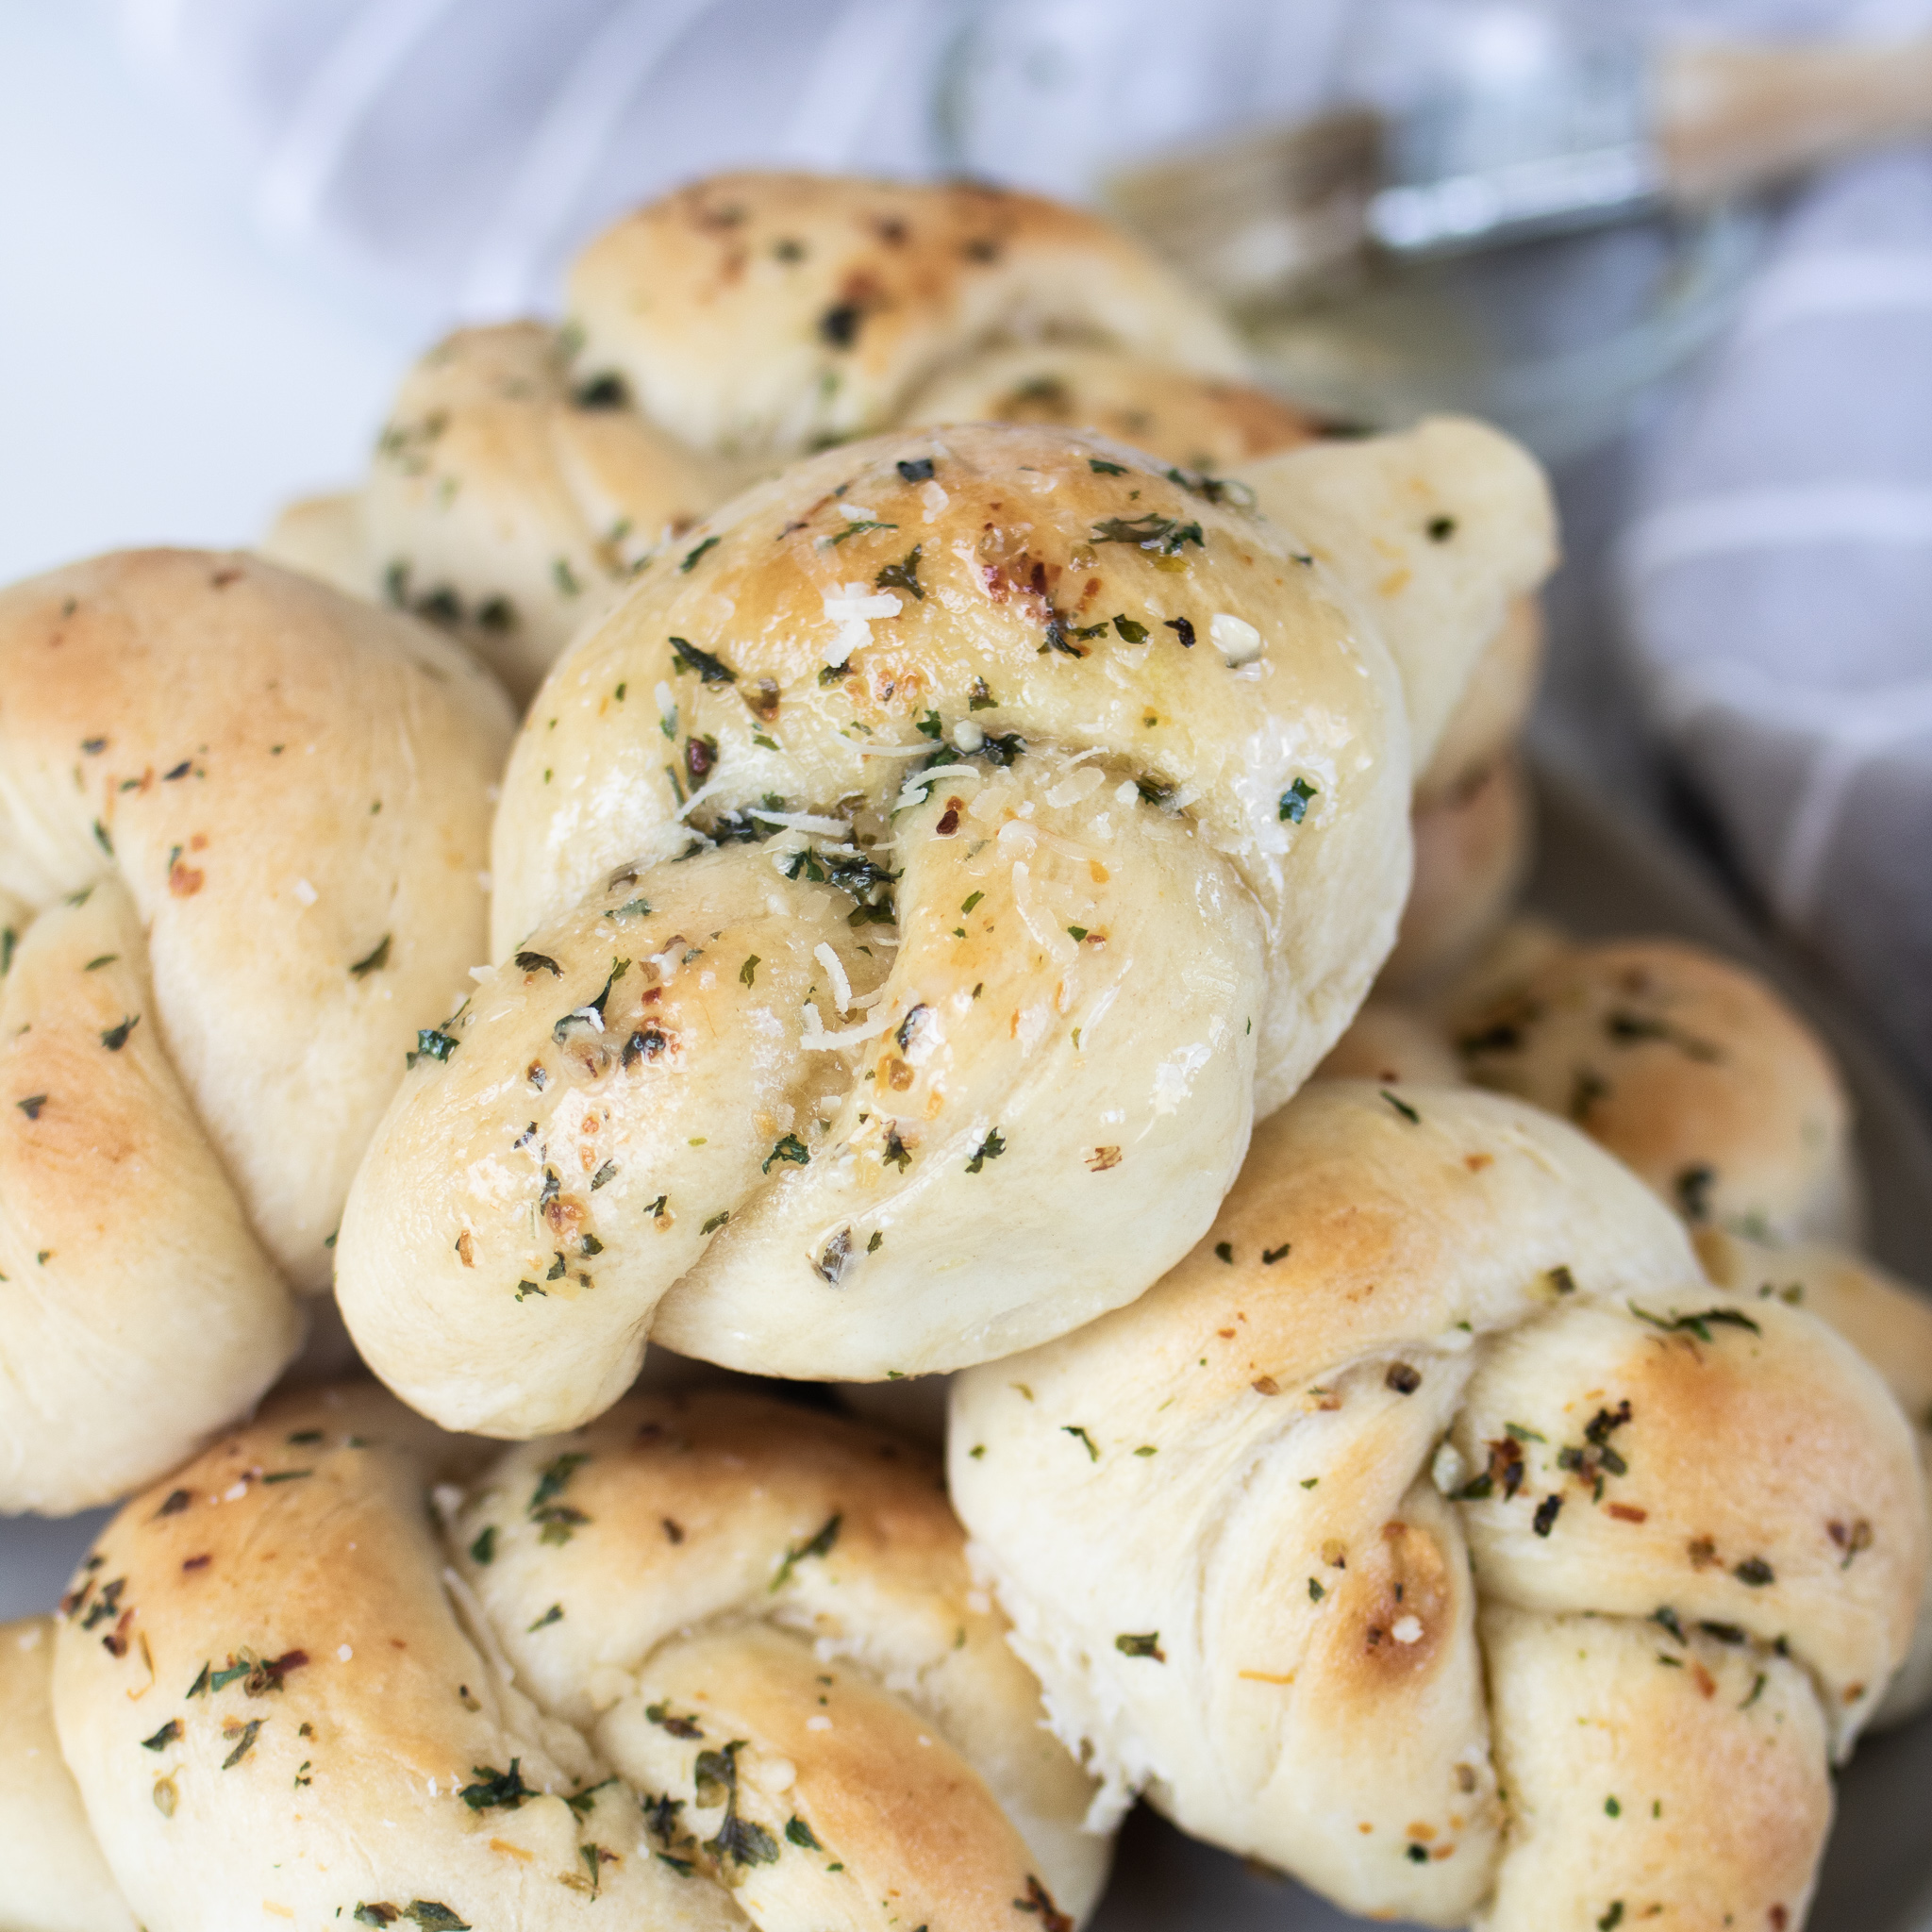
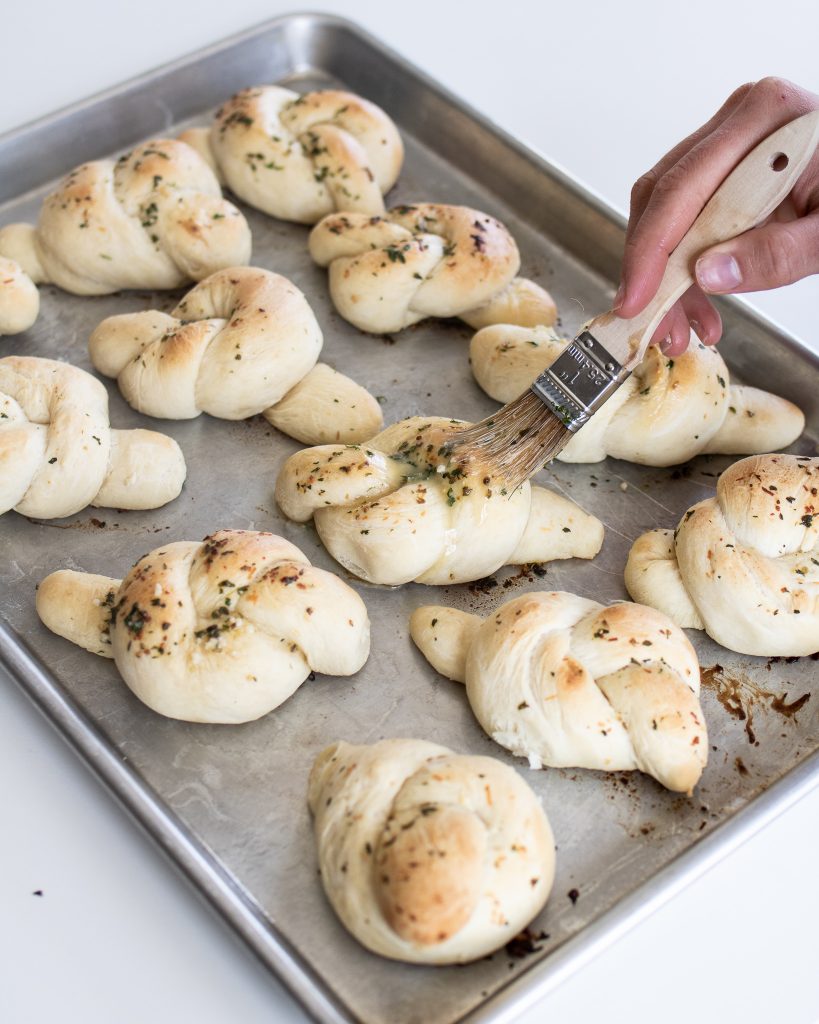
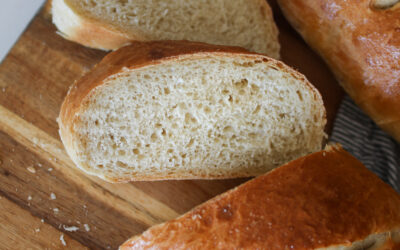
Easy garlic knots that are incredibly soft and fluffy, with a flavorful garlic herb butter lathered on top. The knots are simple to make and I love the way they pull apart, but you can also brush the tops of standard shaped dinner rolls to create the same effect!

Nothing beats a fluffy, buttery roll on the dinner table…and then you add a garlic herb butter and it becomes a complete show stopper. Nothing beats a recipe that’s hard to mess up either. With this recipe I bring you both of those things! A crowd pleasing roll with simple ingredients and simple steps.
Can I make these ahead of time?
Yes! Of course the fresher the better, but I’ve still had great results making these ahead of time. You can make, par-bake, freeze and re-bake day of, OR you can make the dough, freeze the formed dough balls, and then let it thaw, rise, and bake same day. If you freeze the dough, expect that it’ll take about 4-5 hours for the dough to get back to room temperature and rise. Just cover with non-stick sprayed plastic wrap.
Short on time?
There are two short cuts for this recipe. The first is to cut out the first rise time. It makes for softer, fluffier roll, but I’ve skipped the first rise in a pinch and gone straight to forming, and trust me – they’re still incredibly delicious. The second is a huge shortcut, and that’s to use canned pillsbury rolls. You can use this garlic butter recipe to dress up even canned rolls or biscuits! (Your secret will be safe with me!)
New to using yeast?
There are several different kinds of yeasts out there. None are necessarily bad, but they all respond differently so it’s important to know what you’re working with. There are 3 primary kinds of yeasts – active dry, instant, and rapid rise. For this recipe my favorites are either active dry or instant. Active dry needs to be activated prior to using by letting it sit in warm water (at 110 degrees) with sugar or honey for 10 minutes until foamy. Instant has already been partially activated and you can let it get foamy first, or just add it to your recipe with a warm liquid and it’ll still continue activating like normal. For more information on this see my tips page on working with yeast.
How else can I use this dough recipe?
This base dough is the same as my standard dinner rolls, so if you would like to do half normal and half garlic, it’s super easy to do so! Just half the amount of garlic butter in the recipe. This dough can ALSO make sweet rolls. I like to add a tad more butter and sugar to my sweet roll dough, but I’ve made them from this recipe and they still turn out AMAZING. Check out my favorite cinnamon roll or cranberry orange roll recipe – similar amazing base dough with an incredible filling!
How to form garlic knots
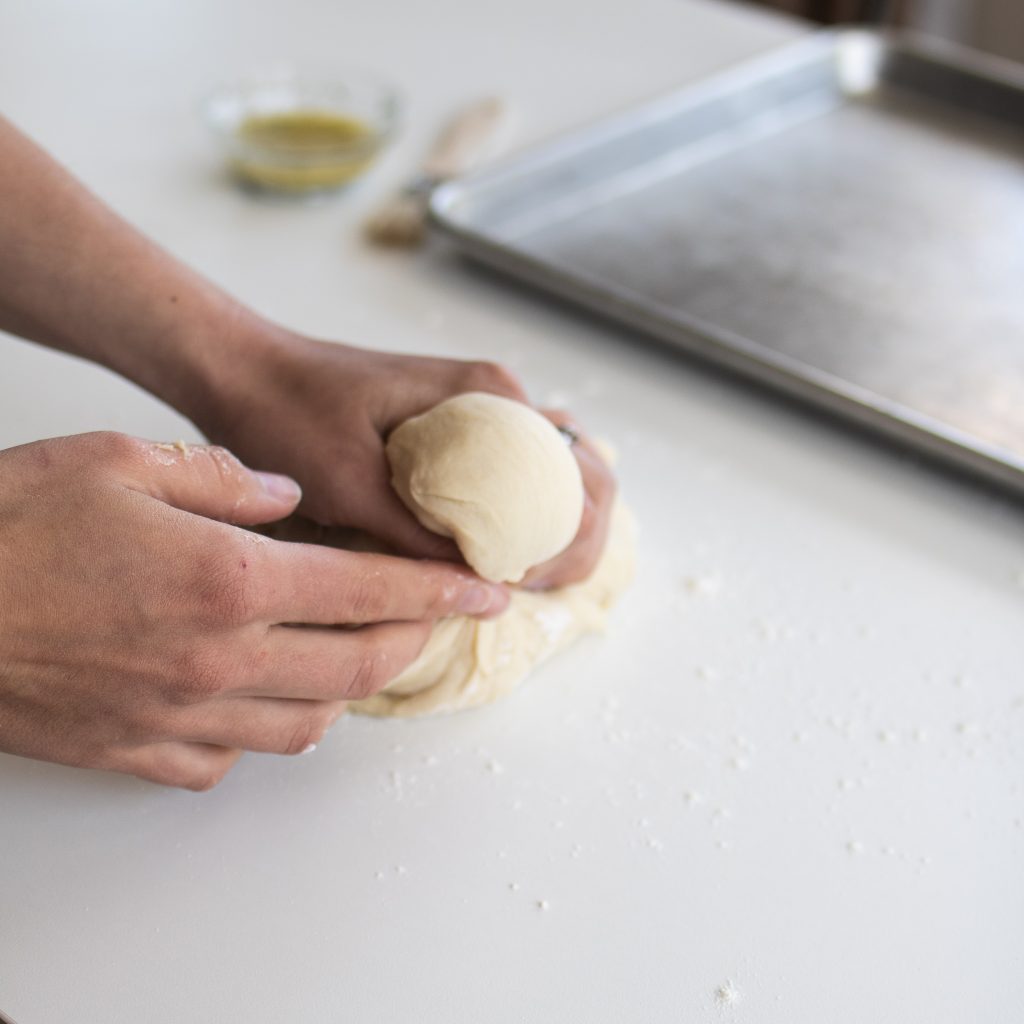
Pinch off small piece of dough
(size of small tangerine)
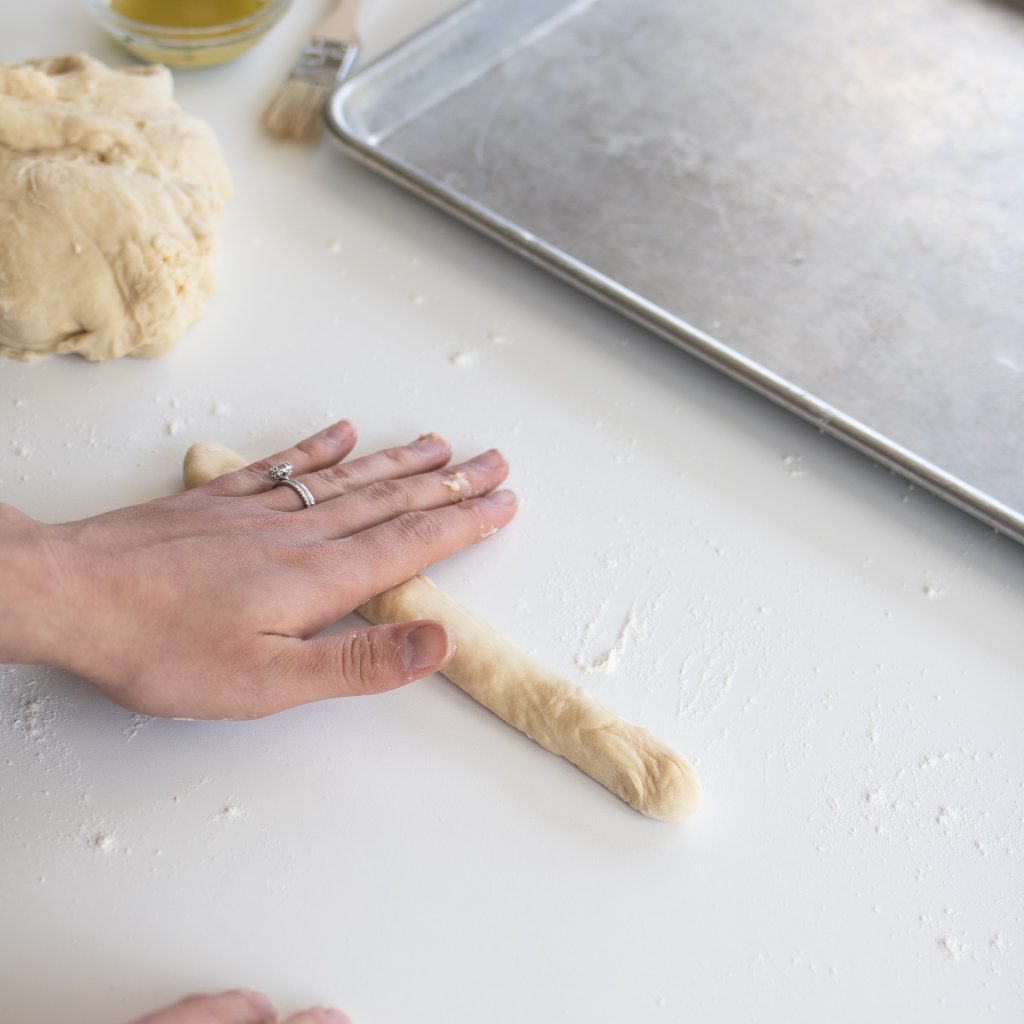
Roll out into a log about 8-10 inches
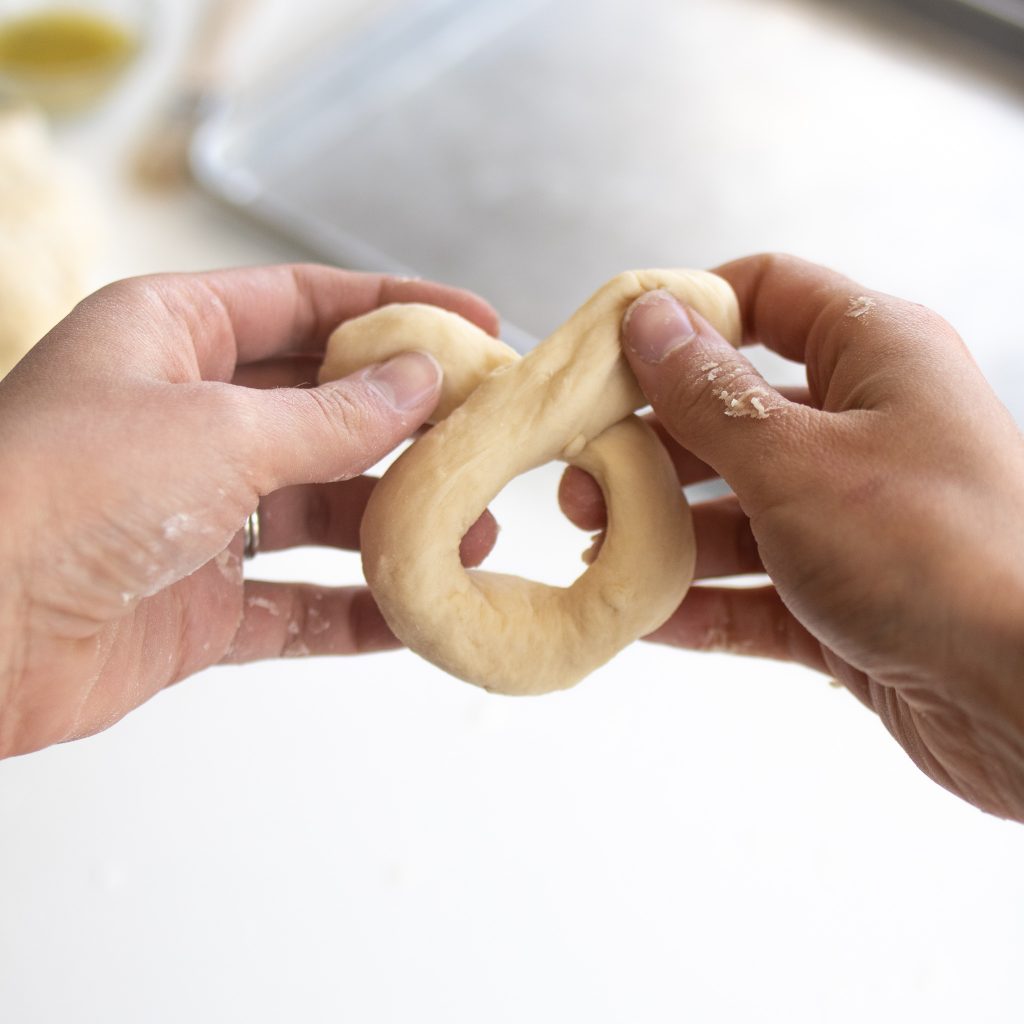
Cross the two ends
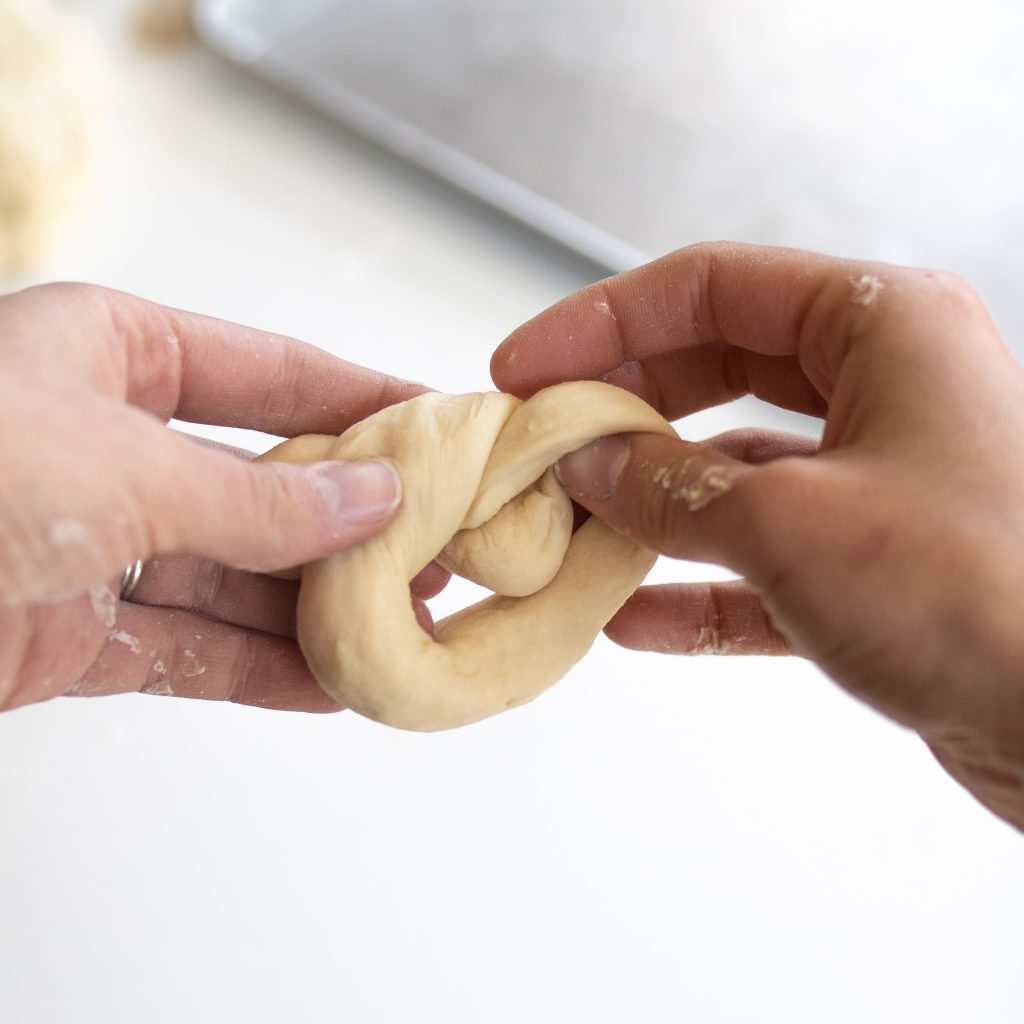
Gently tuck one tail under to form a knot
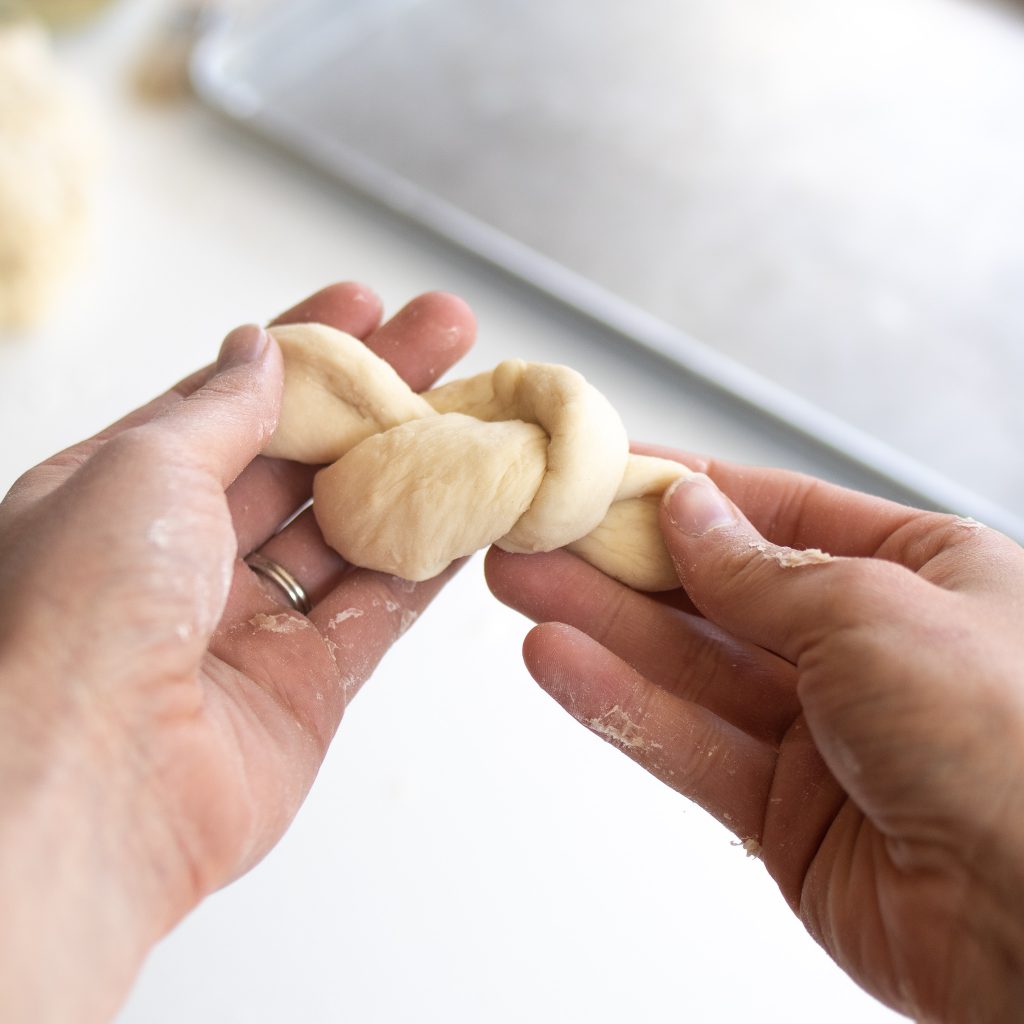
Gently tug the ends to pull through,
but don’t pull tight
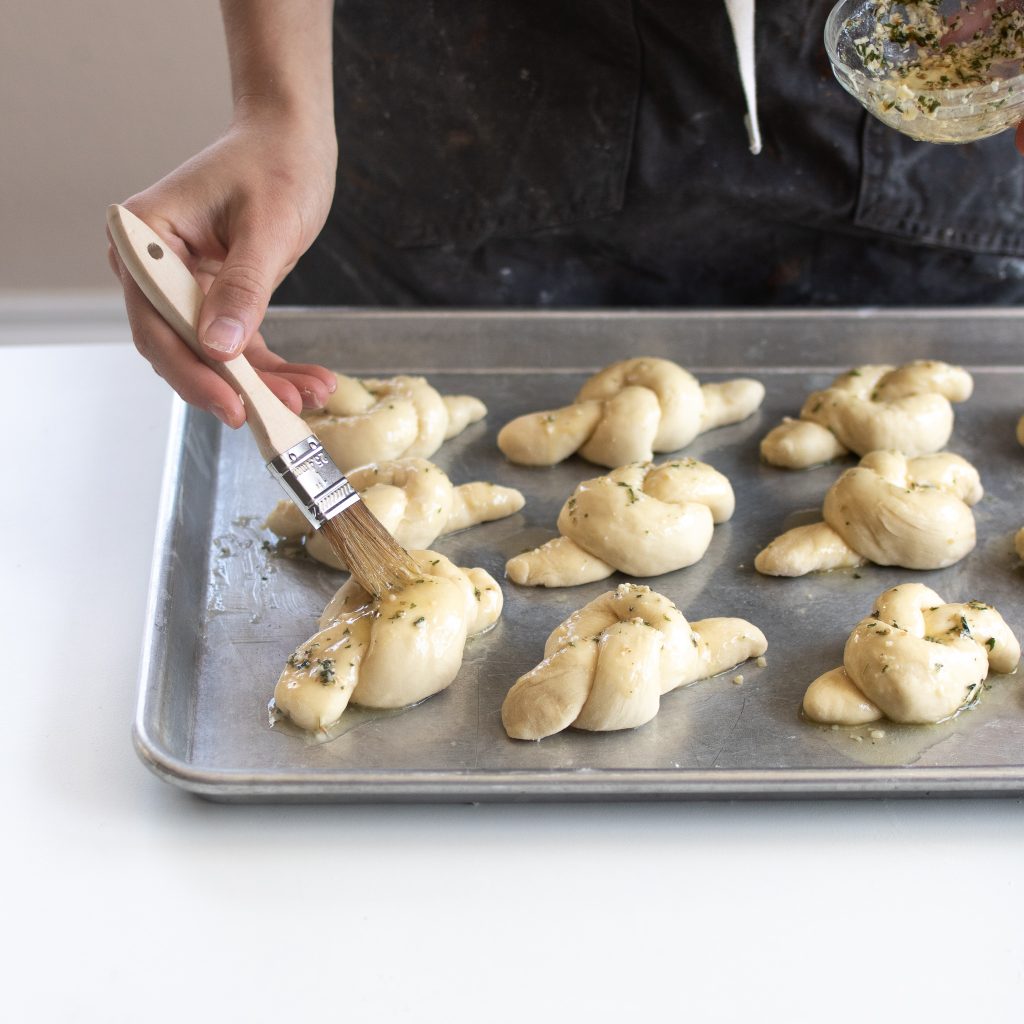
Rise & brush with garlic butter
Standard dinner roll style
If you don’t want to form these into knots, you can still get tasty results by forming them as normal dinner rolls (and it’ll save you a few minutes if you’re short on time or want to easily do half plain and half garlic).

Garlic Knots (or rolls)
Ingredients
- 2 cups warm whole milk (at about 110 degrees F) any other milk will do; fattier the better
- 1 ½ TB instant yeast
- ¼ cup sugar or honey
- ⅓ cup unsalted butter, softened
- 2 large eggs
- 2 tsp salt
- About 5 ½ cups all purpose flour
Garlic Herb Butter
- 12 TB salted butter, melted
- 6 garlic cloves, or 1 tsp garlic powder
- ½ cup freshly minced parsley, or 1 1/2 tsp dried parsley
- 1 tsp dried oregano
- ⅓ cup freshly grated parmesan cheese (crumbled parm. cheese works too)
Instructions
- Dough: Using a stand mixer* with a dough hook, place the warm milk (not scalding hot, but warm to the touch), yeast, and sugar/honey together. After a couple minutes, you should see the yeast starting to foam - that means it's activating!
- Add 3 cups of flour and mix together. Add salt, softened butter, and eggs. Continue to mix on low.
- Slowly add the additional 2 1/2 cups of flour. In pouring your last cup, do so slowly, watching the dough. When you've added enough flour, the dough will be soft and slightly sticky. It will barely start pulling away from the bowl. Leave the mixer on for an additional 8-10 minutes to knead.
- Take your dough hook out, and cover the bowl to let the dough rest and rise for 45-60 minutes, until doubled in size.
- Grease 2 baking sheets. Transfer your risen dough to a floured work surface. Gently pinch off pieces of dough, about the size of a small tangerine. Roll out each piece against your work surface, creating a rope about 8 inches long. Gently tie a single knot, like tying a shoelace. Don't worry about "pulling tight". If it's not a tight knot it's okay. It will rise and fill in. *You can also form these into standard dinner rolls by pinching off pieces of dough the size of small tangerines. Place about 1" apart on the pan.
- When the rolls are shaped, cover with a light kitchen towel and place in a warm, draft free place for about 30 minutes, until dough has grown slightly and is soft. Preheat oven to 350° F while the dough rises.
- Create garlic butter spread by combining melted butter, herbs, and cheese together.
- Using a pastry brush or spoon, use half of your butter spread and gently brush the tops of the rolls. Bake for 16-20 minutes. If the tops begin to brown too quickly mid bake, place a piece of aluminum foil over top to slow down the browning.
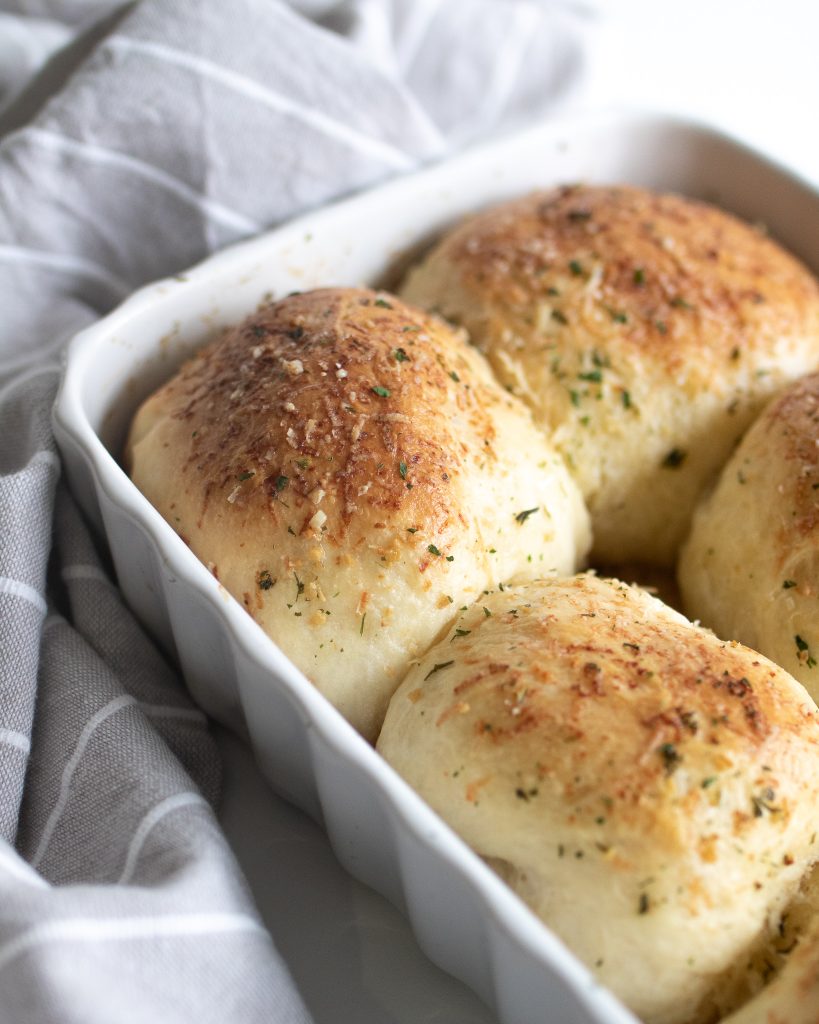
- The rolls will be done when the bottoms are lightly golden brown. Take out of the oven and brush with remaining garlic butter spread while warm. Top with additional fresh parmesan cheese if desired.
Why do we love you so much? Happy day to YOU
So easy to follow and turned out great! You make your recipes user friendly and even the “non baker” can be successful! Thank you for sharing your talents! They are YUMMY