This nutritious wheat bread is soft enough to eat as is, and stable enough to use for sandwiches. Say goodbye to dense or crumbly wheat bread!
This whole wheat bread just might be my biggest pride and joy. I grew up on this bread, but after moving away to higher altitude I became quickly disappointed with the texture. It was either dry and crumbly or too dense. Not sandwich bread material. After several batches, and many fails, the texture and flavor finally came together in perfection. It’s bread I feel good about feeding my family not just because it’s healthy, but because I’m proud of how it taste too!
What makes this bread a winner
Rise time – most breads, but especially wheat bread, benefits from time. The gluten and proteins need time to activate and build a strong and soft texture.
Vital wheat gluten – while you can achieve fabulous bread without this ingredient, I’ve found that this addition helps secure that amazing even crumb structure. The gluten just adds in extra “activation” to make the bread rise well. I will say though, I’ve made it without too, and as long as I give it a long healthy rise time, I’m not disappointed.
Great wheat – the flavor of wheat has a lot to do with the kind of wheat you are using. My favorites are Lehi Roller Mills, Wheat Montana, Bob’s Red Mill, and Kamut. If your wheat is old or a cheap brand, you may not get as ideal results. I love to grind my own wheat, but that’s not mandatory.
How to work with yeast
There are several different kinds of yeasts out there. None are necessarily bad, but they all respond differently so it’s important to know what you’re working with. There are 3 primary kinds of yeasts – active dry, instant, and rapid rise. For this recipe my favorites are either active dry or instant. Active dry needs to be activated prior to using by letting it sit in warm water with sugar (or honey) for 10 minutes until foamy. Instant has already been partially activated and you can let it get foamy first, or just add it to your recipe with a warm liquid and it’ll still continue activating like normal. For more information on this see my tips page on working with yeast.
Whatever yeast you use, two general key principles:
1. It’s best stored in the refrigerator or freezer for longest shelf life. I’ve heard a lot of people say “6 months” for the freezer once it’s been opened, but I’ve used my yeast past that point and it’s still worked great. One If you see your yeast isn’t activating, you could have killed it by using too hot of a liquid, or it could have gone bad if you’ve had it for a while.
2. You can kill your yeast by having your liquid component to hot! On the flip side, it won’t activate well if you put it in water. So what does yeast love? A nice warm bath. It’s true. If you need a specific number, I always recommend 110 degrees F. I recommend taking the temperature especially if you’re new to bread making because it can be the make or break of having successful results.
How to make perfect wheat bread
If you haven’t checked out my classic white sandwich bread, now is a good time. It provides additional step by step visuals that may be helpful as you follow along with the written instructions. The steps are identical. Here are additional visuals that I hope help!
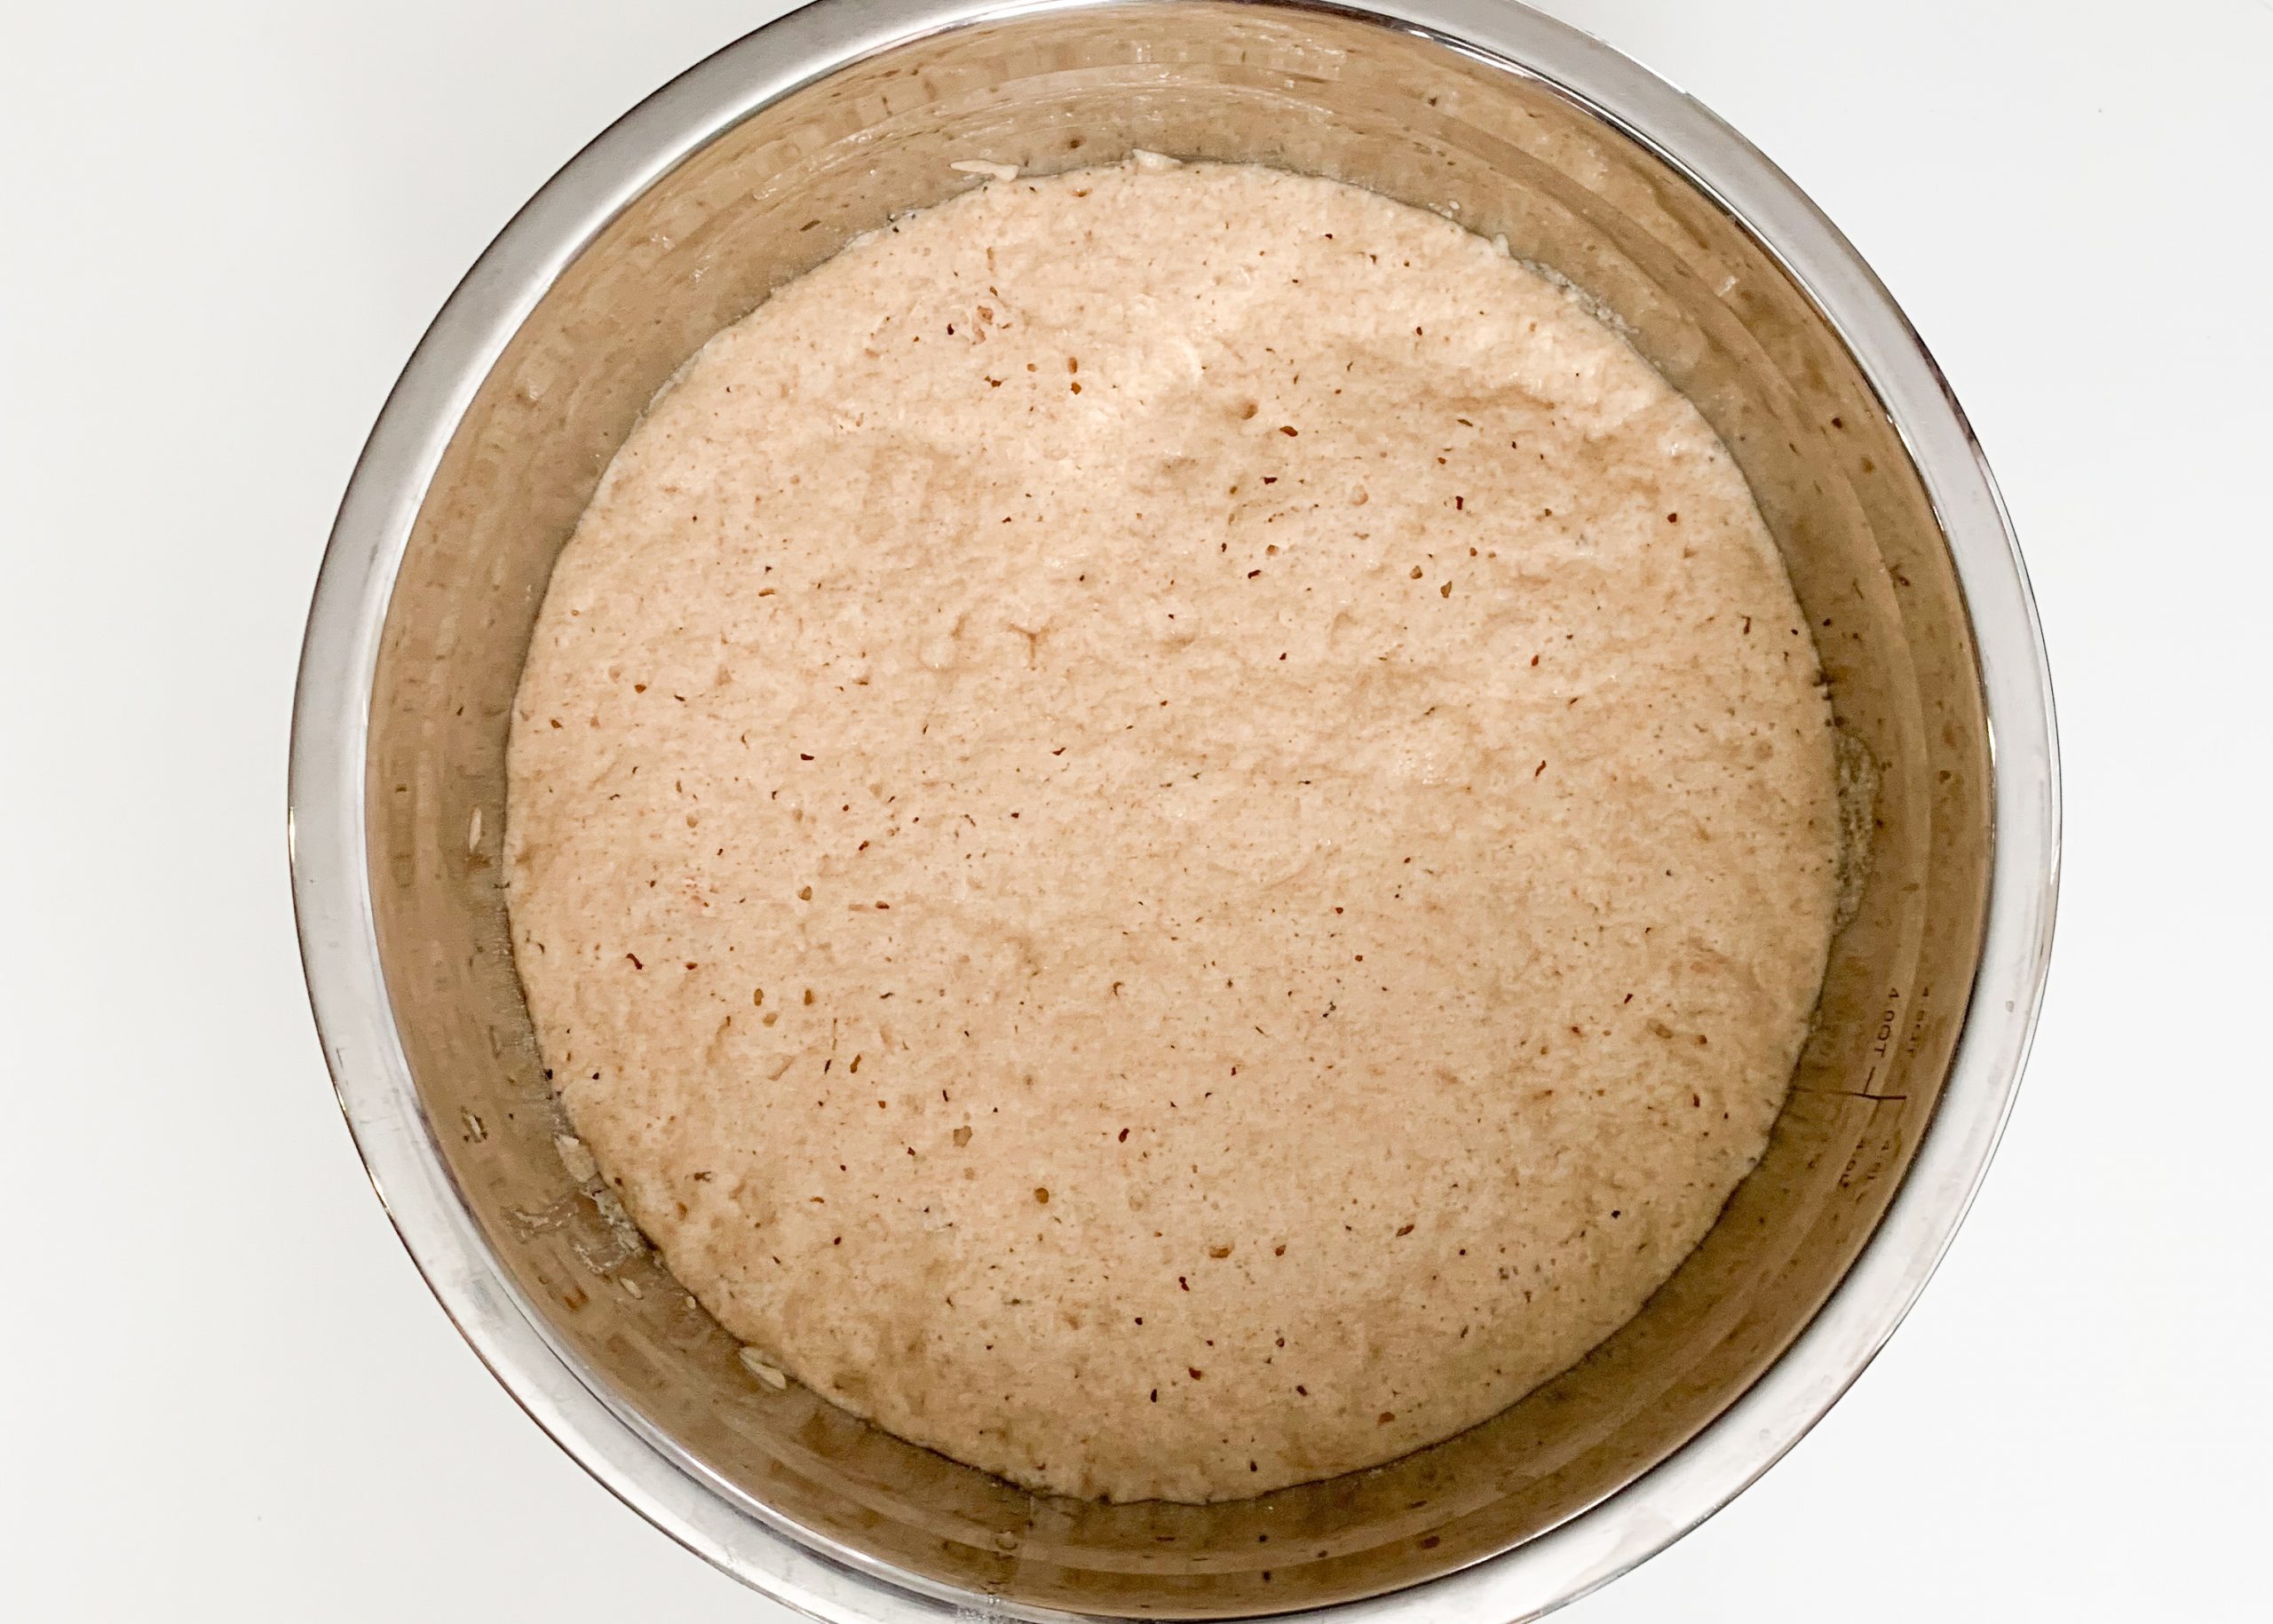
STEP 1 & 2: Make the sponge and rise. This is about what the sponge will look like after it’s risen. Slowly add in the rest of the ingredients and the sponge will naturally deflate as you mix it together.

STEP 3: Knead the dough for about 10 minutes to activate the gluten. You’ll know there’s enough flour when you can put the finger in the dough and it won’t stick to you but will also slowly bounce back. Put dough back in the greased/floured bowl to rise.
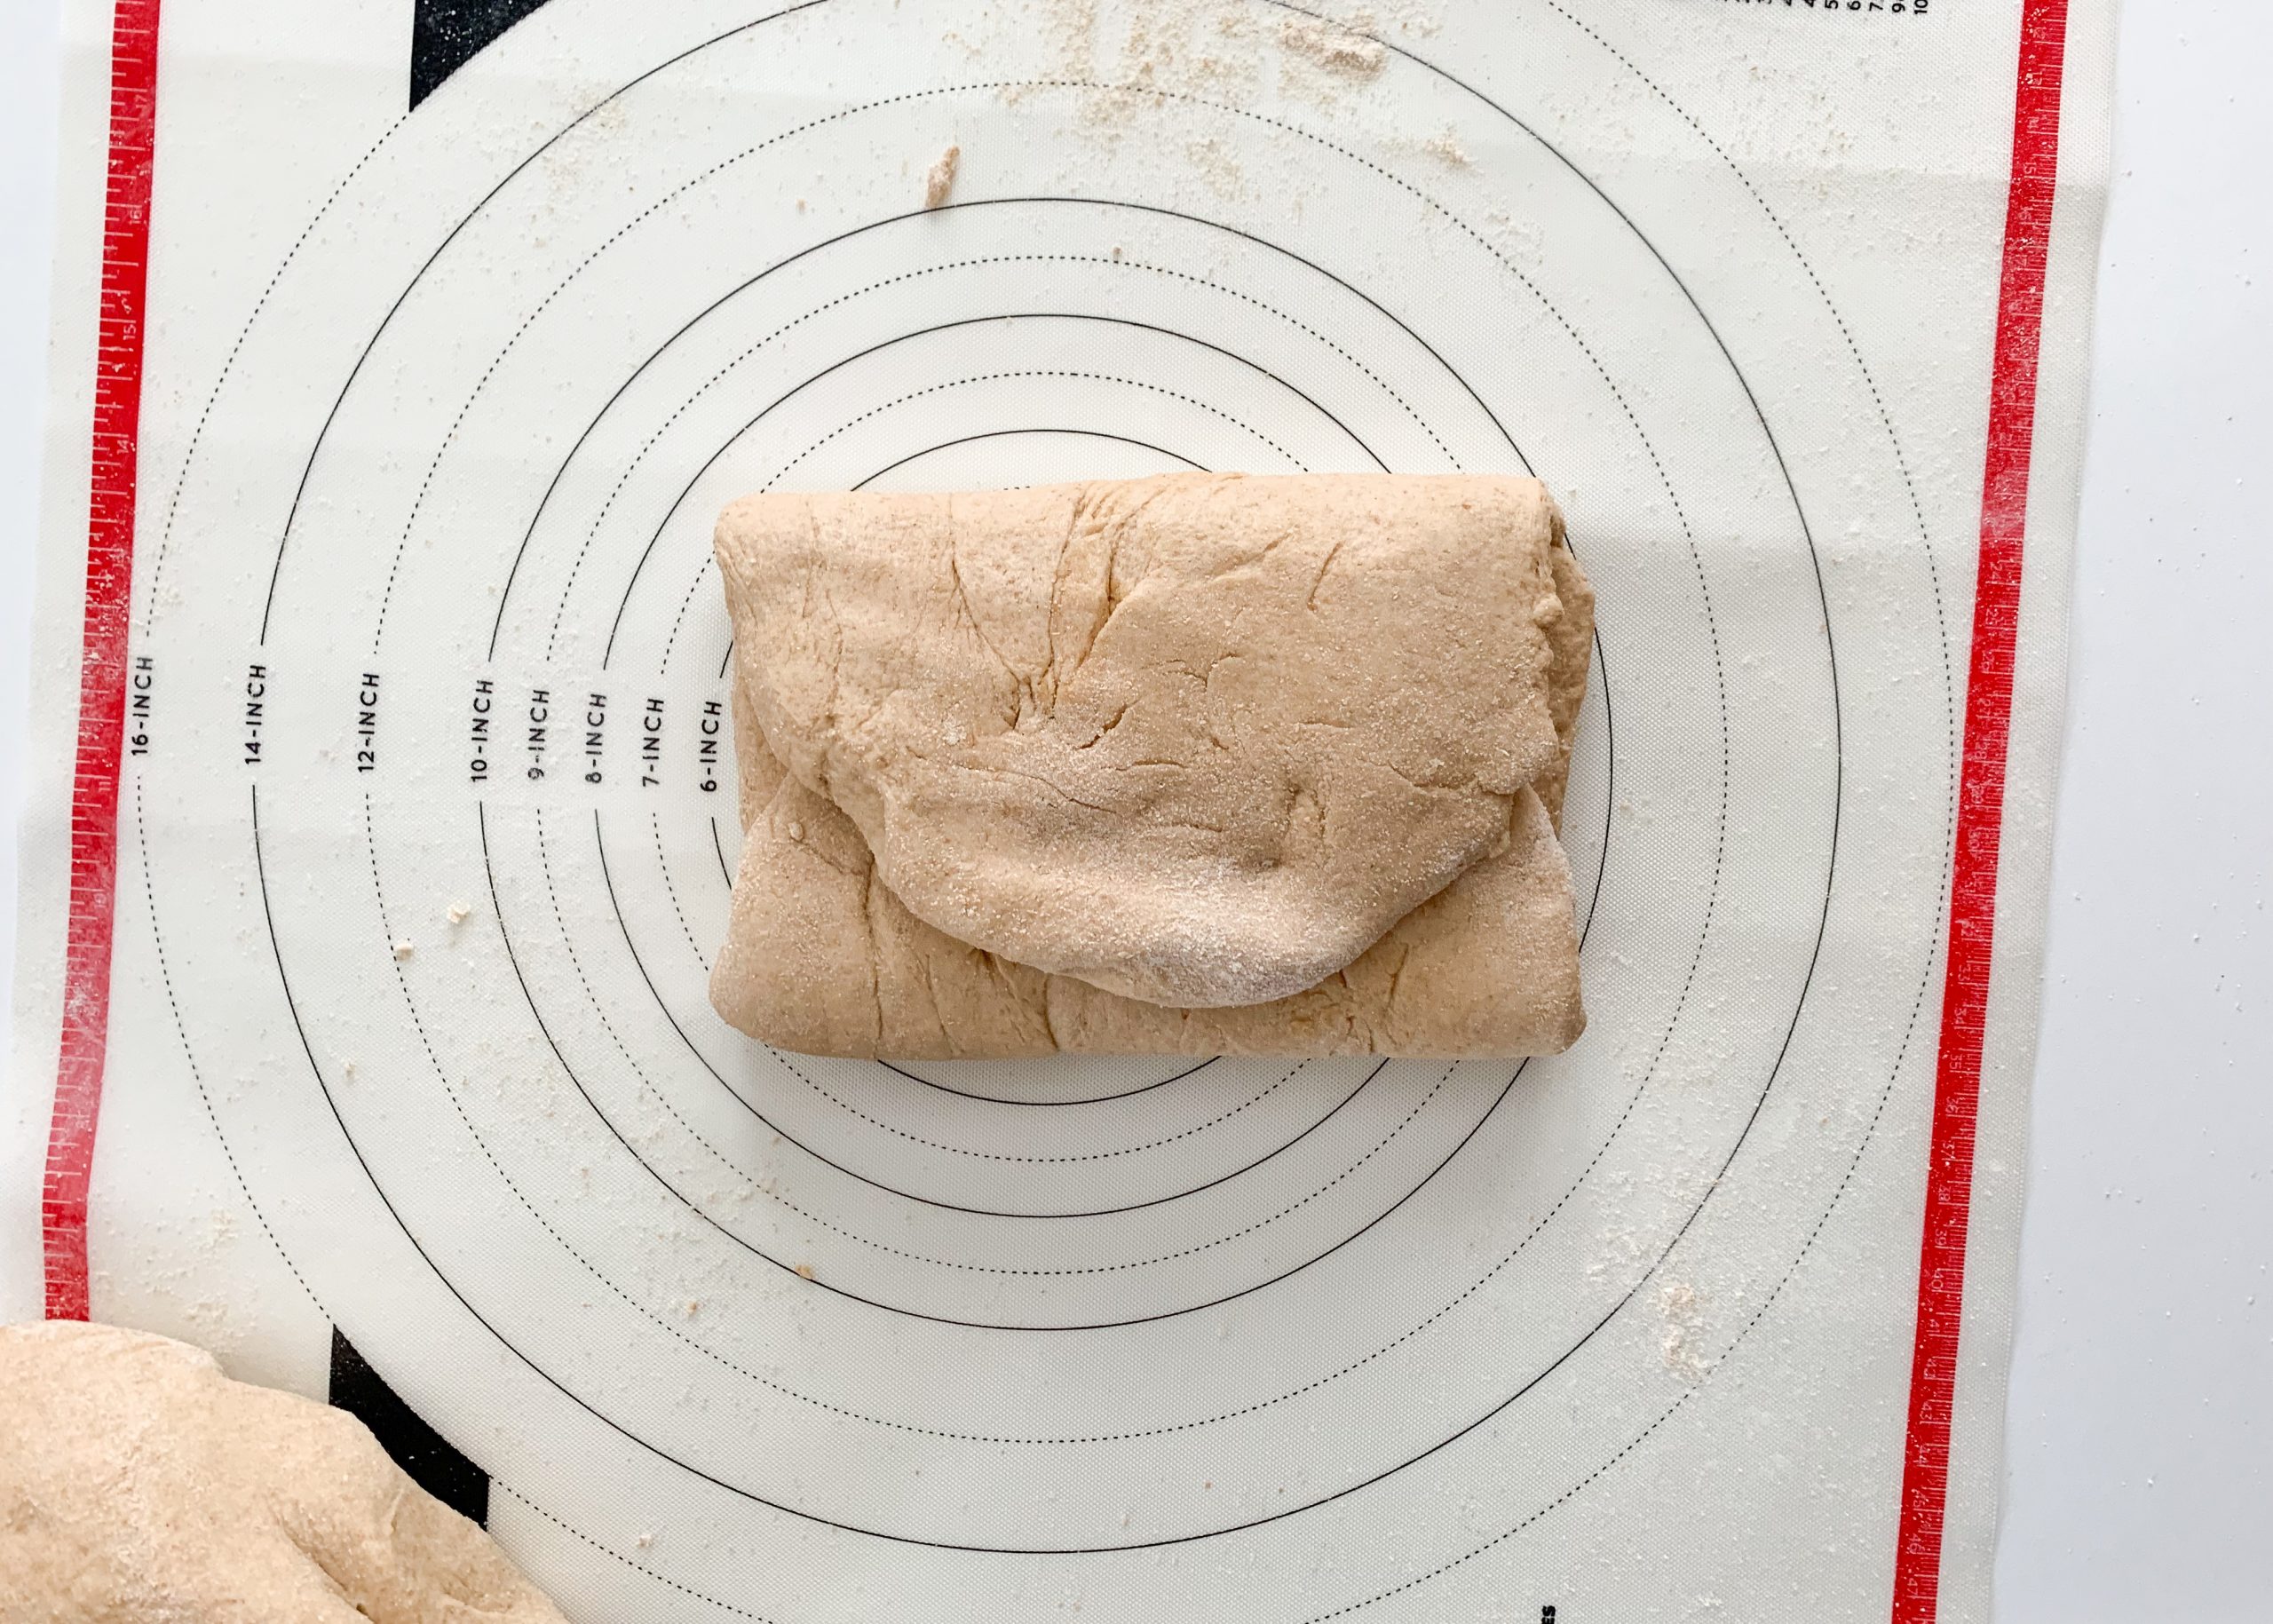
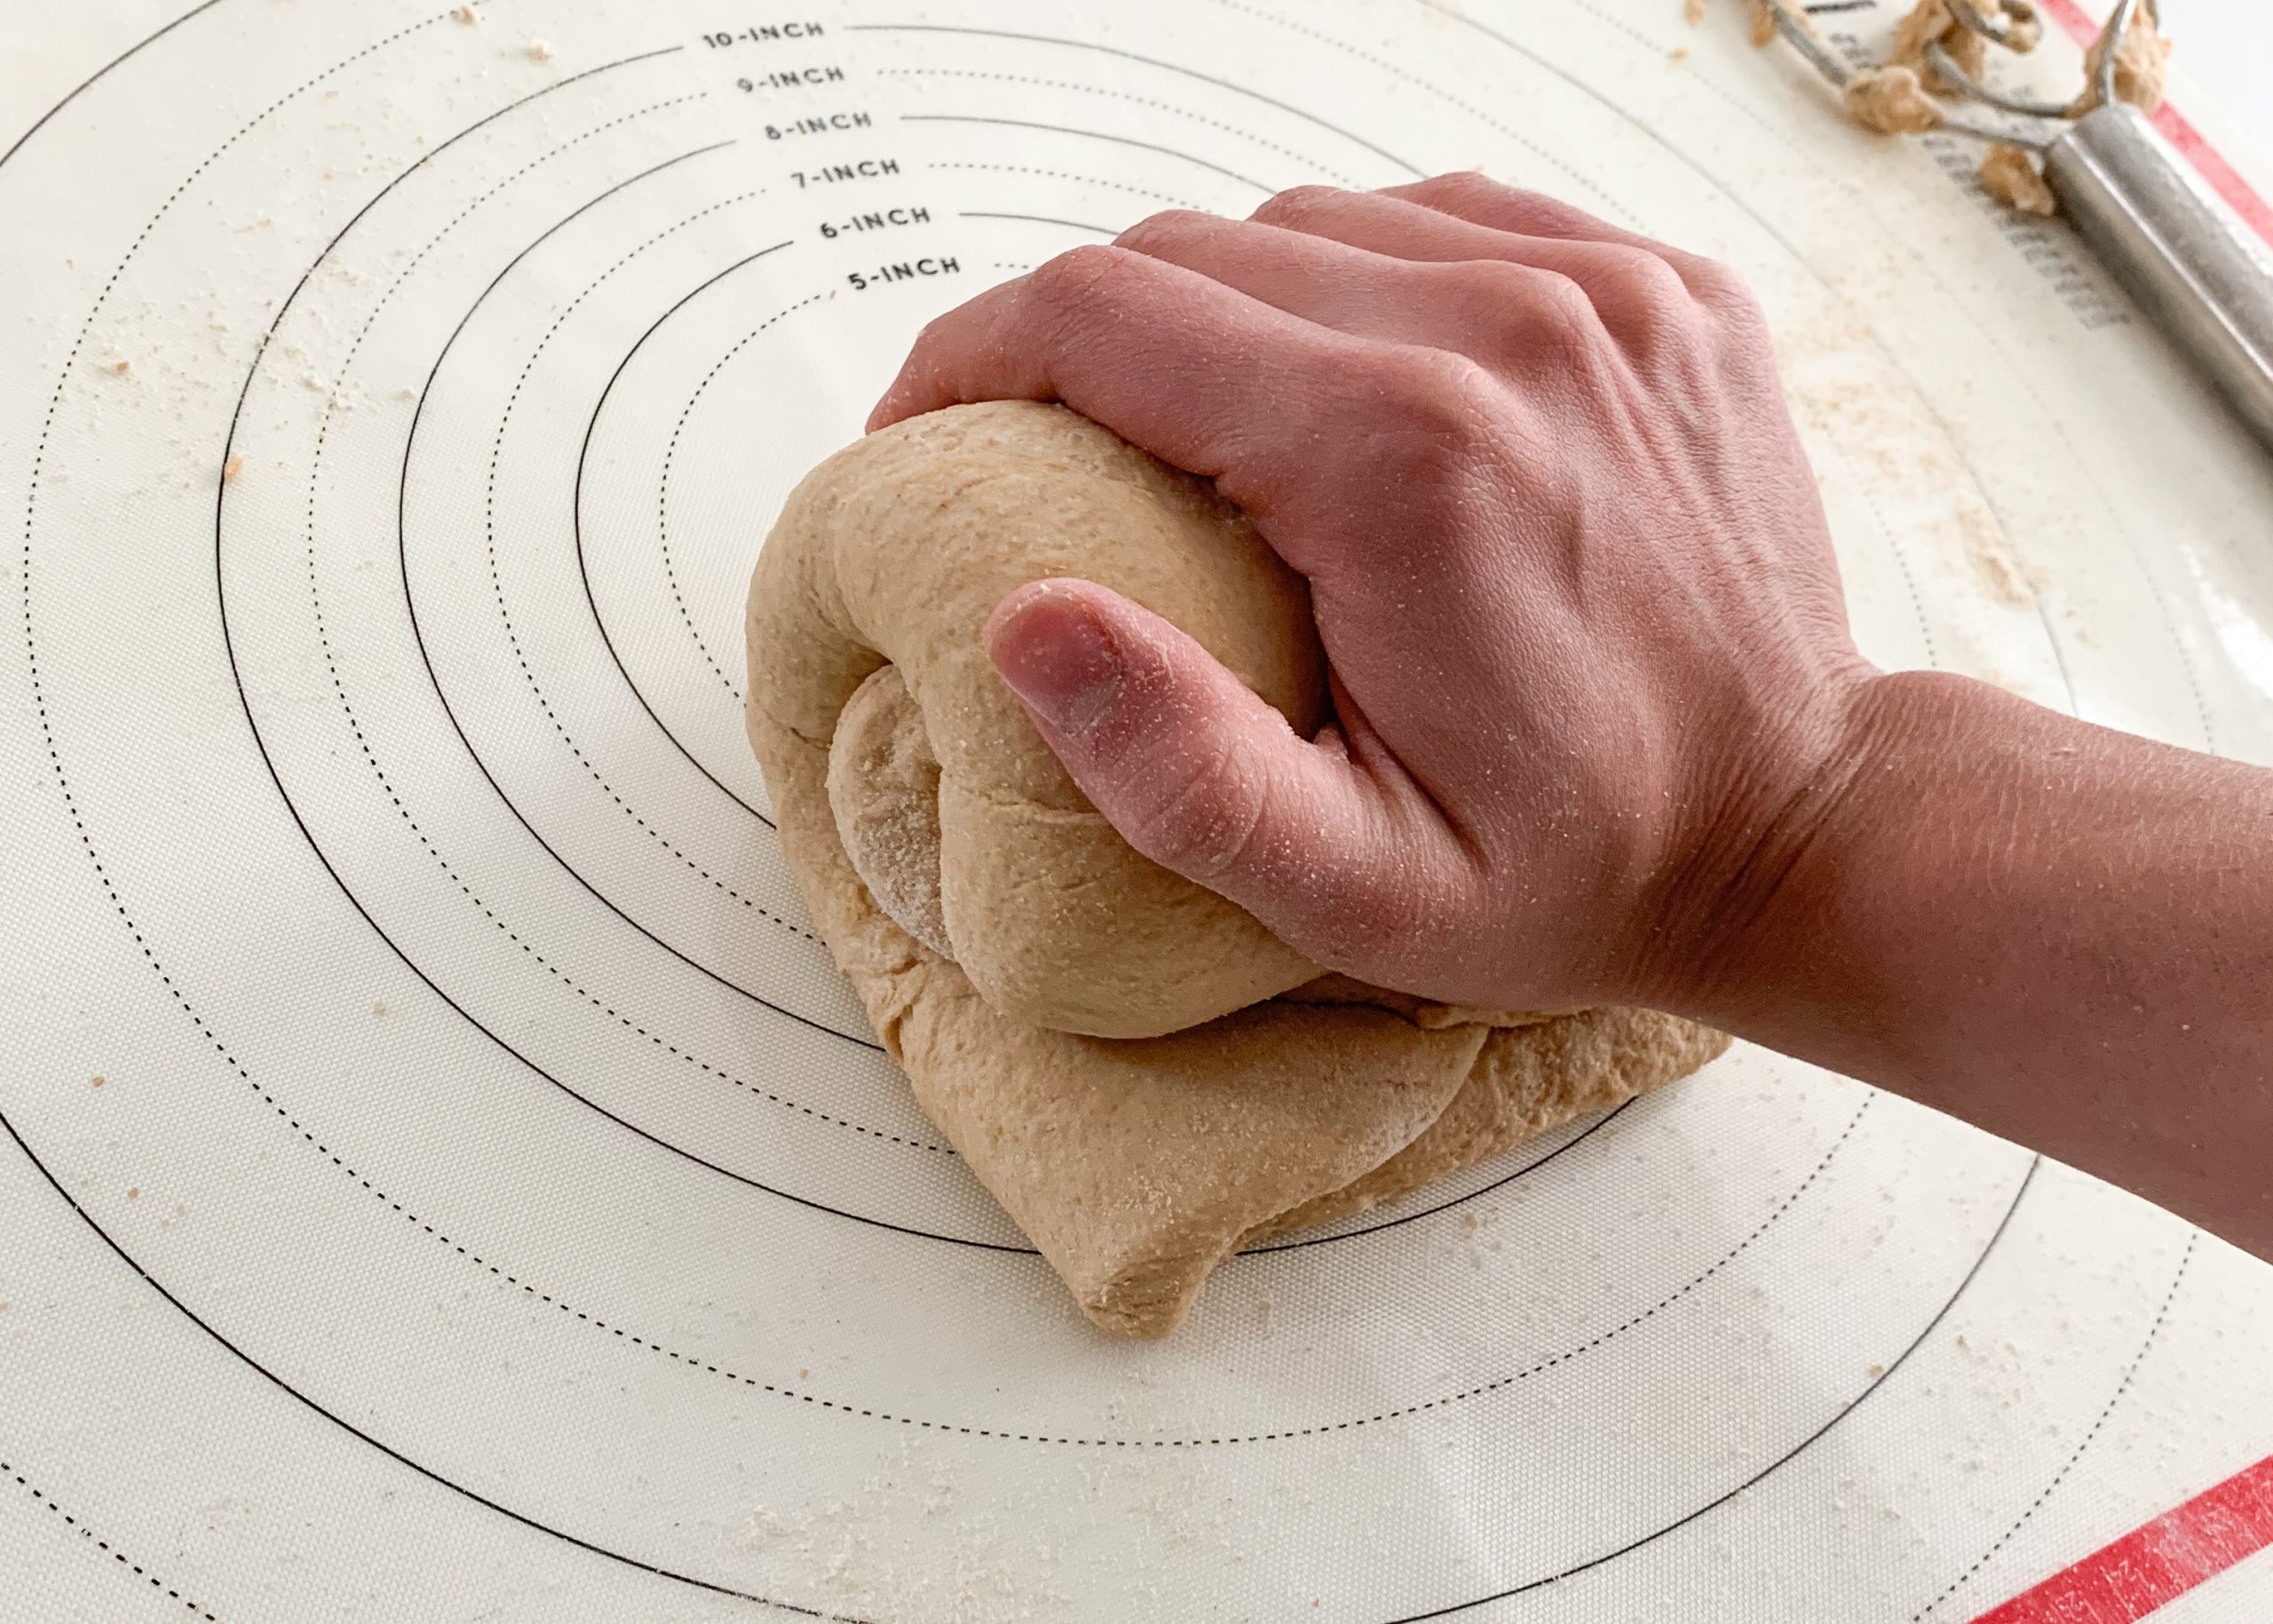
STEP 4: Punch down the risen dough. Split the dough into two even piles. Form into loaves. I like to do so by first folding into thirds (like dough on left), then rolling up starting from the opposite ends of the folds. Pinch the seams and ensure there are no air bubbles.
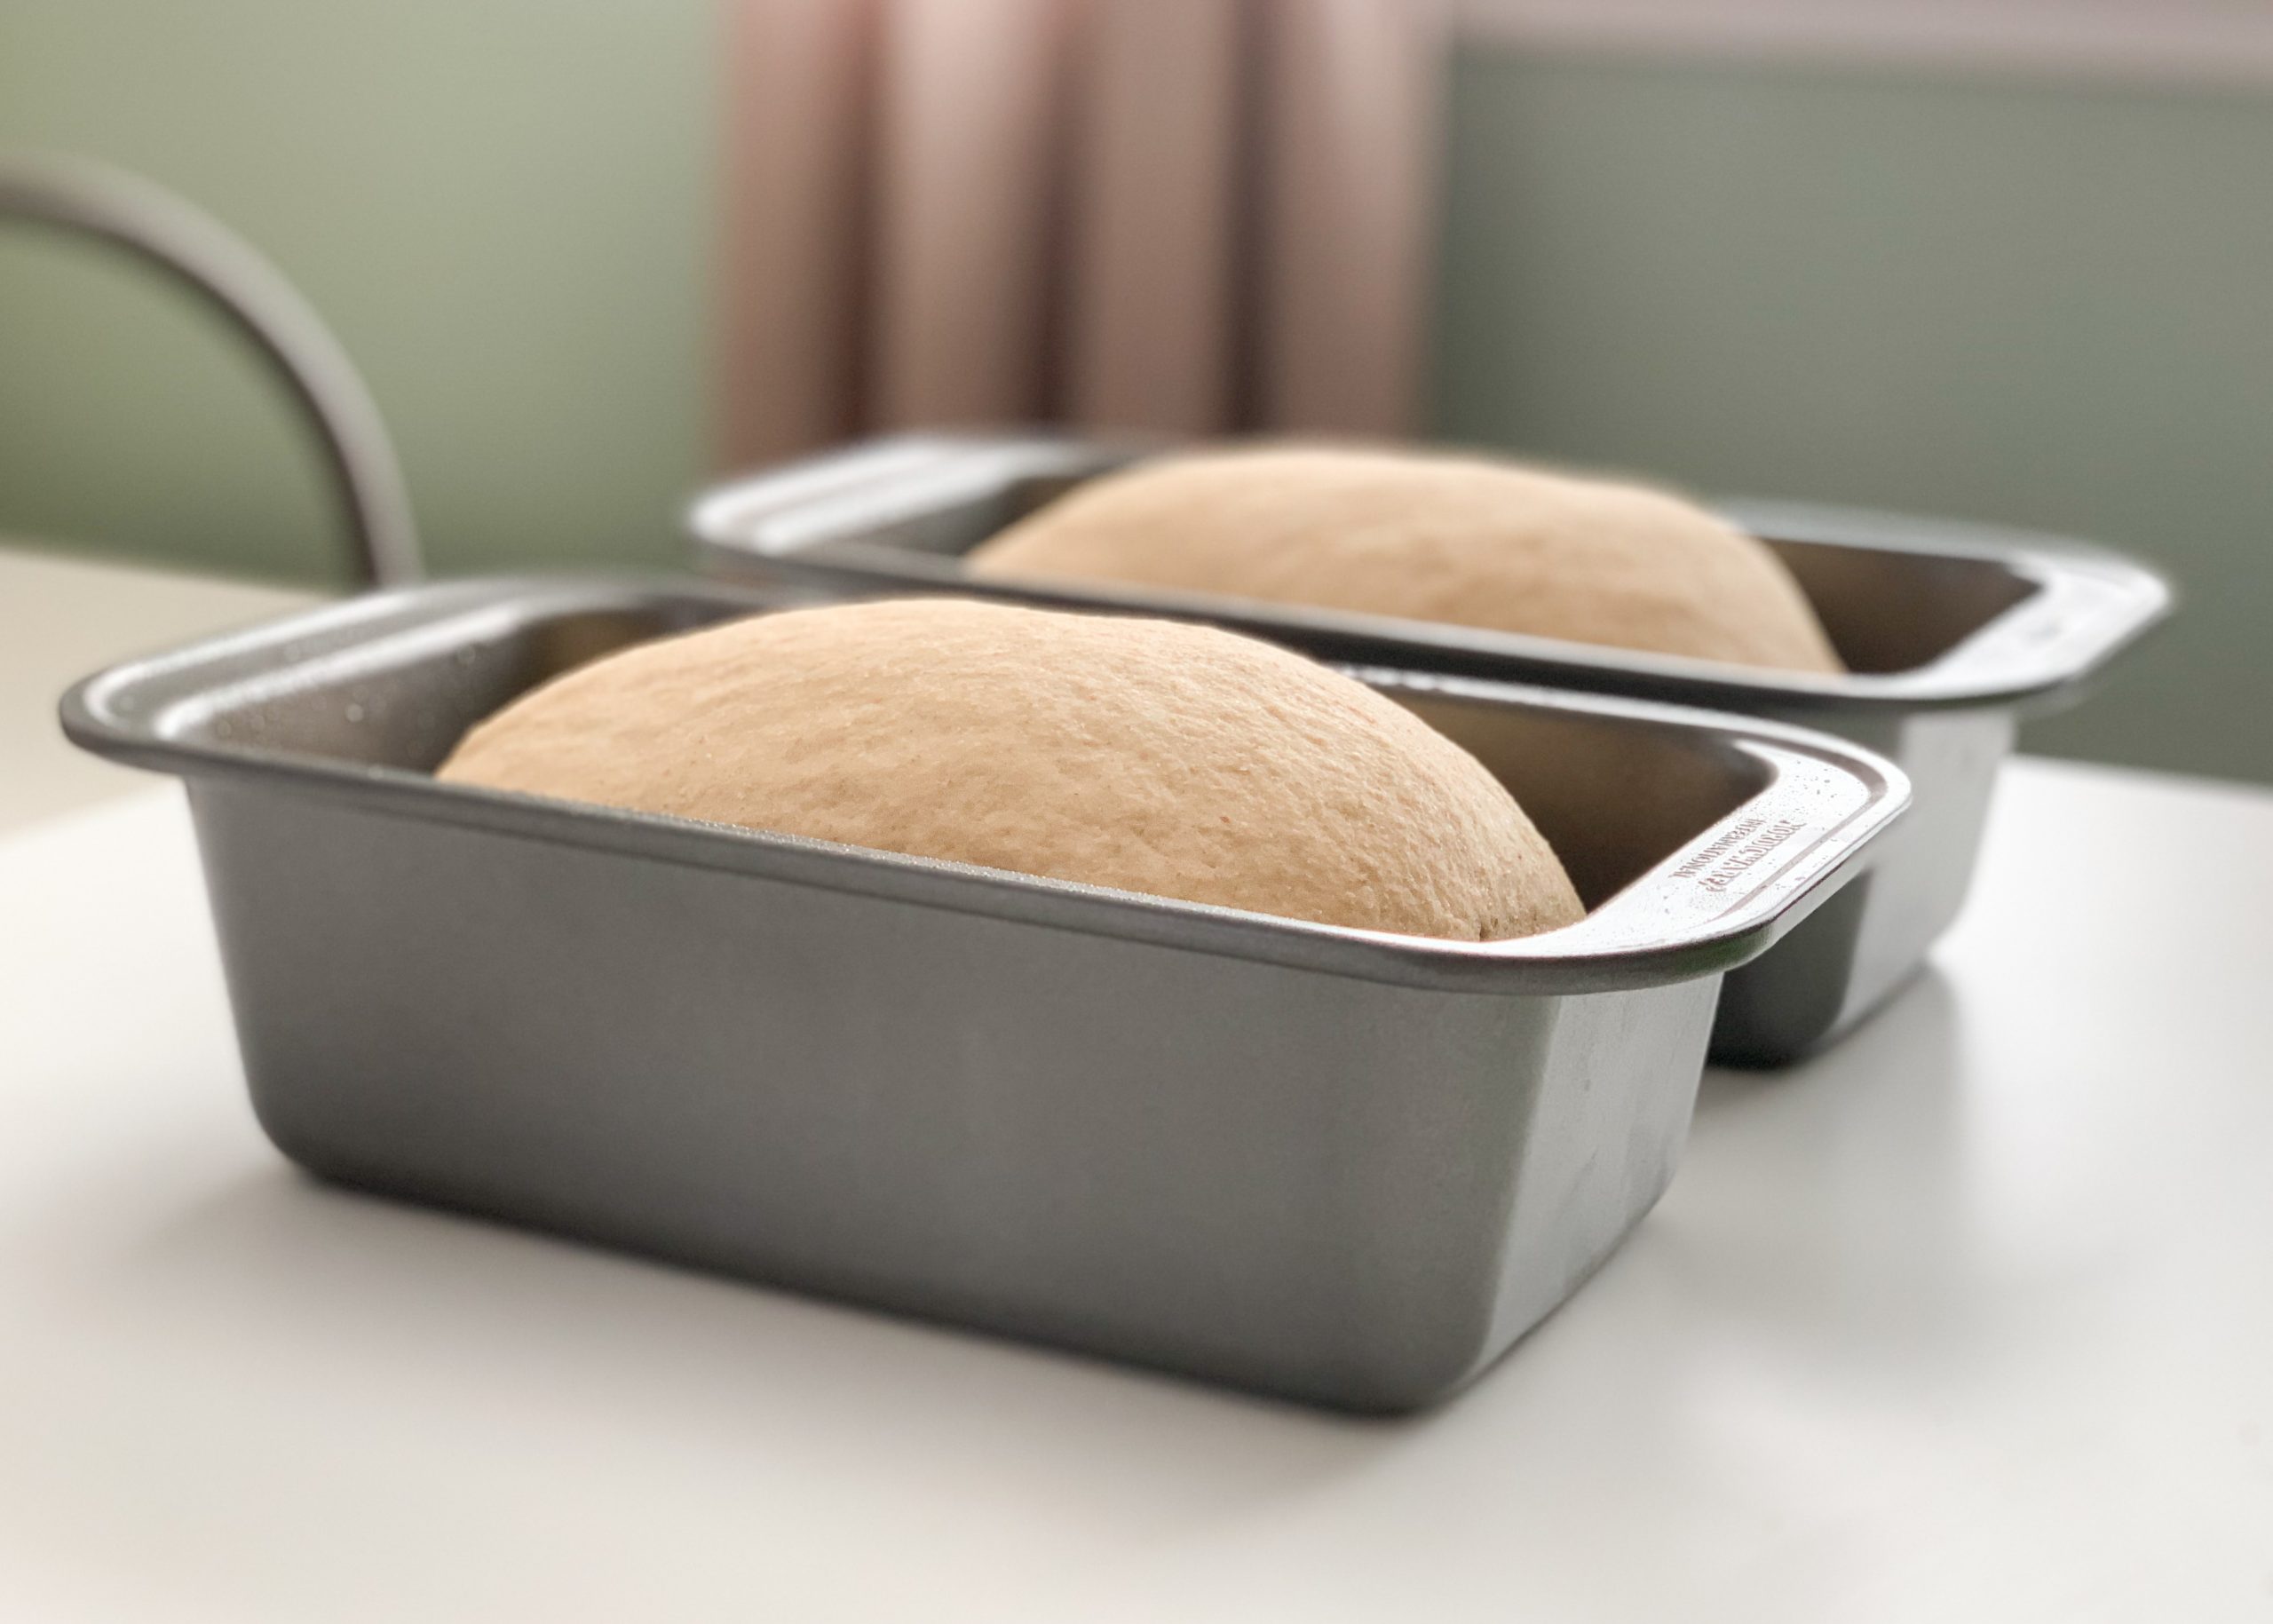
STEP 5: Place the formed loaves into sprayed 9×5 inch pans. Let rise in a warm, draft free place until loaves are just arched over the tops of the pans.
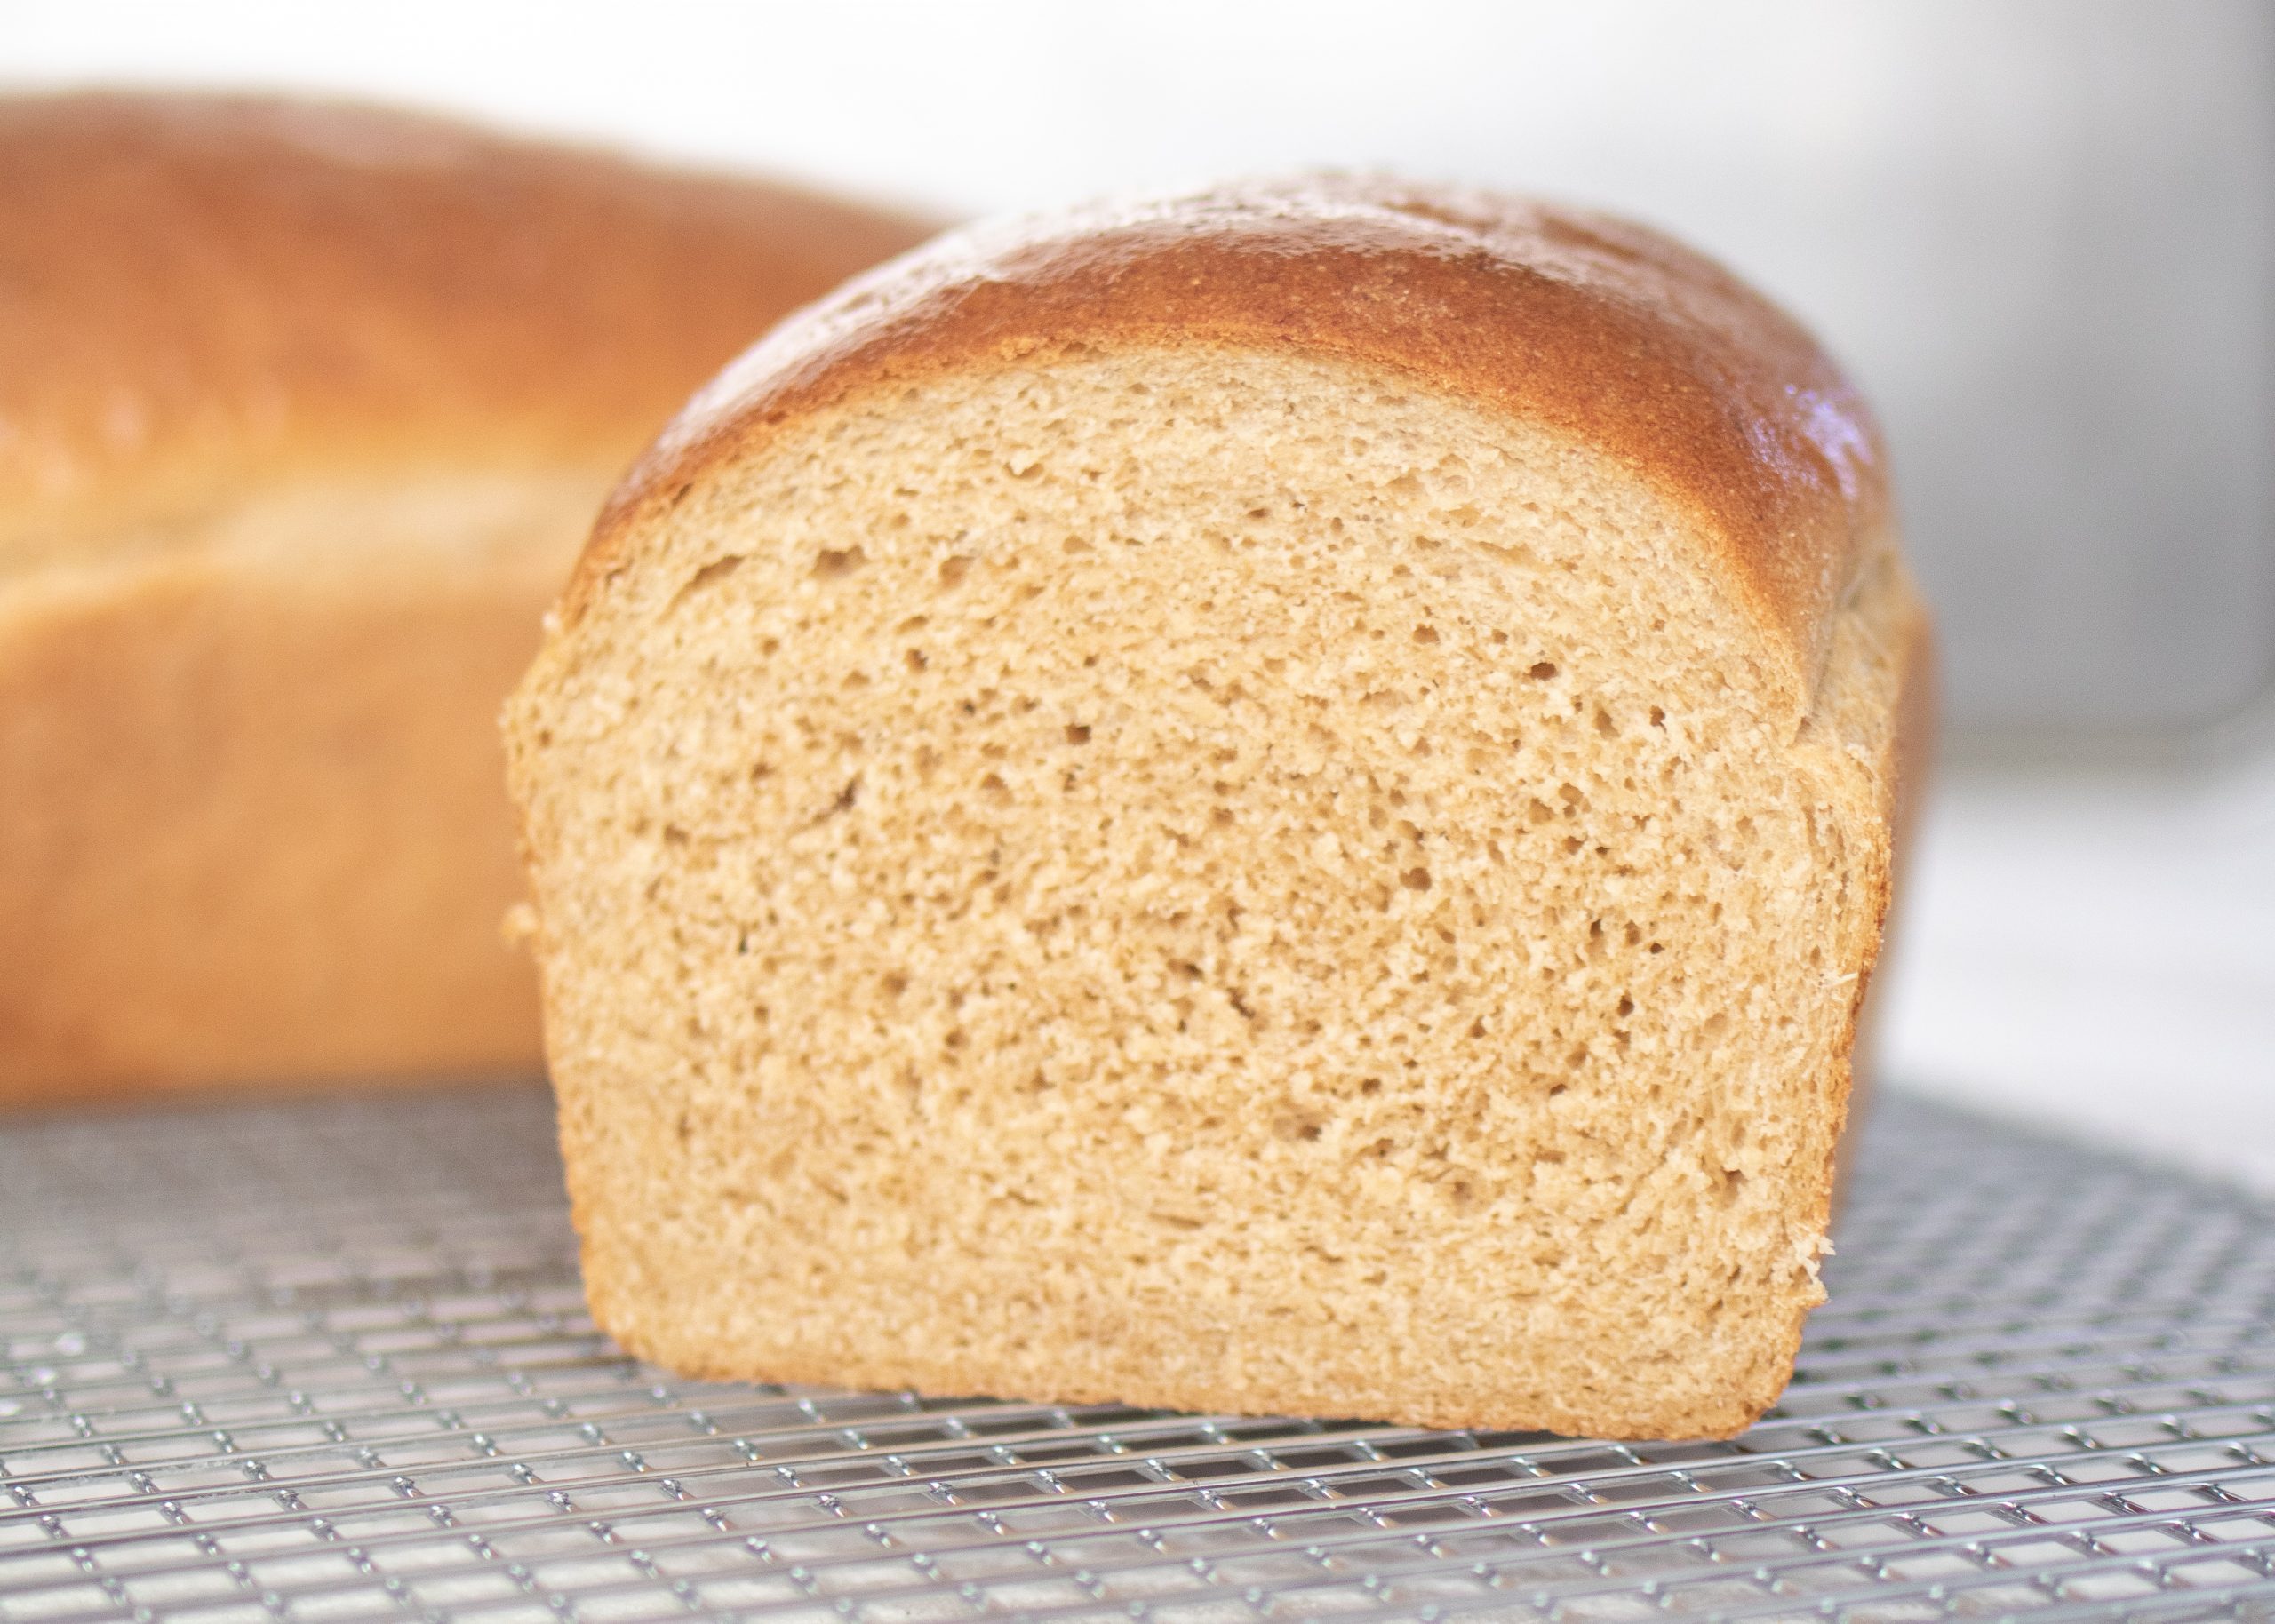
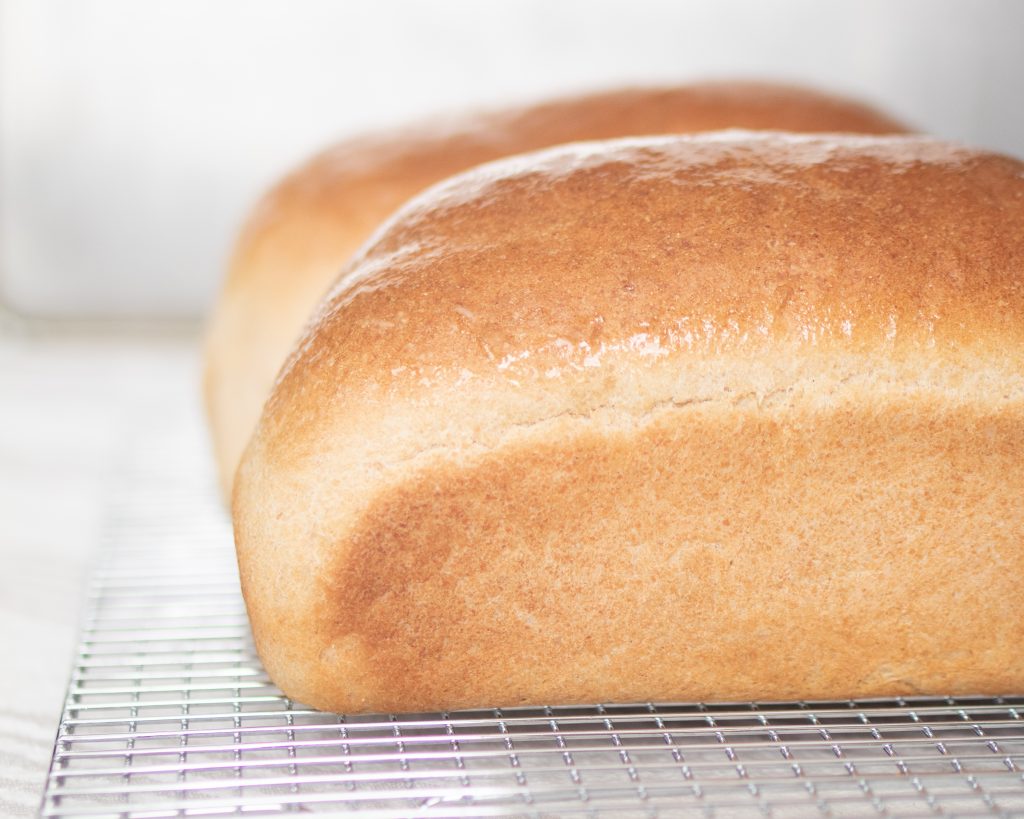
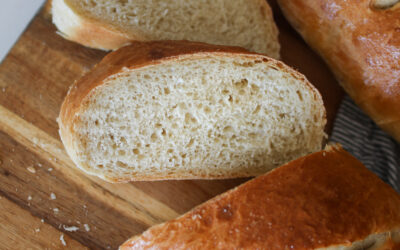
STEP 6: Bake for about 25 minutes, until bottoms are golden brown. Place on cooling racks. Brush the tops with butter while bread is warm. Pat yourself on the back for that crumb structure!
Video Tutorial
Watch my easy tutorial on how to make this bread on my Instagram page here.
Can I simplify the steps?
Yes! I’ve said this in my white bread recipe as well. To achieve best results, I encourage you to follow all of the steps and rise times. Really, there isn’t a lot of hands on time, most of it is just waiting for the bread to rise where you can prep other ingredients or do other things around the house while you wait. HOWEVER, there are some days we just don’t have 3 hours. I get that. My mom (who I consider Queen of Sandwich Bread) does a one-rise approach, and her bread still turns out amazing. I’m just turning into a bread snob and prefer the extra fluff and rise if I have the time. So, what do I do if I want to keep it simple with a single rise?
Simplify the steps by cutting out the first and second rise. You will keep the same order of adding the ingredients (adding the hot water, yeast, and honey first). Slowly add the rest of the ingredients and knead for 10 minutes like normal. Form the loaves and let them rise in their pans (referred to as the third rise listed in the original instructions). Bake as directed.
Happy baking!
Softest Whole Wheat Bread
Ingredients
- 2 ½ cups warm water about 110 degrees
- 1 ½ TB instant yeast
- 1/3 cup raw honey
- ¼ cup unsalted butter softened (or oi+ more for brushing
- 2 tsp sea salt
- About 6 ½ cups whole wheat flour
- 3 TB vital wheat gluten**
Instructions
Create Sponge
- In a large bowl (or mixer with dough hook), mix together the water, yeast, honey, and 3 cups of flour. Mix well until combined. Cover with a clean sack cloth towel or sprayed plastic wrap and wait about 20 minutes, or until the mixture has almost doubled in size and looks “sponge-like”.
Create Dough
- Add the vital wheat gluten, 1 more cup of flour, salt, and butter (or oil) to your sponge. It is normal for your sponge to “deflate” as you mix this together. Slowly incorporate the remaining flour in ½ cup increments. When the dough seems soft, not too sticky, and is gently pulling away from the sides of the bowl, it means you’ve added enough flour. Knead for 10 minutes.
- If you are kneading by hand: when the dough mixture becomes more difficult to stir and work with in the bowl (usually at about 5 – 5 ½ cups). I like to work in the rest of the flour by hand. Place the dough on a clean, floured work surface. Sprinkle a little flour on top of the dough and begin to knead. The quicker you work your hands, the less likely they are to stick. I like to knead by pulling in the corners of the dough with my fingers and then pressing down with heel of my hand, quickly and gently over and over again. While doing so, I continue to slowly add additional spoonfuls of flour. This will take about 10 minutes depending on how fast you knead. You know the dough is ready when it’s not too sticky, and very soft.
- After kneading, round out the dough into a circle; doesn’t have to be perfect. Grease or flour the bottom of a bowl, place dough in bowl, and cover. Let rise about 25-30 minutes, or until doubled in size.
Forming the Loaves
- Grease two 9×5 inch pans. Punch down the risen dough to release air bubbles. Divide the dough in half. Gently work your dough into a thick rectangle (about 12×8)and fold into thirds. Roll it up, pinch the seams together, and gently throw your loaf on the work surface to release any last air bubbles. (There are many ways to form a loaf. Do what's comfortable and what works for you.)
- Place loaves in prepared pans, cover, and let rise again for about 25 minutes, or until thepeak of the loaf is just arching over the rim of the pan.
- While dough rises, preheat oven to 350°(I like 375°F for high altitude).
Bake
- Bake for about 25 minutes or until bottoms are golden brown. If the tops are browning too quickly, but still needs time to cook, you can cover tops with aluminum foil to slow down the browning.
- Transfer loaves to a cooling rack and generously lather the tops with butter while warm.
Notes
- To help dough rise quickly, place in a warm, draft free place. This is often my warm laundry room or closed oven door with the oven light on.
- The amount of flour you use and the baking temperature will vary due to the amount of humidity, temperature and brand of flour, and many other factors.
- Bread can be stored in an airtight bread bag at room temperature for about 5 days and can be frozen for up to 6 months.
- Ensure your water isn’t too hot when combining with the yeast in the first step. If your bread is struggling to rise, it could be because the water was too hot and killed the yeast. You know your yeast is activated when it gets foamy within a couple minutes in the first step.

Best wheat bread! Hands down! So delicious, flavorful and soft!
Turns out perfect and delicious every time at 4500 ft. Thank you for this fantastic recipe!
So glad it’s a hit for you! It was developed at high altitude so it was made for you! 🙂
Made it for the first time WITHOUT the vita wheat gluten and it’s perfect. I love this bread, so soft but firm.
Thank you for taking the time to share Andrea! So glad you love this bread as much as we do!